 |
 |
 |
 |
 |
 |
 |
All
images and content © 2015
D. Canaan |
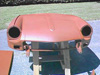
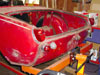
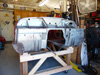
LOG BOOK: 09-21-15: Boot area Hopefully you'll note that progress has been steady. My project has no timeline or goal. I'll get there when I get there, but I don't want to stall or put things off either. Each time I go out to the garage at least once a week, I want to set an achievable goal and make progress. Even if it's just sanding down one spot, tapping out a ding, massaging a bit of metal. Doesn't have to be much, but I always want to be going forwards. Picked up a 4' x 10' piece of 20 ga steel sheet for $60, which is a great price. They charged $30 to shear it down into 24" x 60" pieces, which was a bit much, but it makes moving and storing it a whole lot easier, so I still consider that bargain. I have more than enough to do a lot of repairs now and in the future. It was worth the price. Taking a break from the windshield cowl and firewall, I inspected the tub more closely with an eye that has become more experienced in welding with this British tin and finally hitting the 'sweet spot' for settings on my Hobart welder. I now can butt weld the sheet metal with minimal blowthrough, and even if you do, it's easy to fix. This is a big deal and it changes how I approach the repairs. Looking at the rear valence, there was rust around the trunk latch and license plate lamp housing. The car has been hit from the rear in the past and while they did minor repairs, most was done with body filler. I was able to massage much of it back to the right profile, but the amount of rust at the bottom and other damage means I might be spending a lot of time patchign this up. I have the metal, and I think I can do it. BUT. I have a replacement valence. Do I drill out all those spot welds and replace the entire thing, then try to drill new lamp holes for the back up and turn signal lamps? Try to get the bumper bracket holes lined up? I spent a lot of time smoothing out those areas around the lamp holes. I could replace the entire panel, but geez, that is going to be a serious ton of work. Do I *have* to? I'm now seriously considering cutting up the replacement panel and cutting out the worst of the damage on the original, leaving the seams intact and welding in the replacement metal. Yes, it would mean ten million tiny spot welds, but it's very doable. If I totally blow it, well, I can buy another panel. So that's my current plan. I marked out the valance to see where the cuts would be the easiest to do and be least visiible. This looks to be doable. I did cut out one piece of rusted out metal at the boot lip to see how a repair on flat surface sheet would work out. 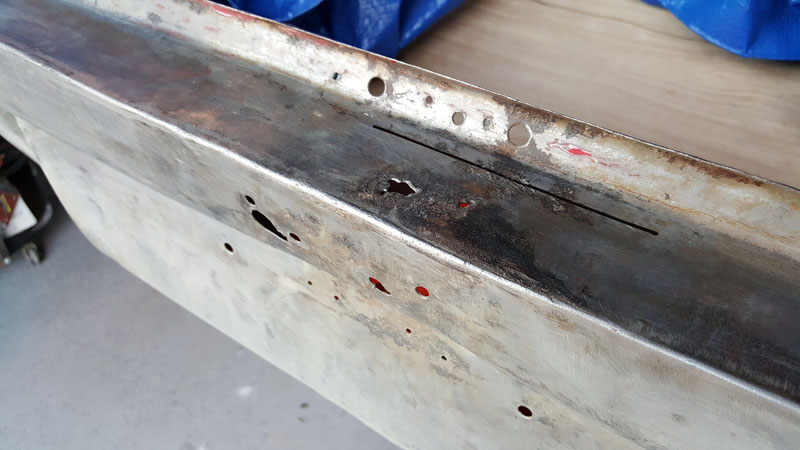 This area is pretty cheesy, and once I probed for solid metal, I was out to an area about 1.5" by 4". Luckily I just happen to have all this lovely new 20 ga sheet metal handy! A quick bit of cutting, filing, trimming, more filing and I had a piece ready to go for welding. 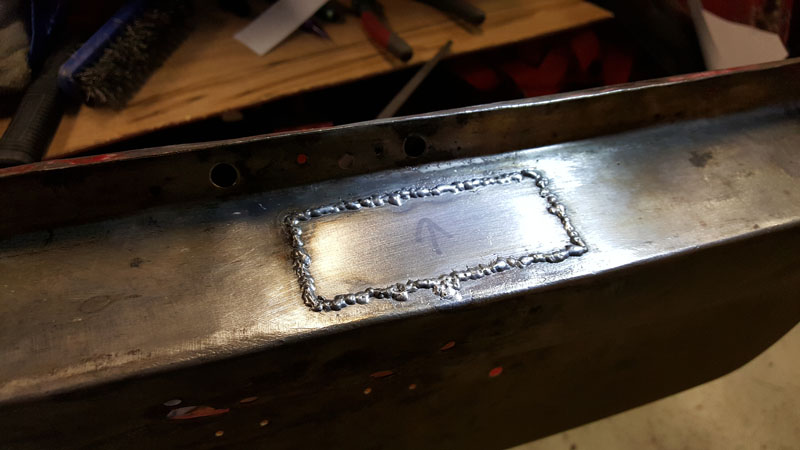 It looks like a lot of welds, and it is. Now remember this is a tiny area. Each of those spot welds is around 3/16"-1/8" in size. I'm really working on keeping the weld spot small. Make sure you get good penetration, but all metal built up on top has to be ground away, so it isn't adding any strength. To avoid warping, put in a spot weld in one area, then move an inch or so away, do again. I'd do 3-4, then hit the area with compressed air to cool. If I could touch it with my fingers, then it was cool enough to keep going. When you get too much heat, that's when you start blowing through. Tack weld, move, cool, come back and add more. Eventually you'll get the whole thing welded in. Flapwheel grinding disks are your friend. 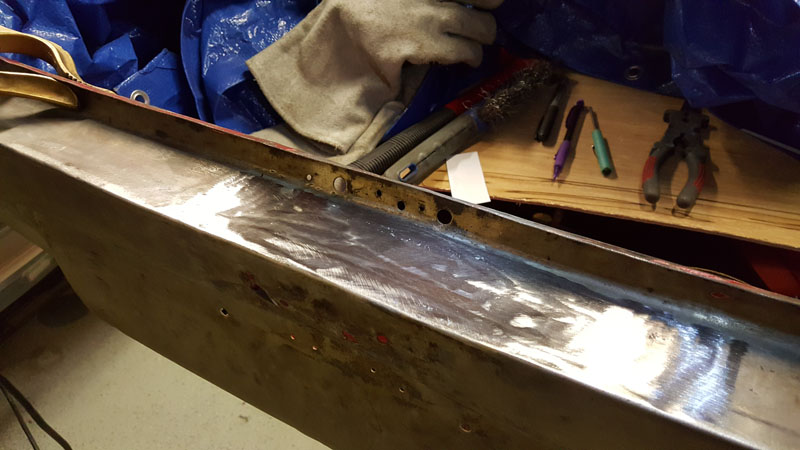 It sure is nice when you can make rusted out holes disappear. It is repairs like this that give me confidence I can attempt the rest of the body repairs with some amount of confidence. 09-15-15: Windshield Post Mounts Now that the cowl is ready, the windschield needs something to bolt to. The brackets under the cowl went missing during my teardown. I bag and tag everything, but this apparently slipped by and I can't find them anywhere. A forum member on the Triumph Experience web site (www.triumphexp.com) had a spare set and sent them out. Thanks! Once they arrived, I media blasted and painted them. I know nobody will see them under the dash, but why invite problems with bare steel? Paint is cheap protection. Mounted the windscreen, minus the glass which broke during removal. No biggie, was going to replace it anyways. The holes in the cowl where the posts pass through were very badly messed up and rusted horribly. This could not be left alone.  I needed to know where the holes were supposed to be, so a quick temporary mounting with a slight gap at the bottom allowed the frame to mount and position, but a gap let me then slip masking tape strips all around the post. Multiple strips eventually surrounded the post and when the frame was removed, it left a hole exactly where the posts were located. 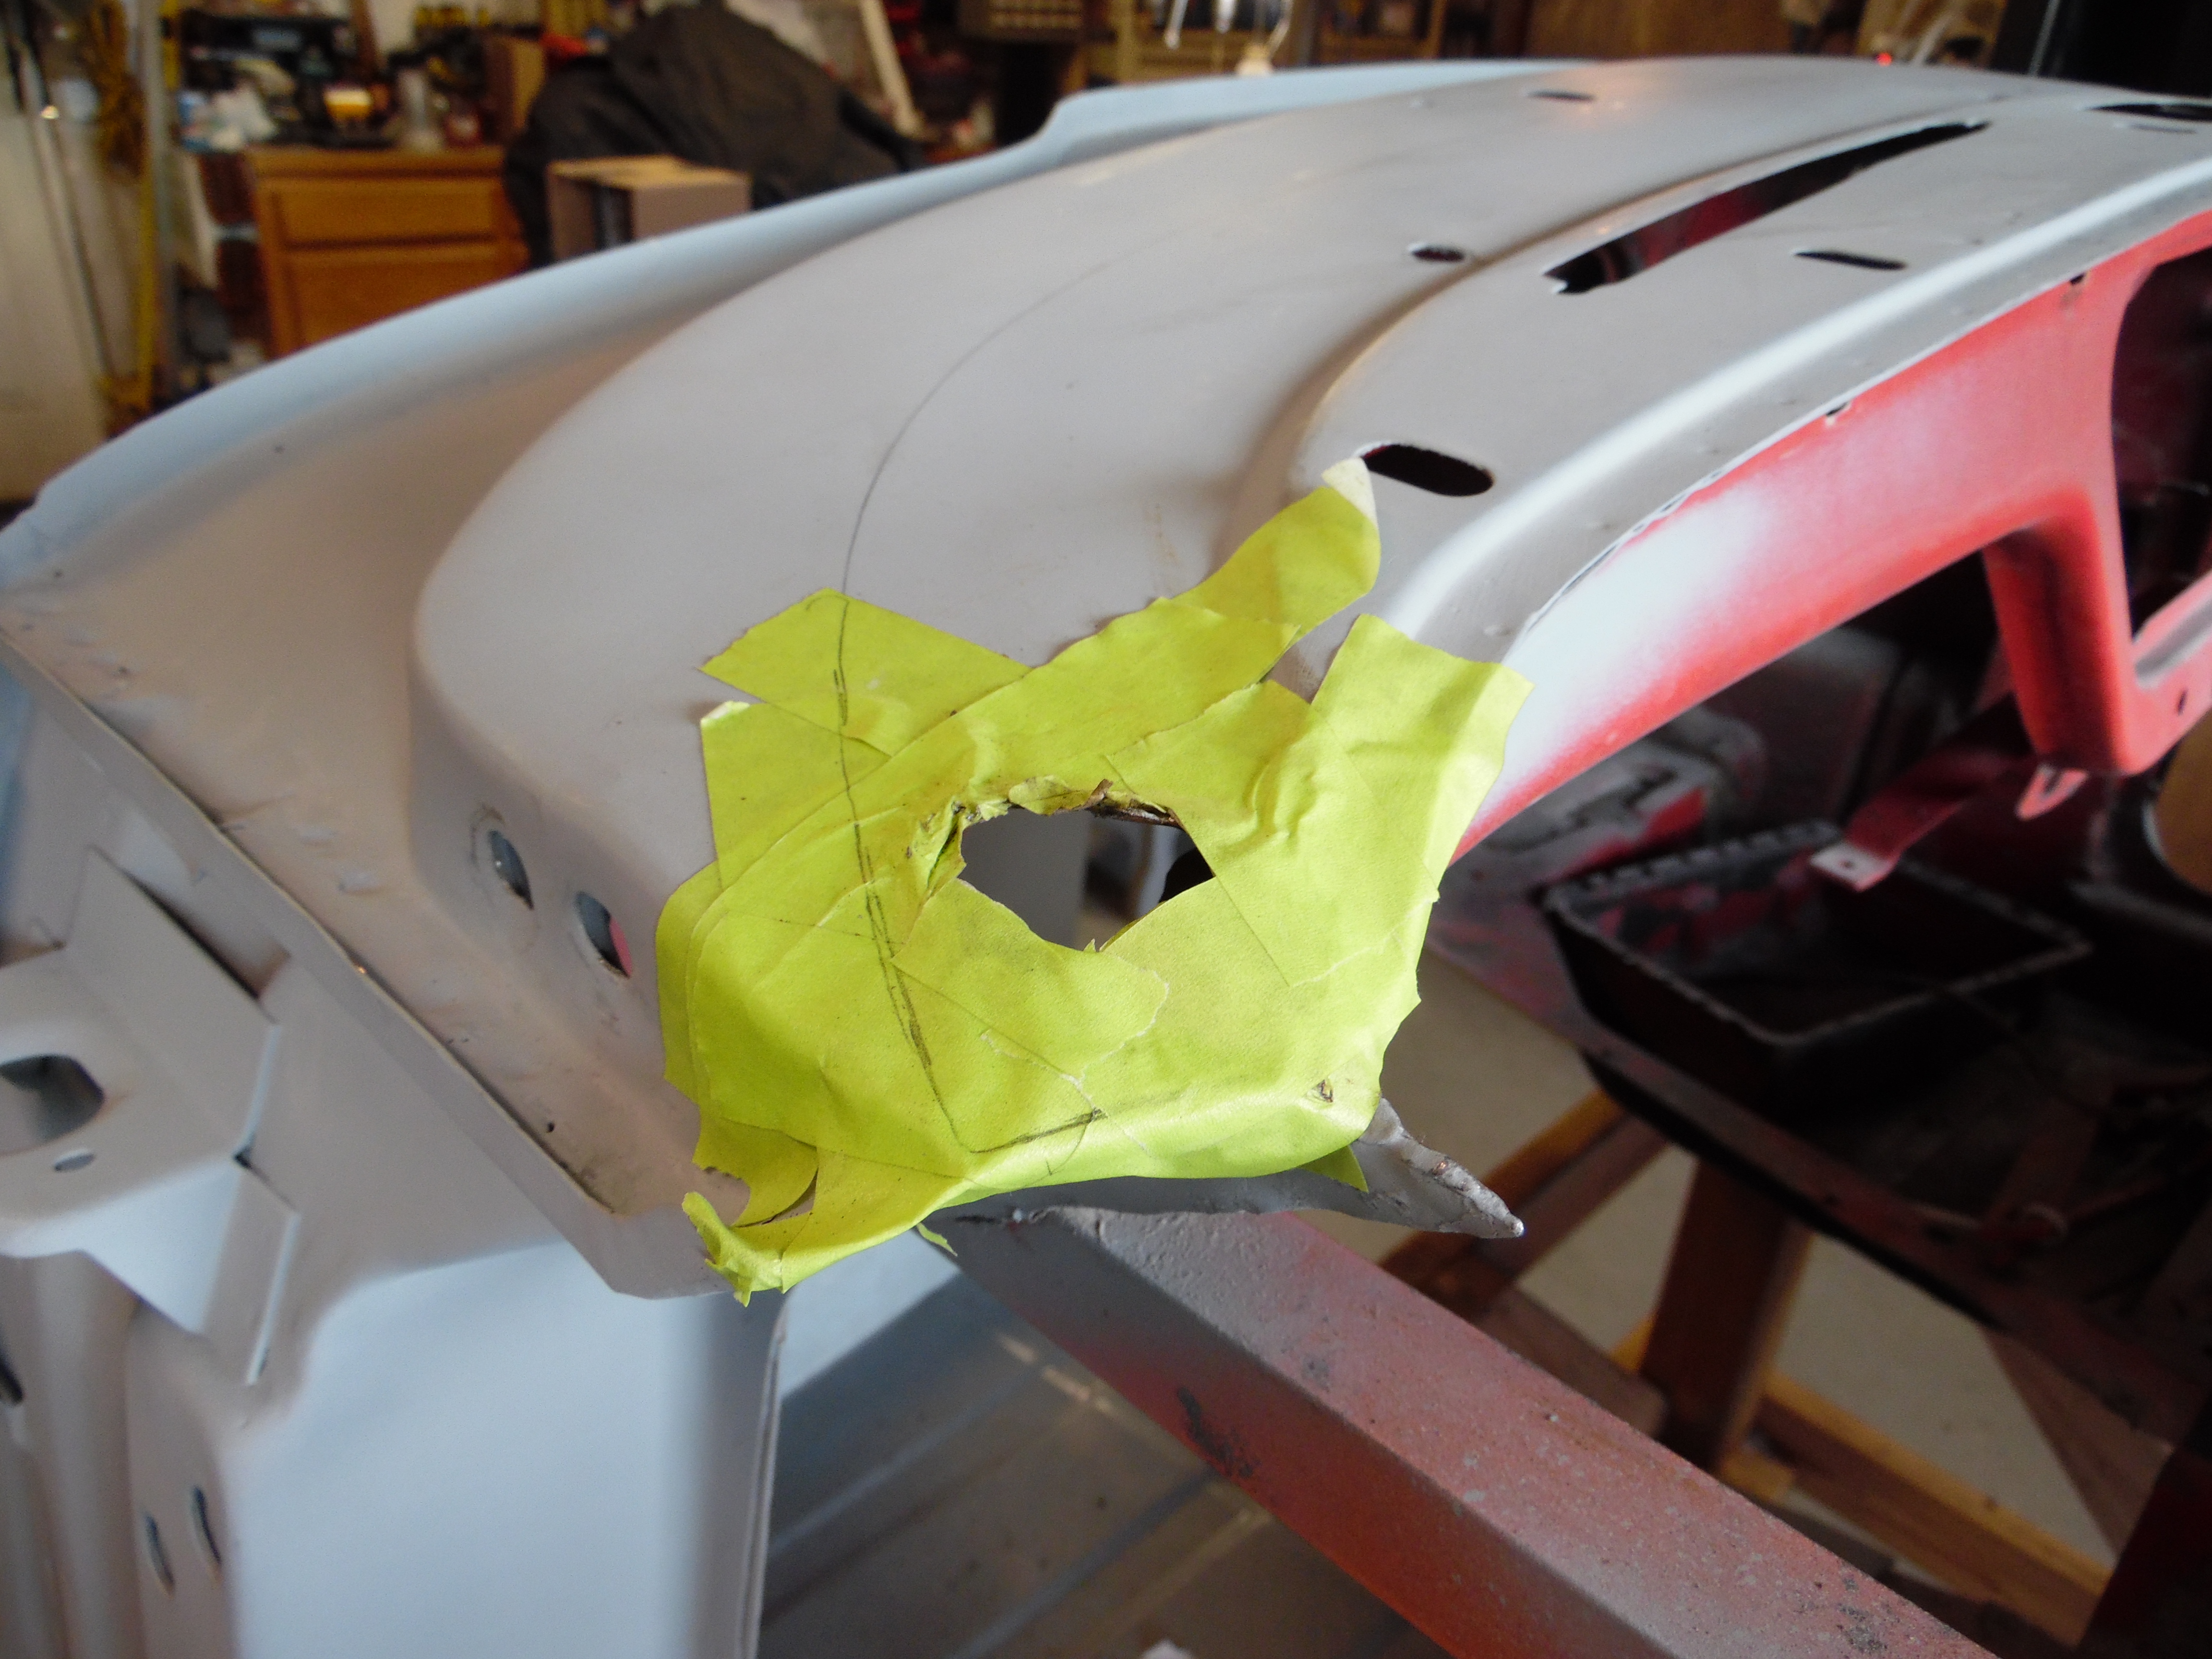 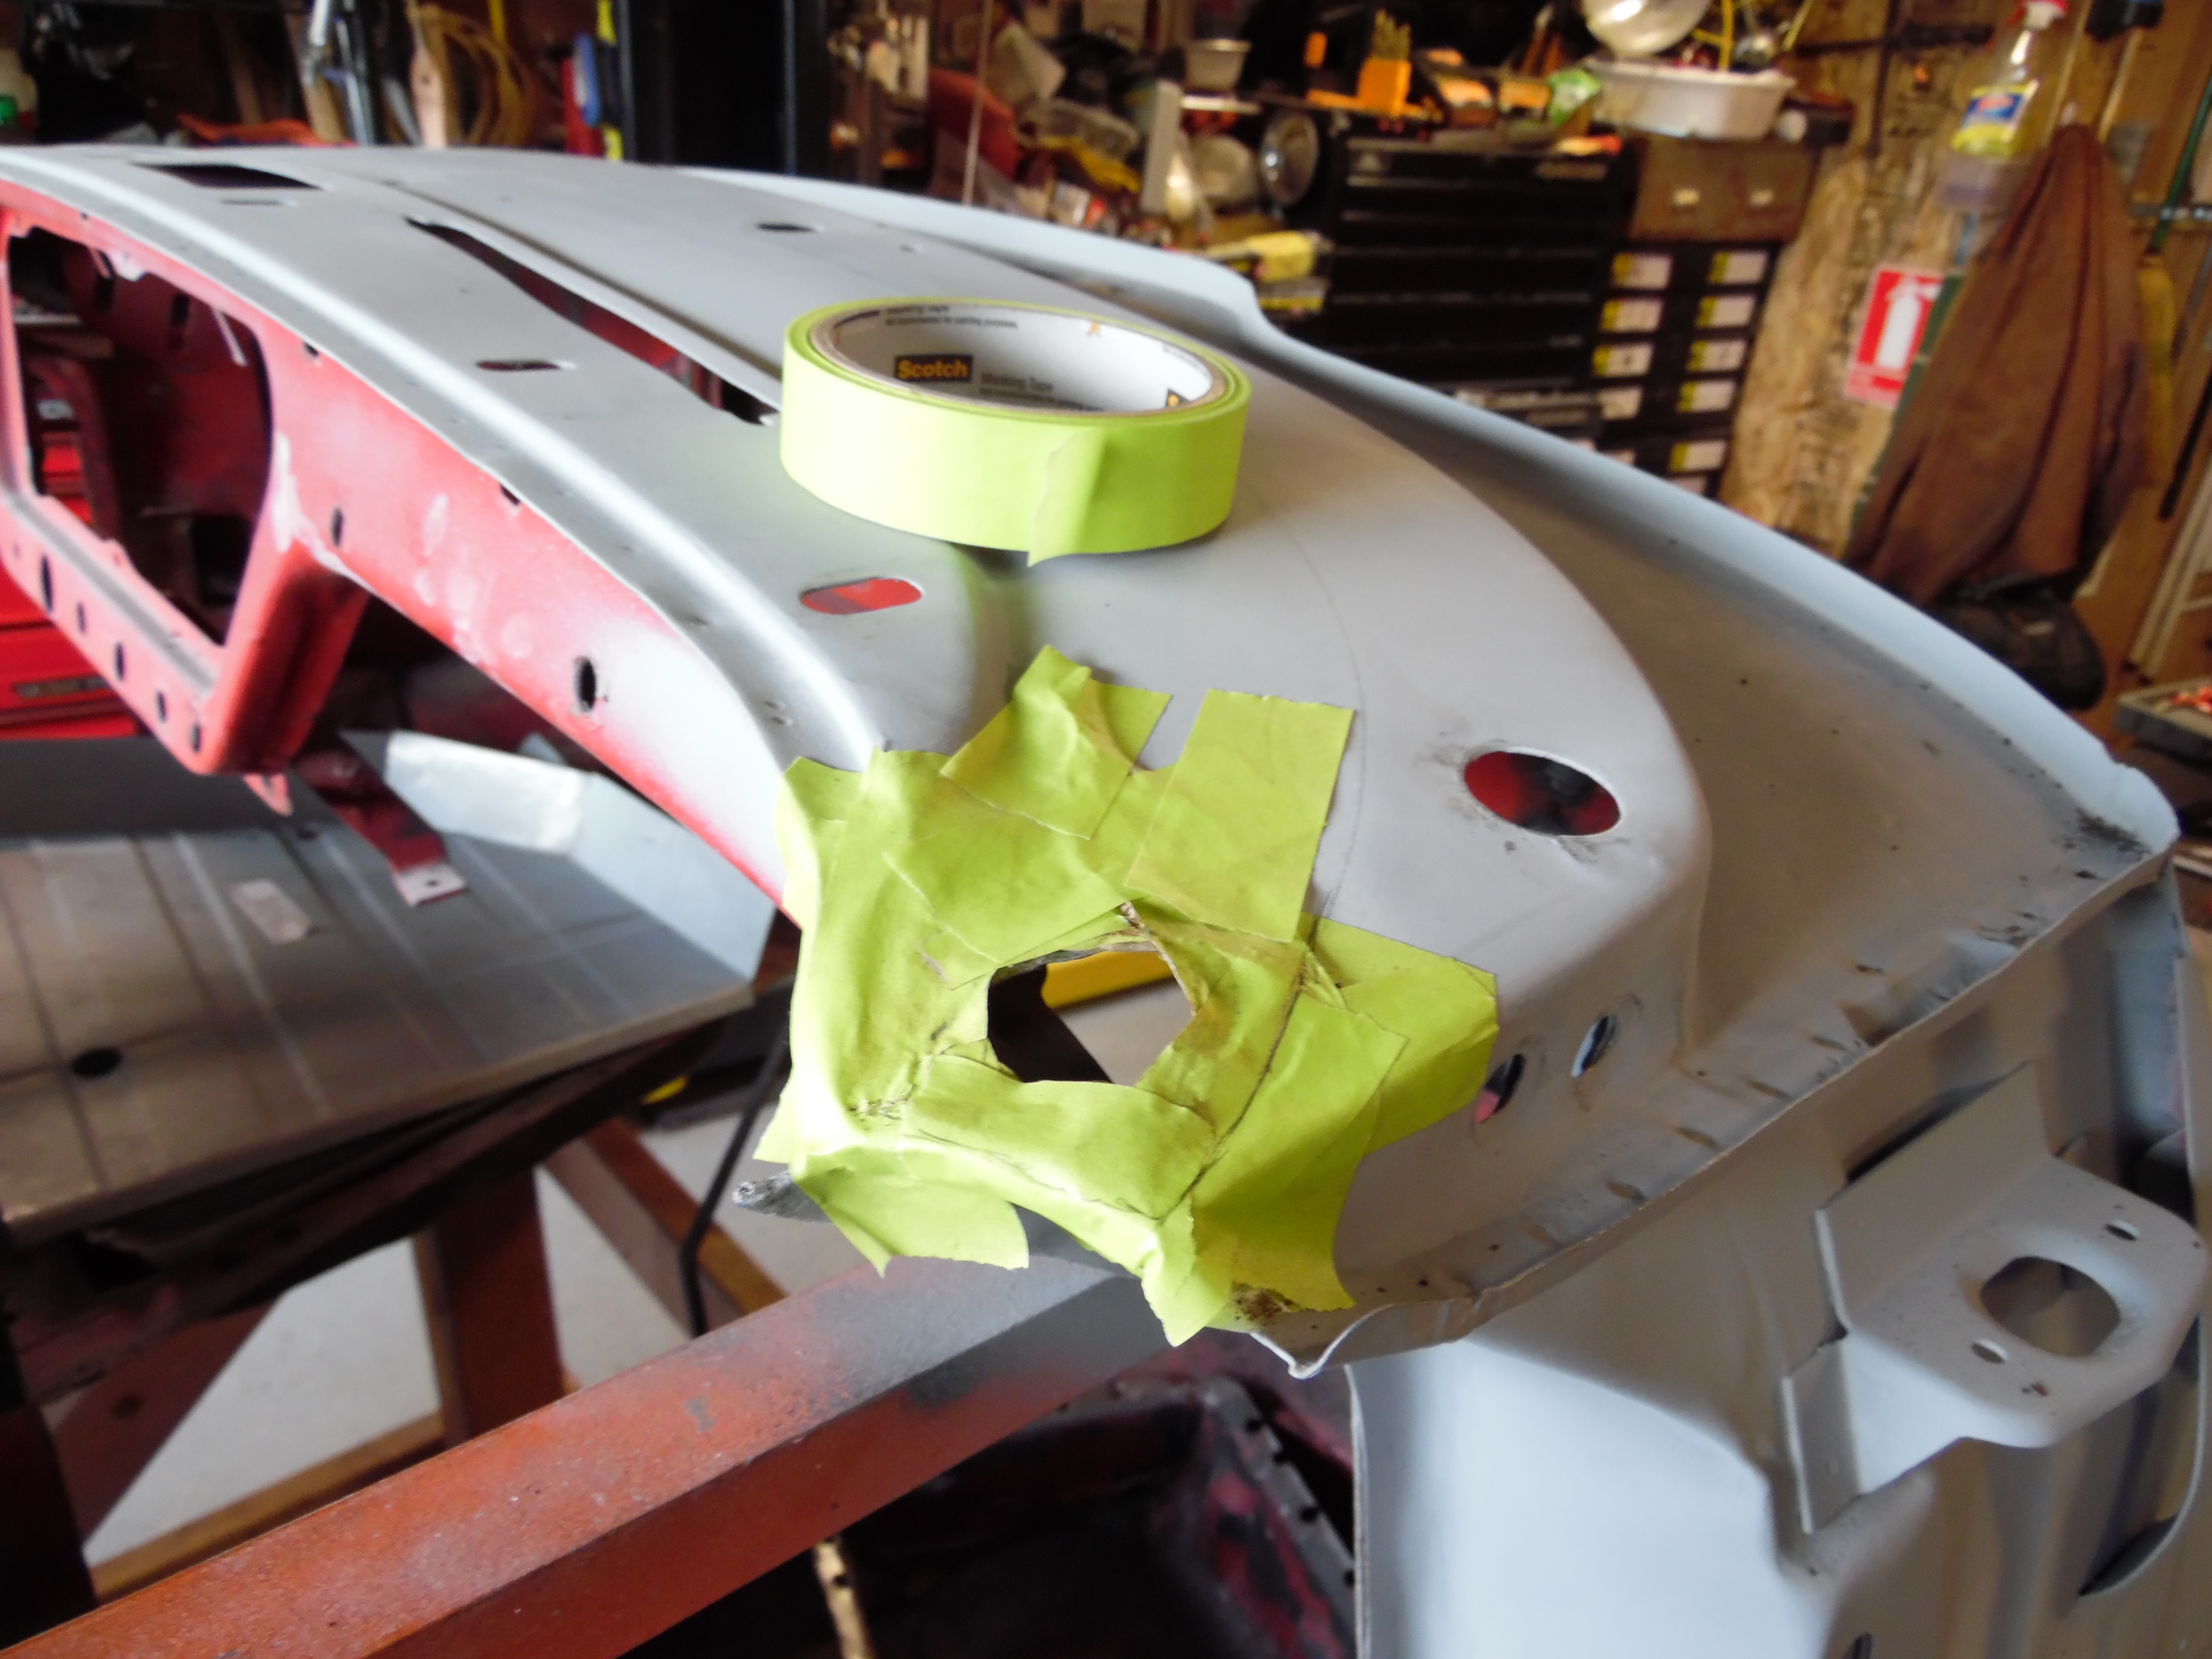 Now armed with an accurate location, I mocked up a new patch piece of sheet metal, made reference lines on both the cowl and the patch piece. I drilled holes in the patches, then tested against the cowl. Once I was happy with that, I went to town cutting it out. I drilled a series of holes around the line and snipped out the metal, then filed the opening clean. I matched up the patch piece to the opening and was ready for welding. 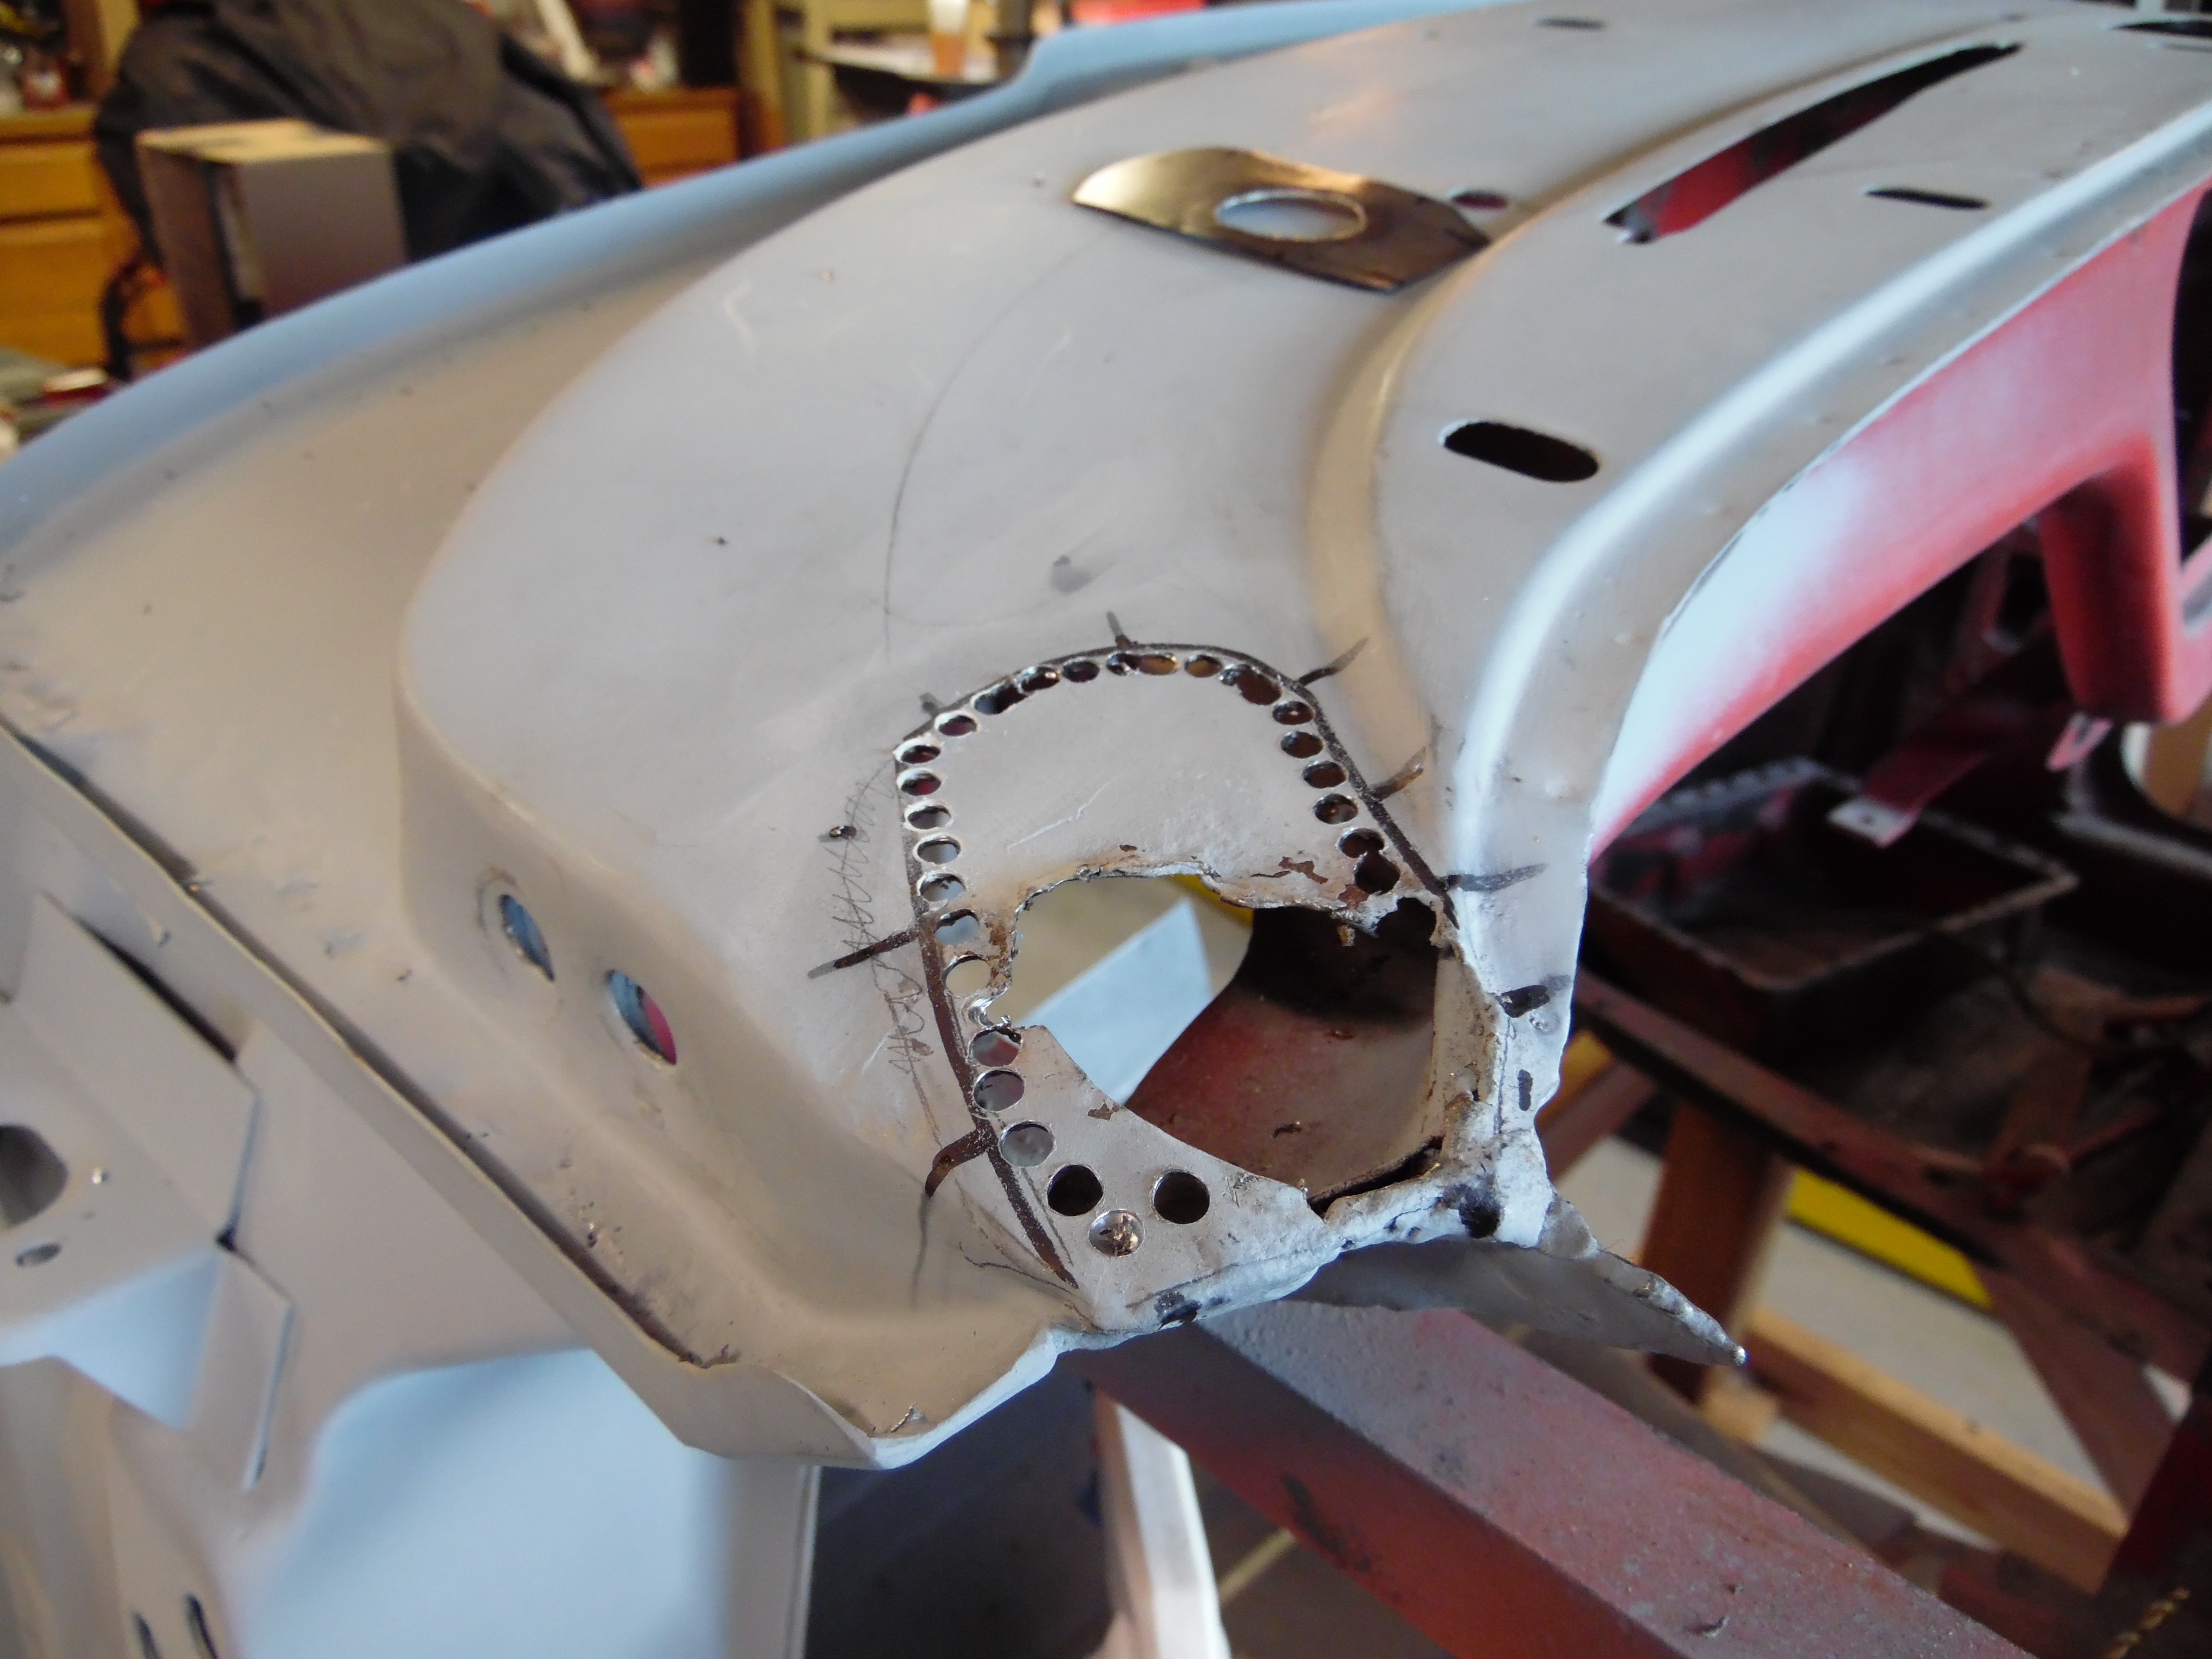 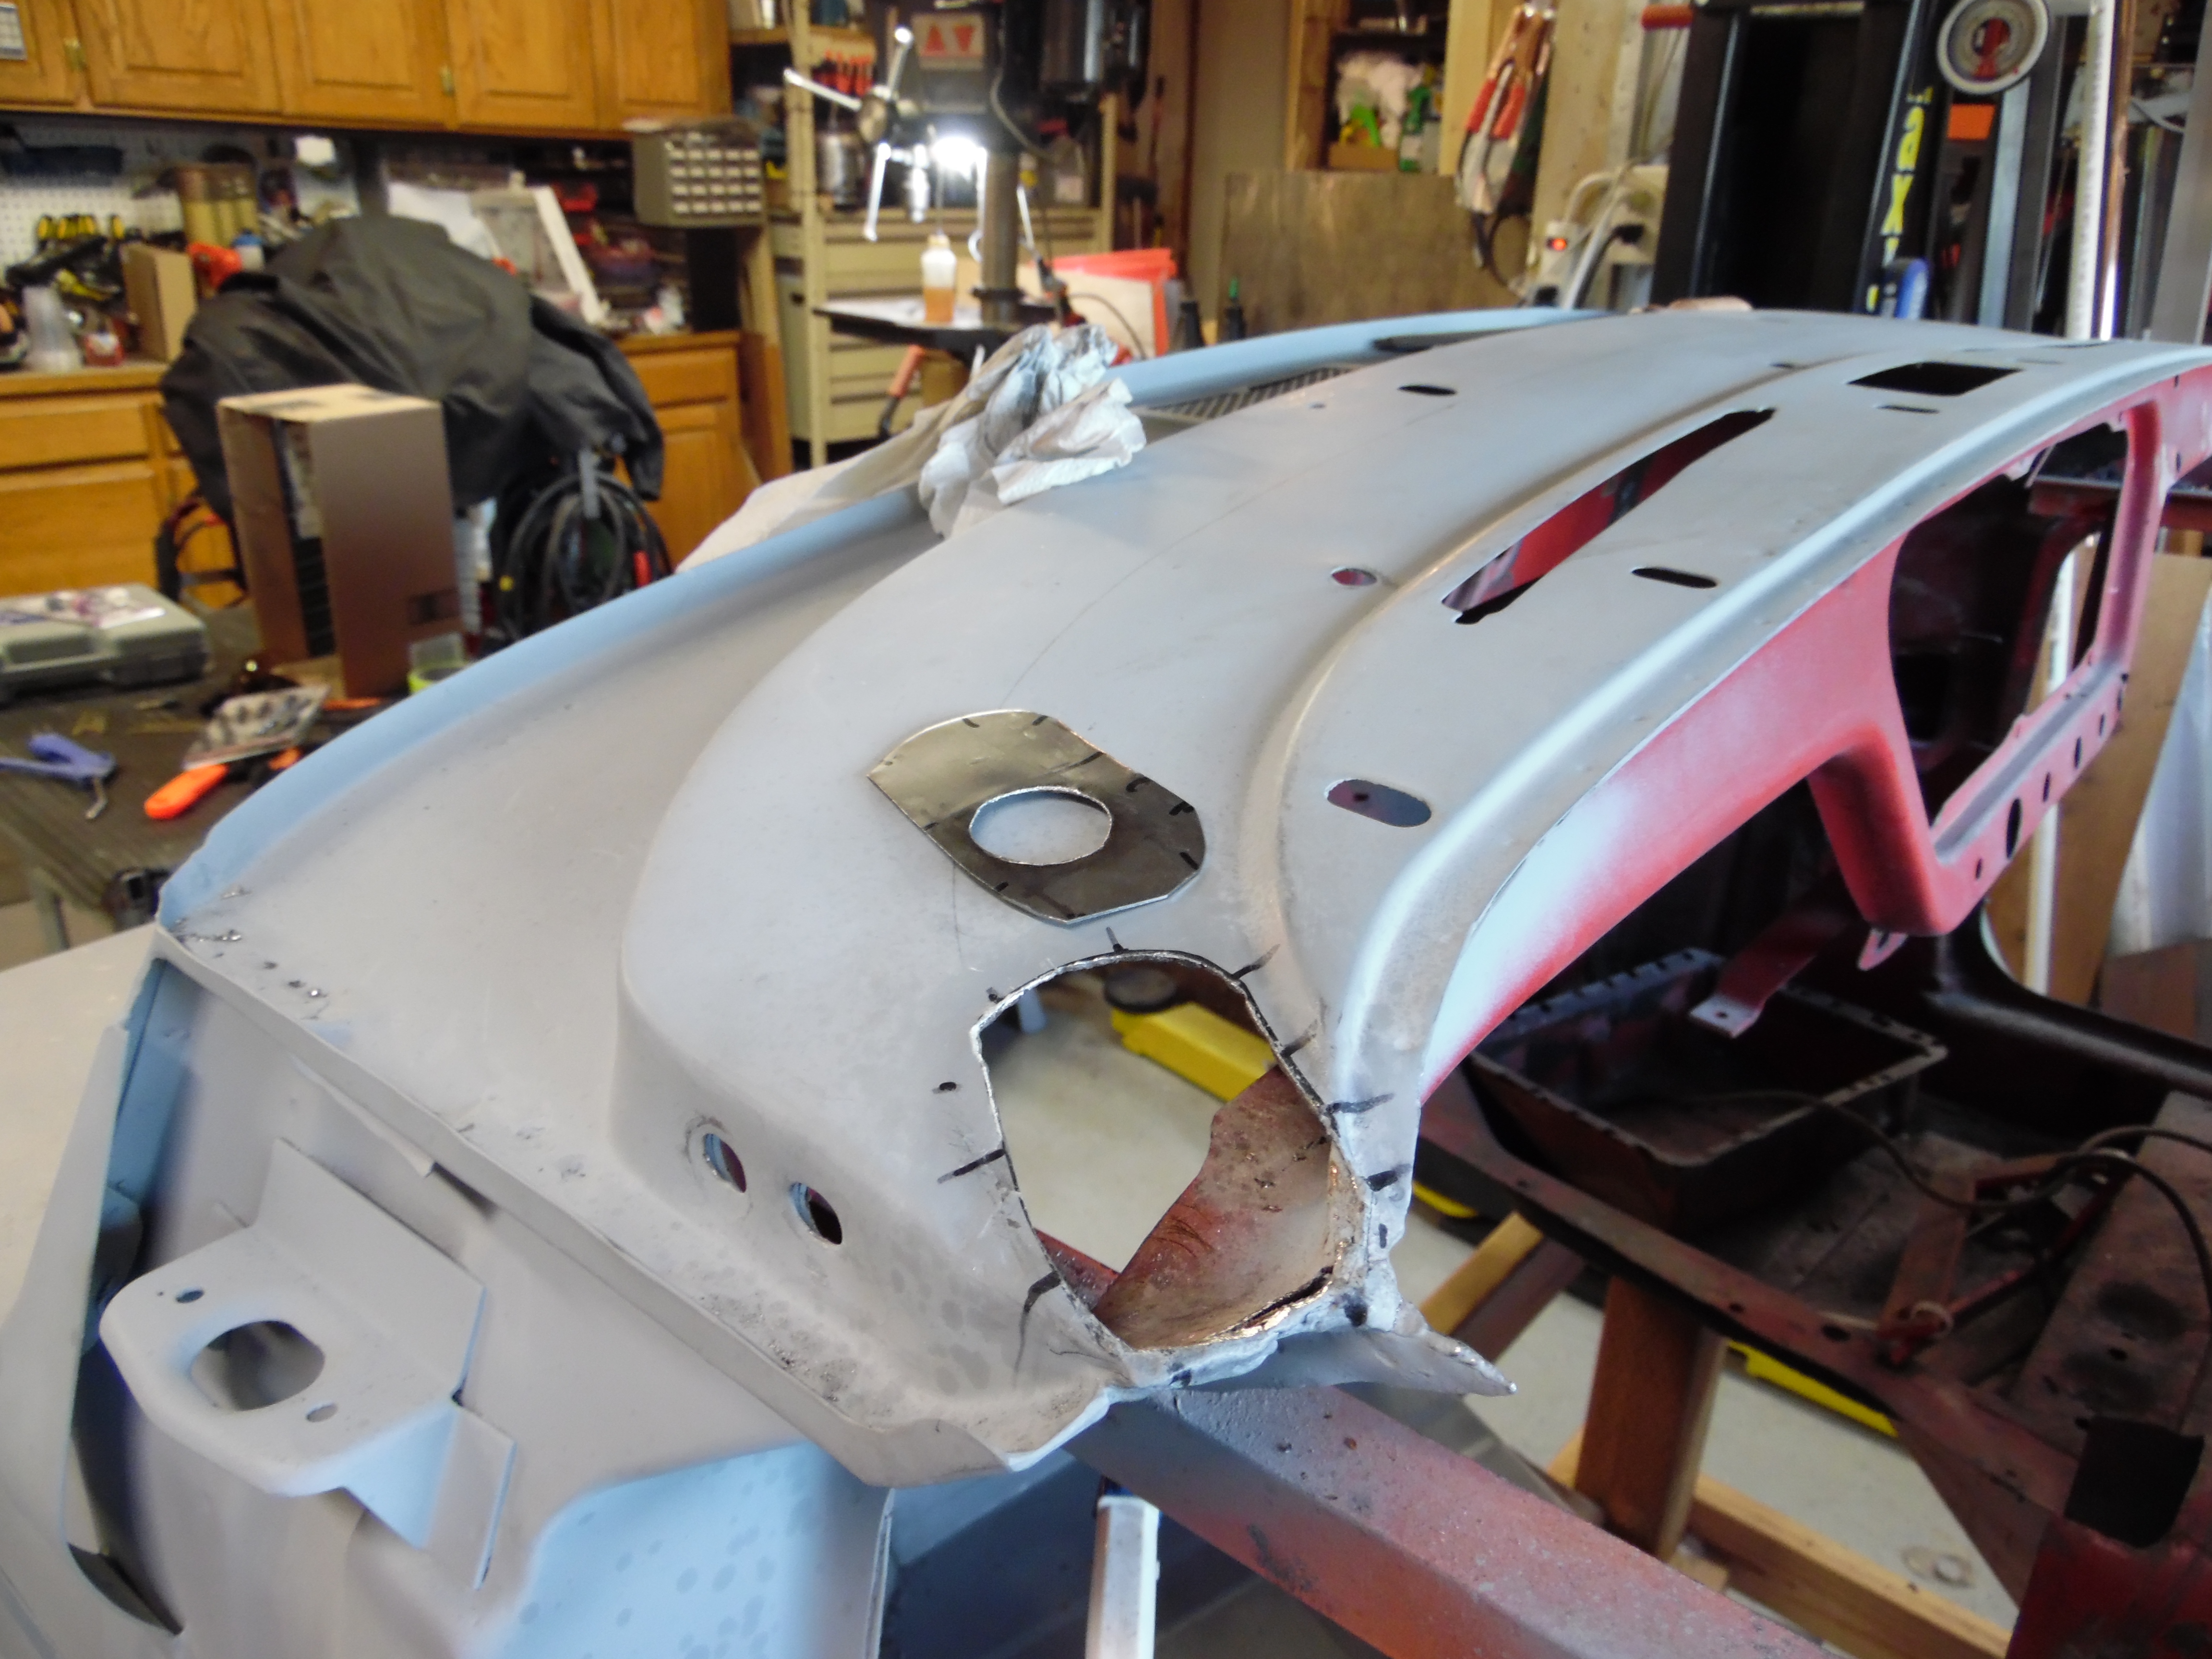 Welding in a sheet metal patch can be tricky. Controlling the power, wire speed, distance to tip, and temperature can all have an effect. You're dealing with very thin metal (20-22ga) and too much heat will cause the welds to blow through the metal instead of fusing it. The key is keeping the metal cool. Using a series of tiny tack welds and cooling the metal between each tack with a blast of compressed air, I was able to finally get a full weld around the perimeter. You don't want to add any more metal than needed as it will have to be ground off. A perfect tack is very low profile, nicely rounded, and flat. If the weld is on top of the metal in a ball, you're not getting it right, and that can be a matter of adjusting things and technique. The first few tacks were flat and pretty, then started getting piled up on top, telling me I was going too fast and putting too much metal down at once. SLOW DOWN! It takes time, but you'll get there. 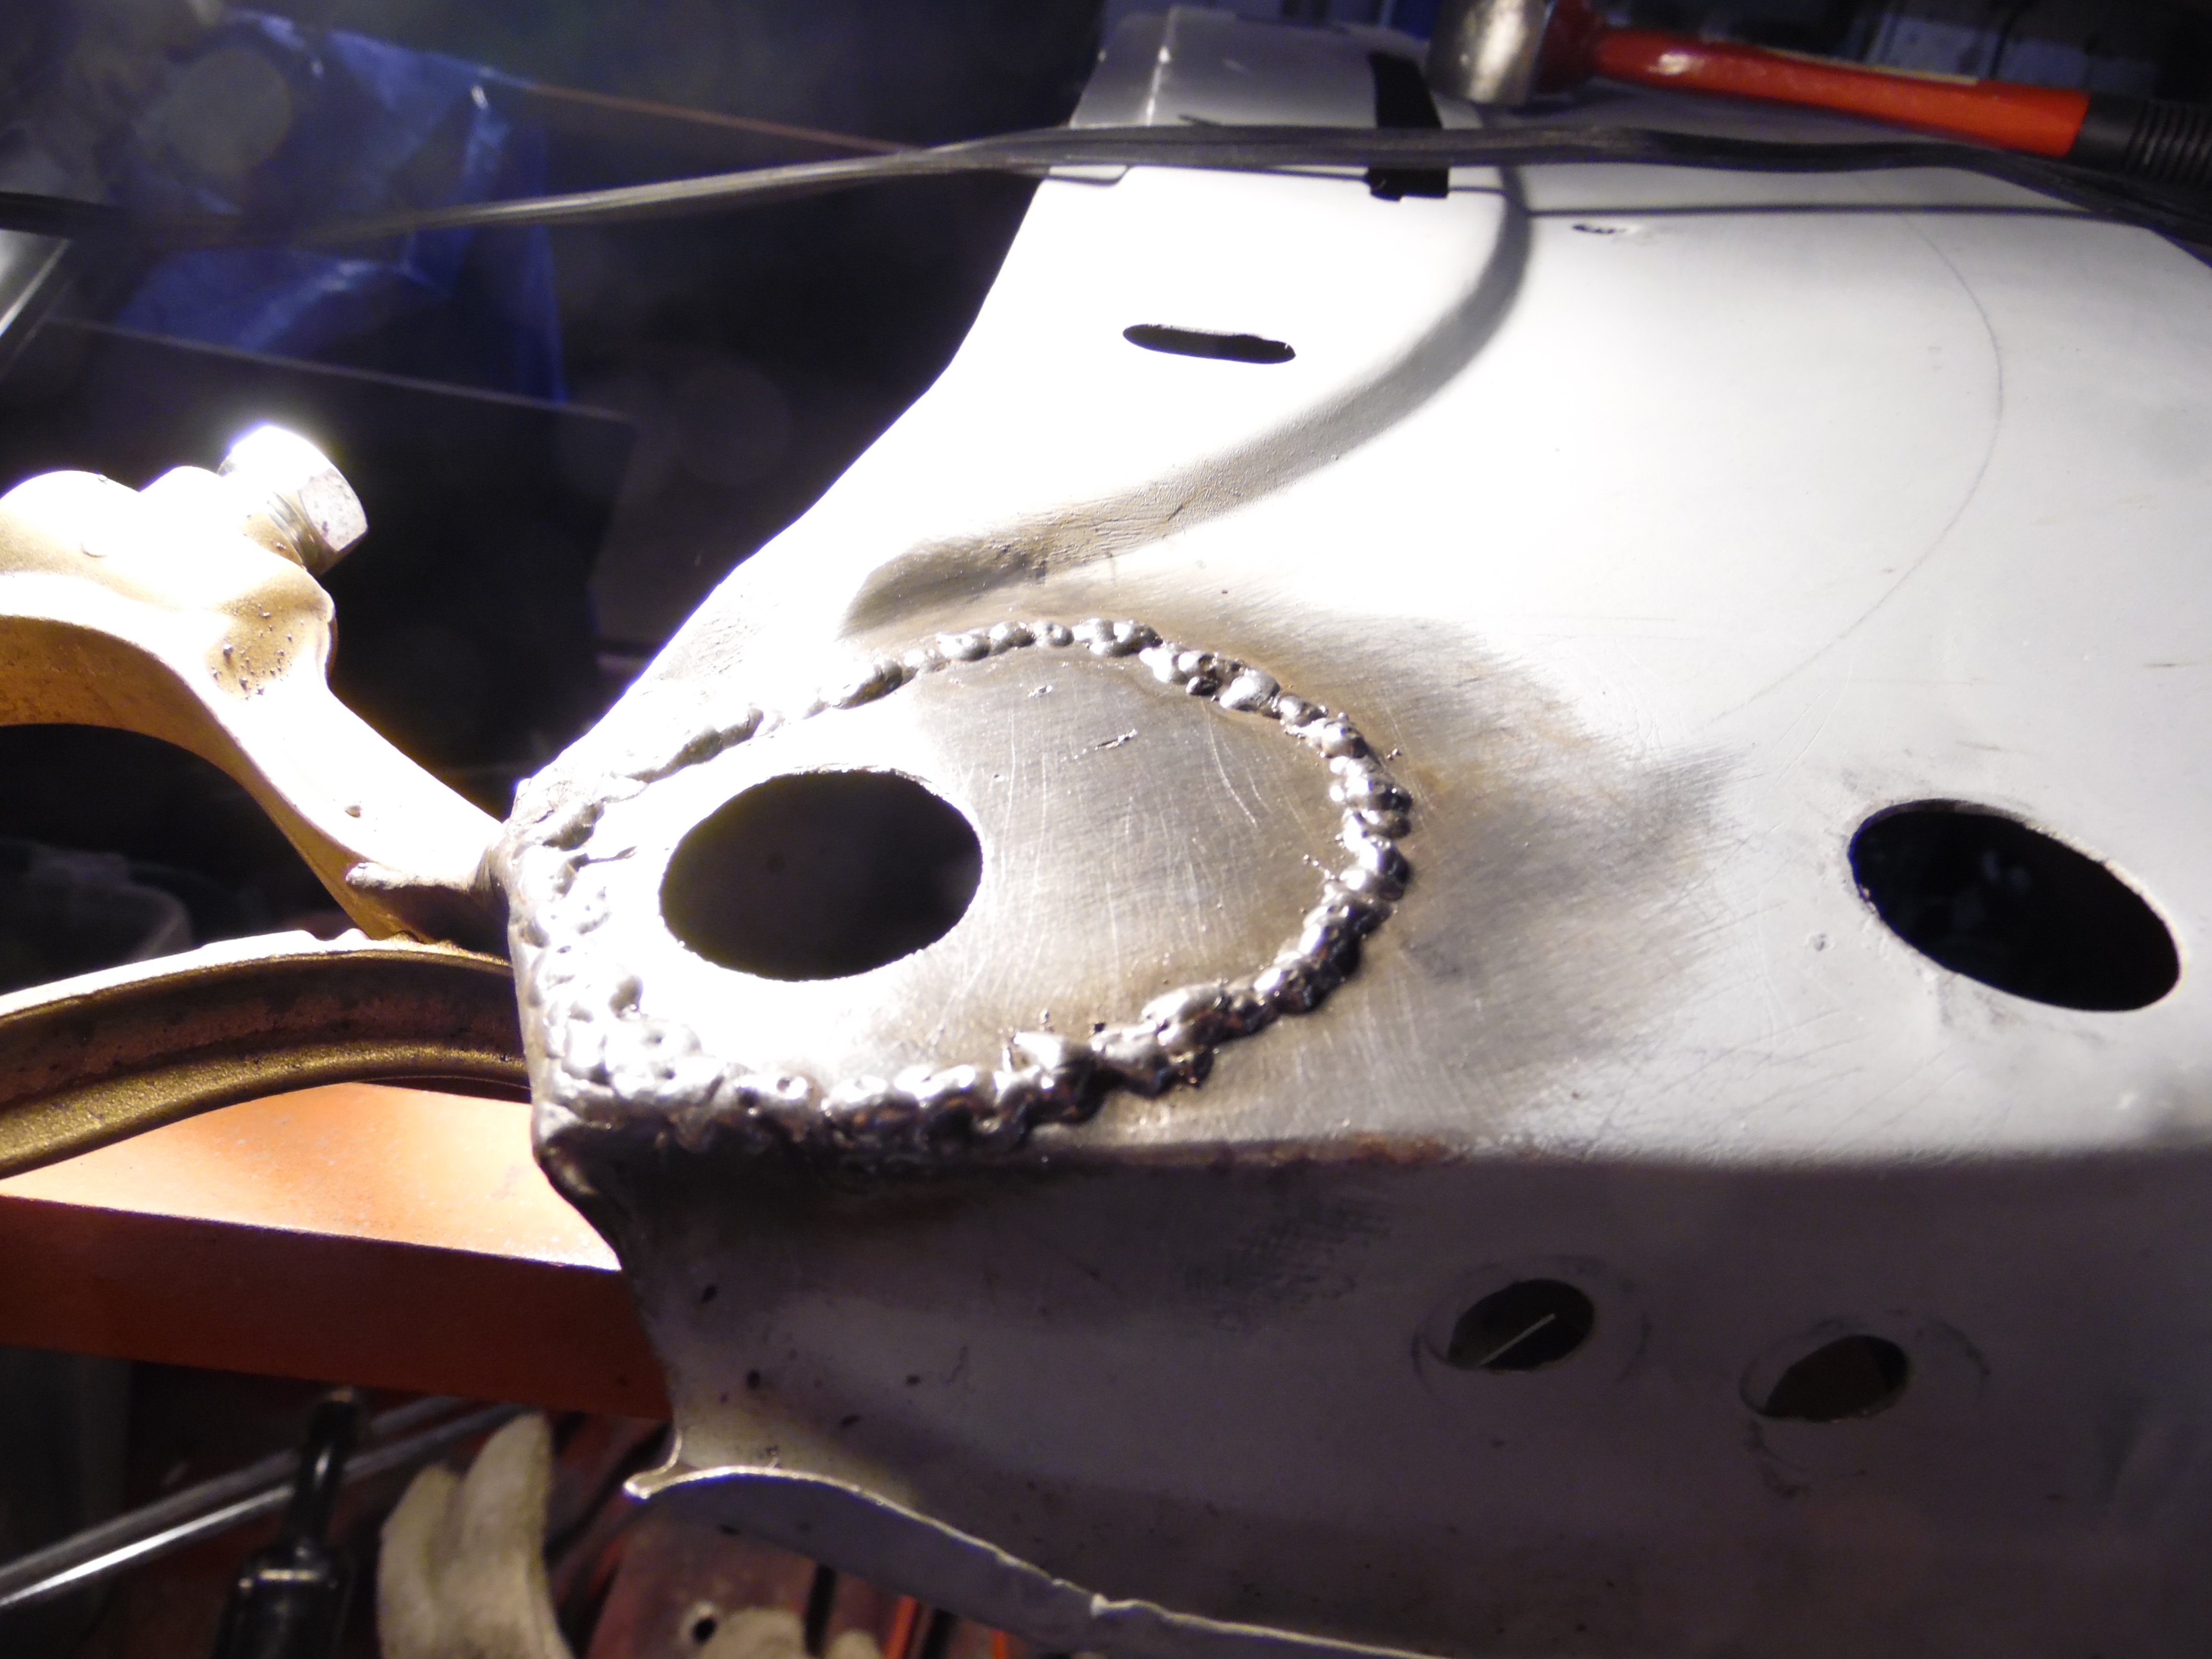 I was doing both sides of the cowl at the same time, so I could bounce back and forth as needed. 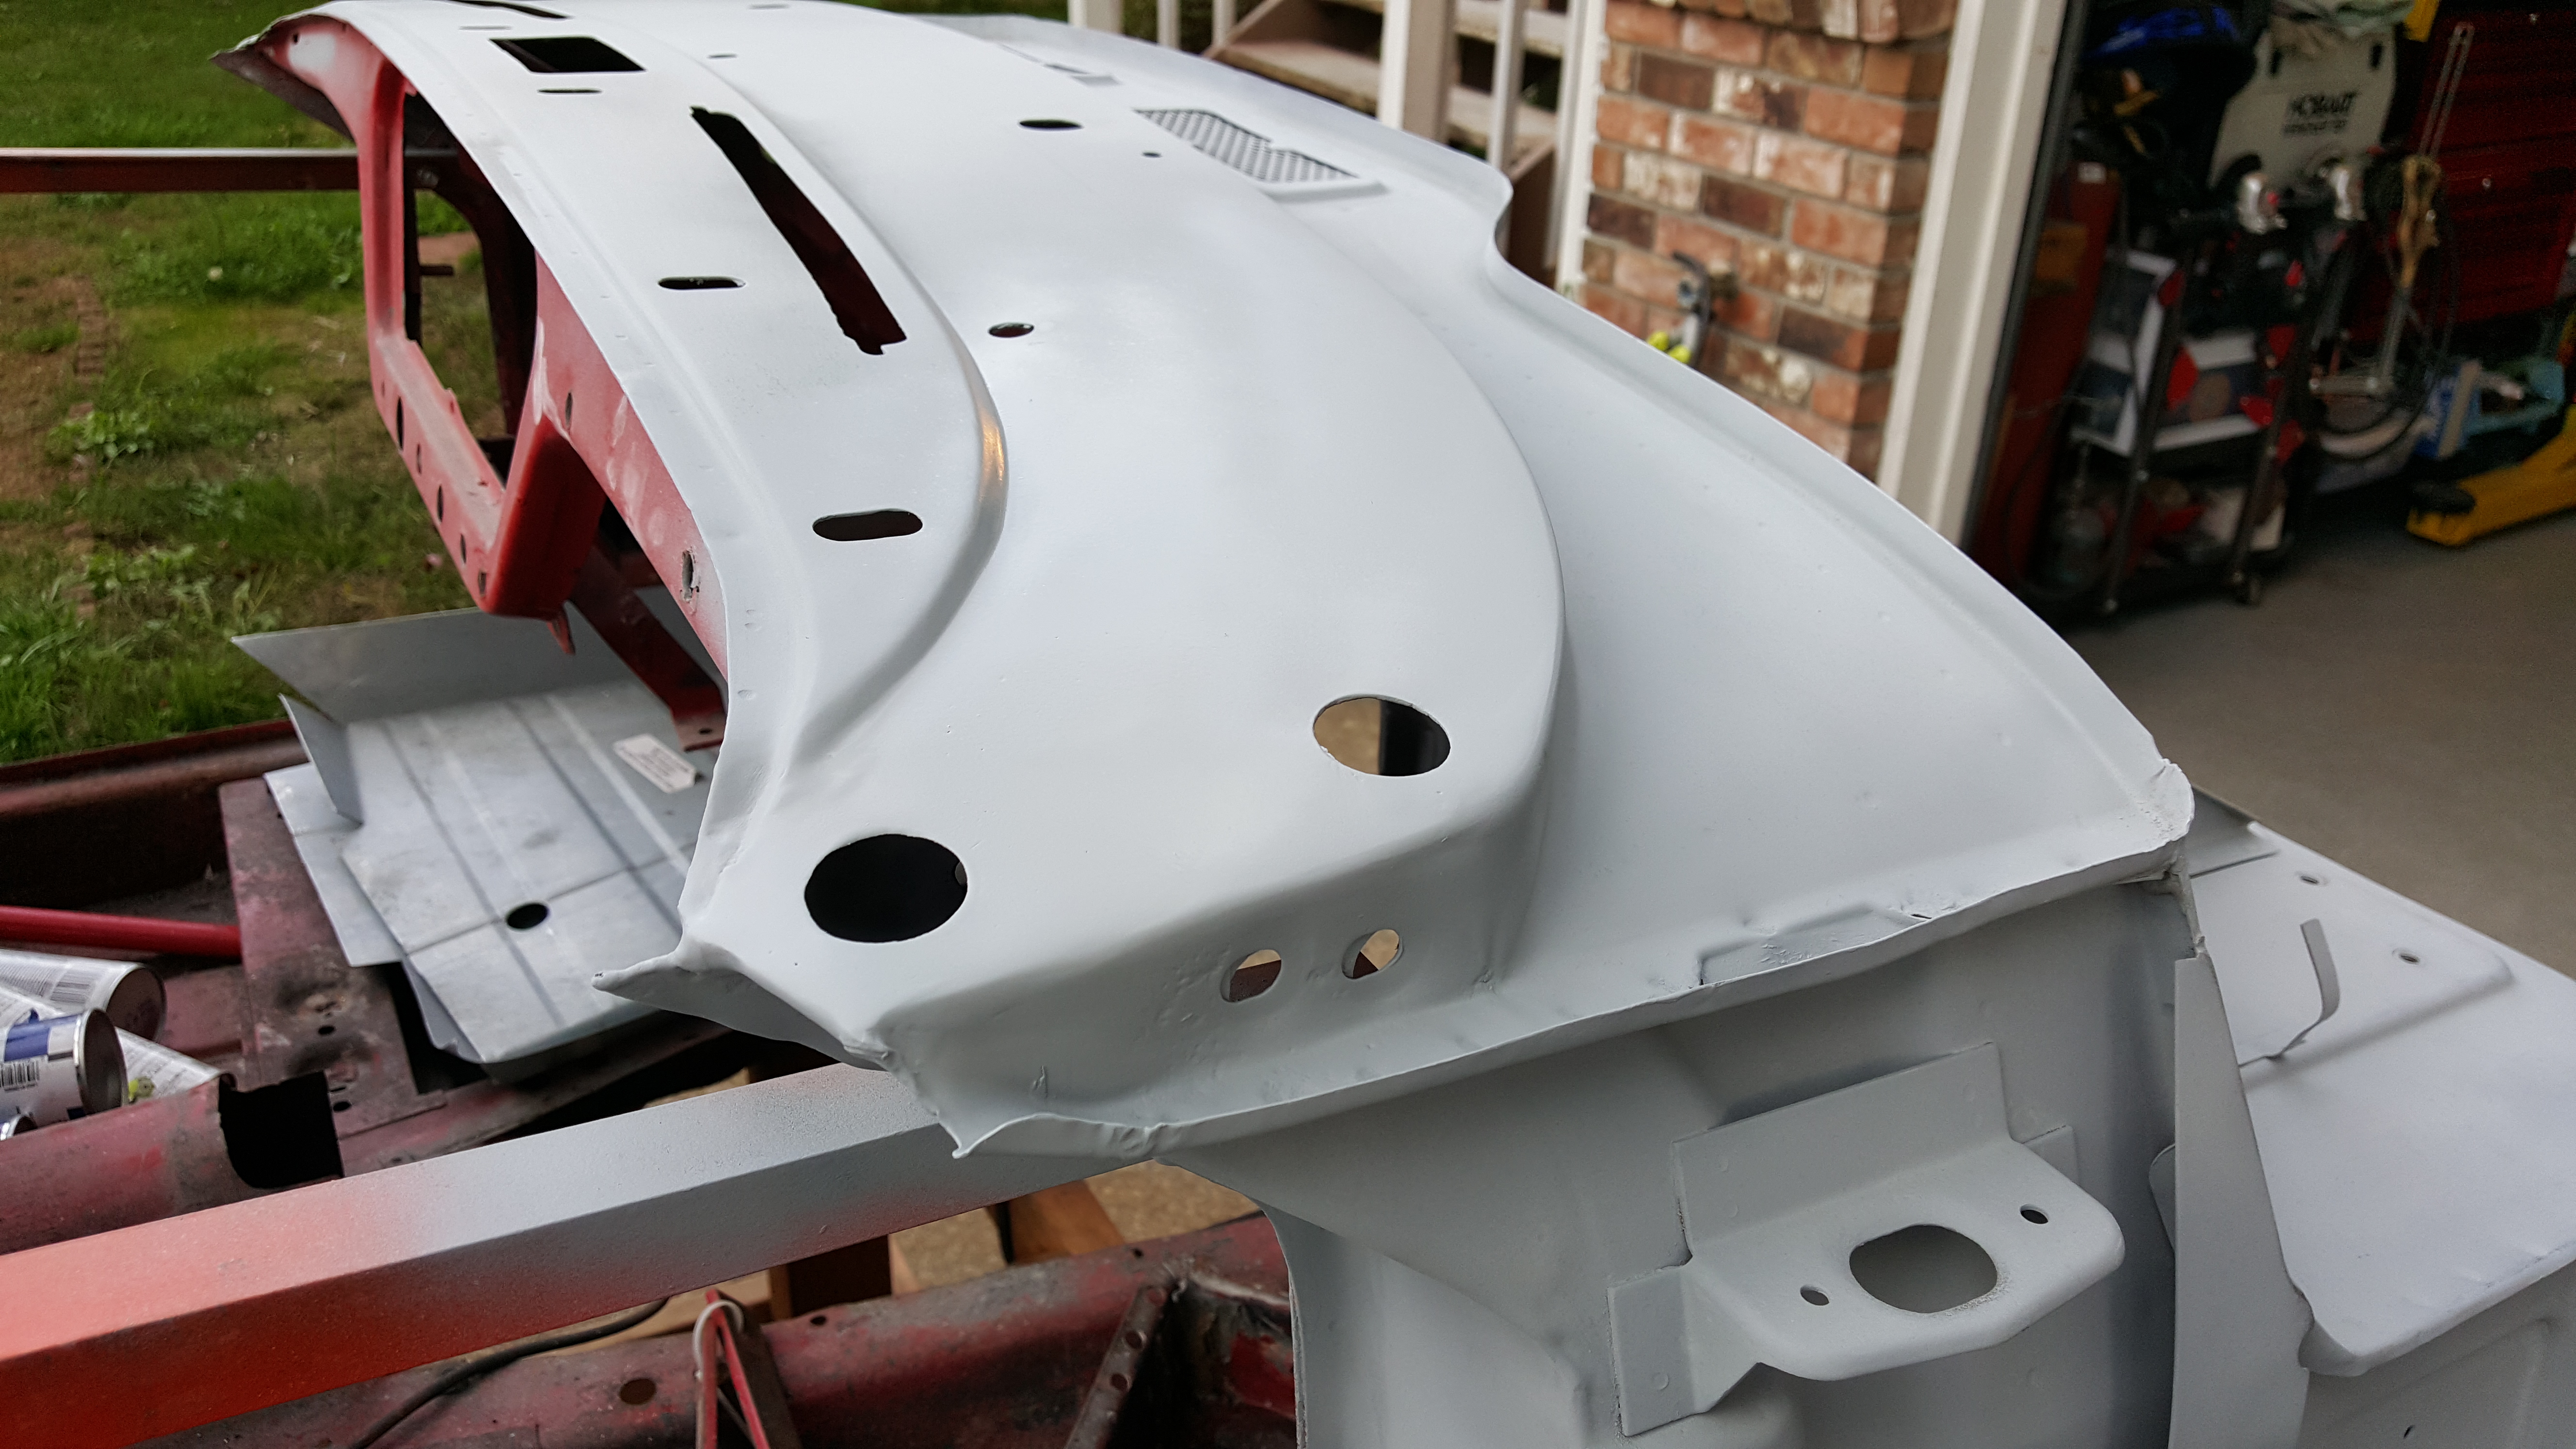 Once ground down and a bit of glazing putty for some surrounding sanding scratches, it scuffed out and primed very nicely. This is all hidden from view by the windshield frame exceept a tiny portion. Even if it's hidden, there's no reason not to finish it right. It's easier to do it right now, than redo it later! Next up: The windscreen frame. 09-07-15: Windshield Cowl Drains At the end of each side ofthe windshield cowl is a spot where water runoff can drain down and through a body weld point on th top of the cowl. The drain works, but if debris builds up, it can easily rust. One the driver side of my tub, the metal had rusted away and even was missing part of the panel as a result. 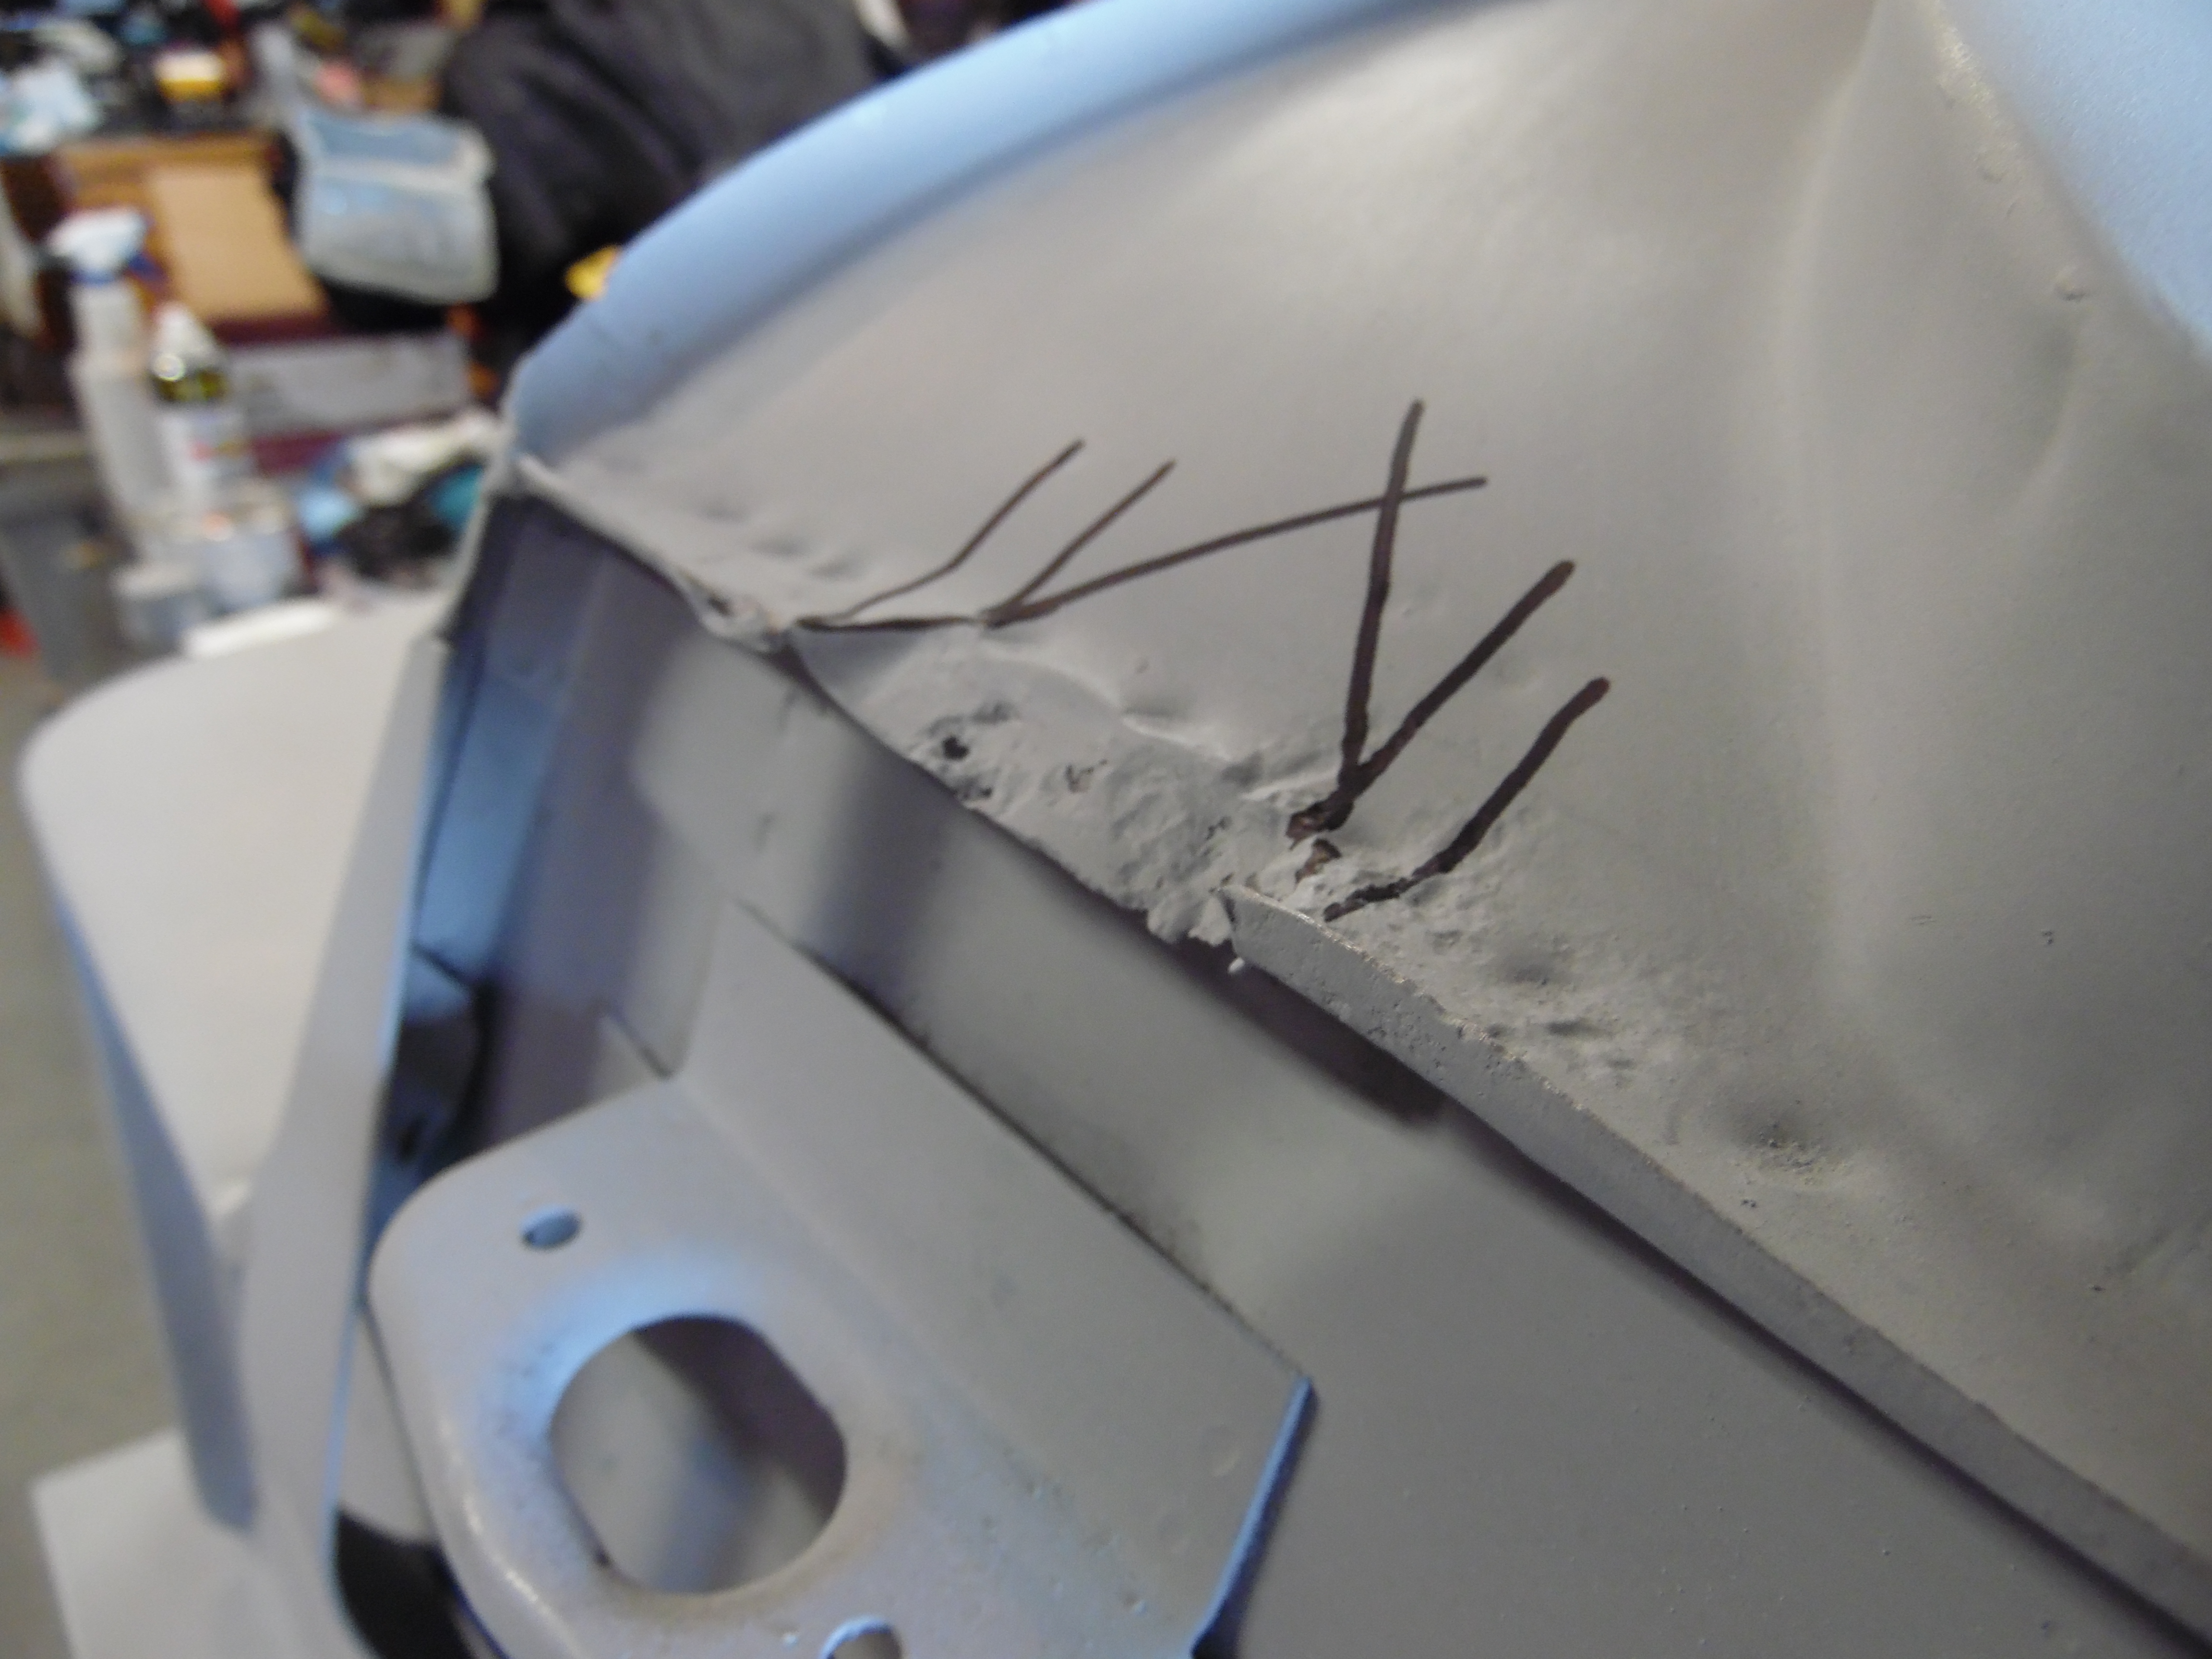 The vertical lip you see in the foreground should extend across the gap. You can see it's missing and even on the far side, it's not the same height or shape. The passenger side showed me what it needed to look like. This would require metal working and some more metal added. I used a sheet metal brake to form a simple angle to form the vertical lip. This will have to be cut and trimmed to fit around the opening and bent up at the door side to account for the angle there. 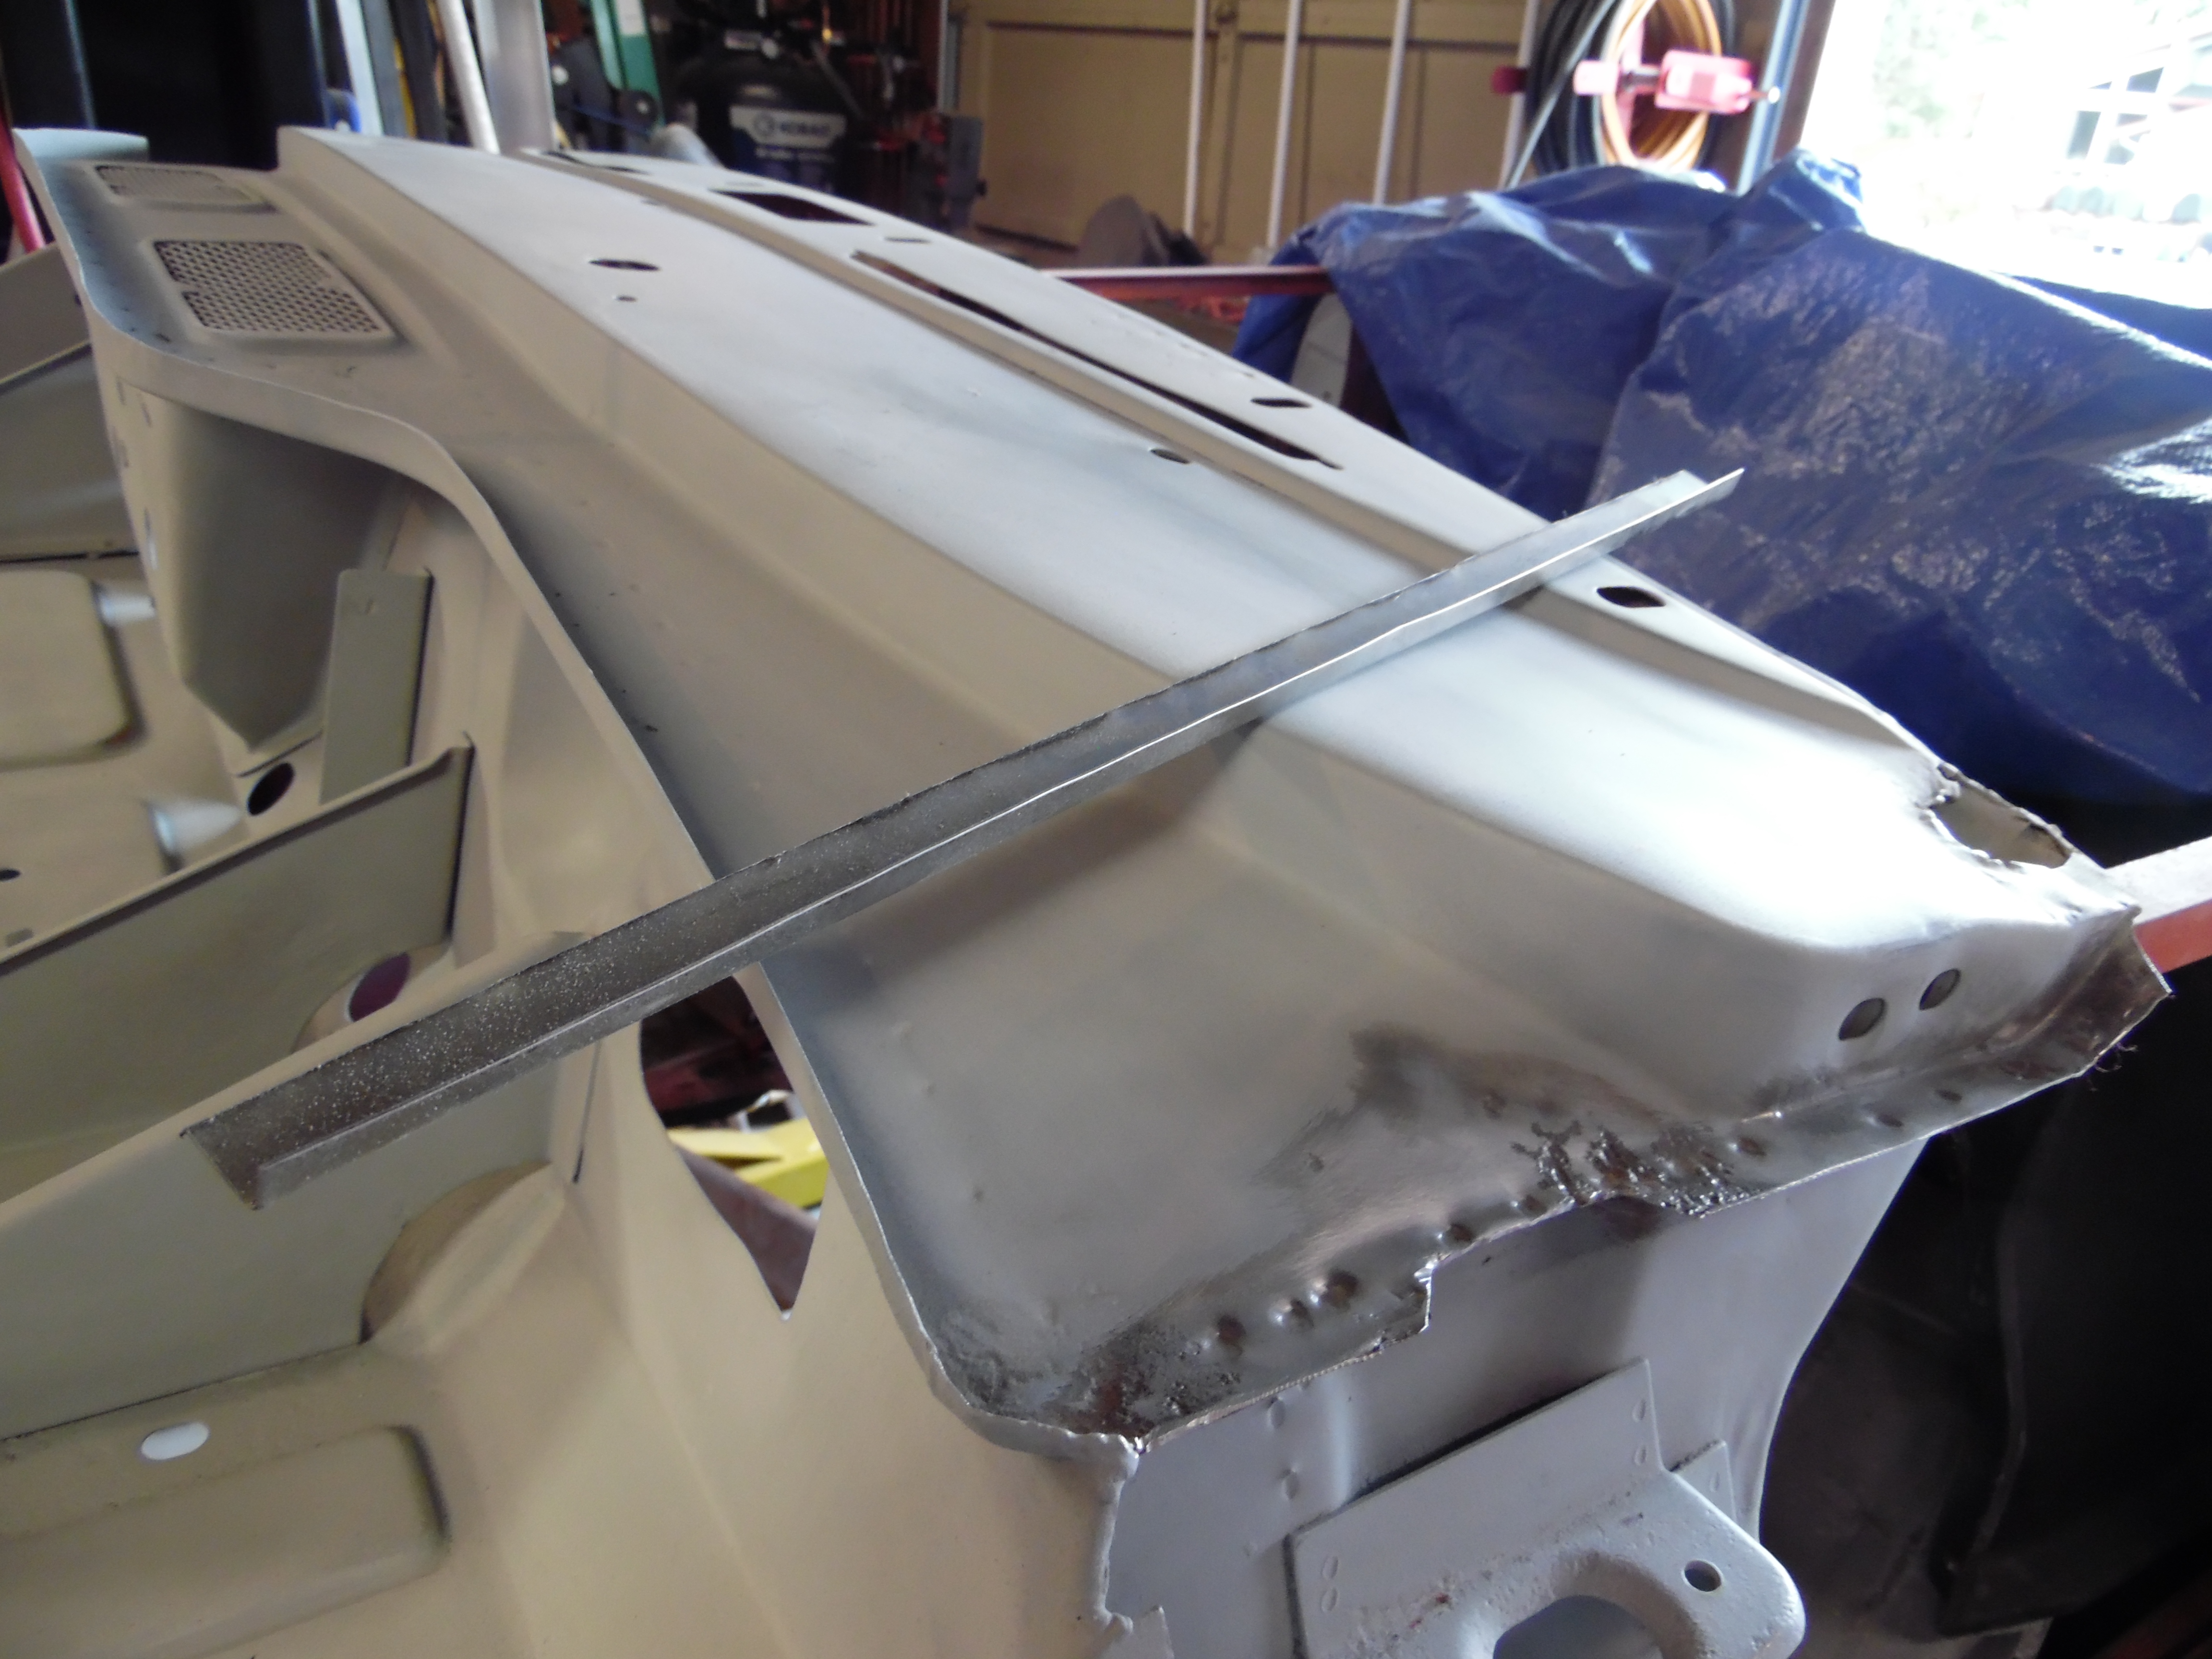 Cleaned up the area, reshaped the opening. It's missing the metal bit below the gap that funnels water away from the edge- and right on the bonnet cone mounts. Weird design. Not sure that is a good thing, but it is how it is. Metal is thin here and will need some spot welding to build it back up to be usable, or cut it out and replace entirely. 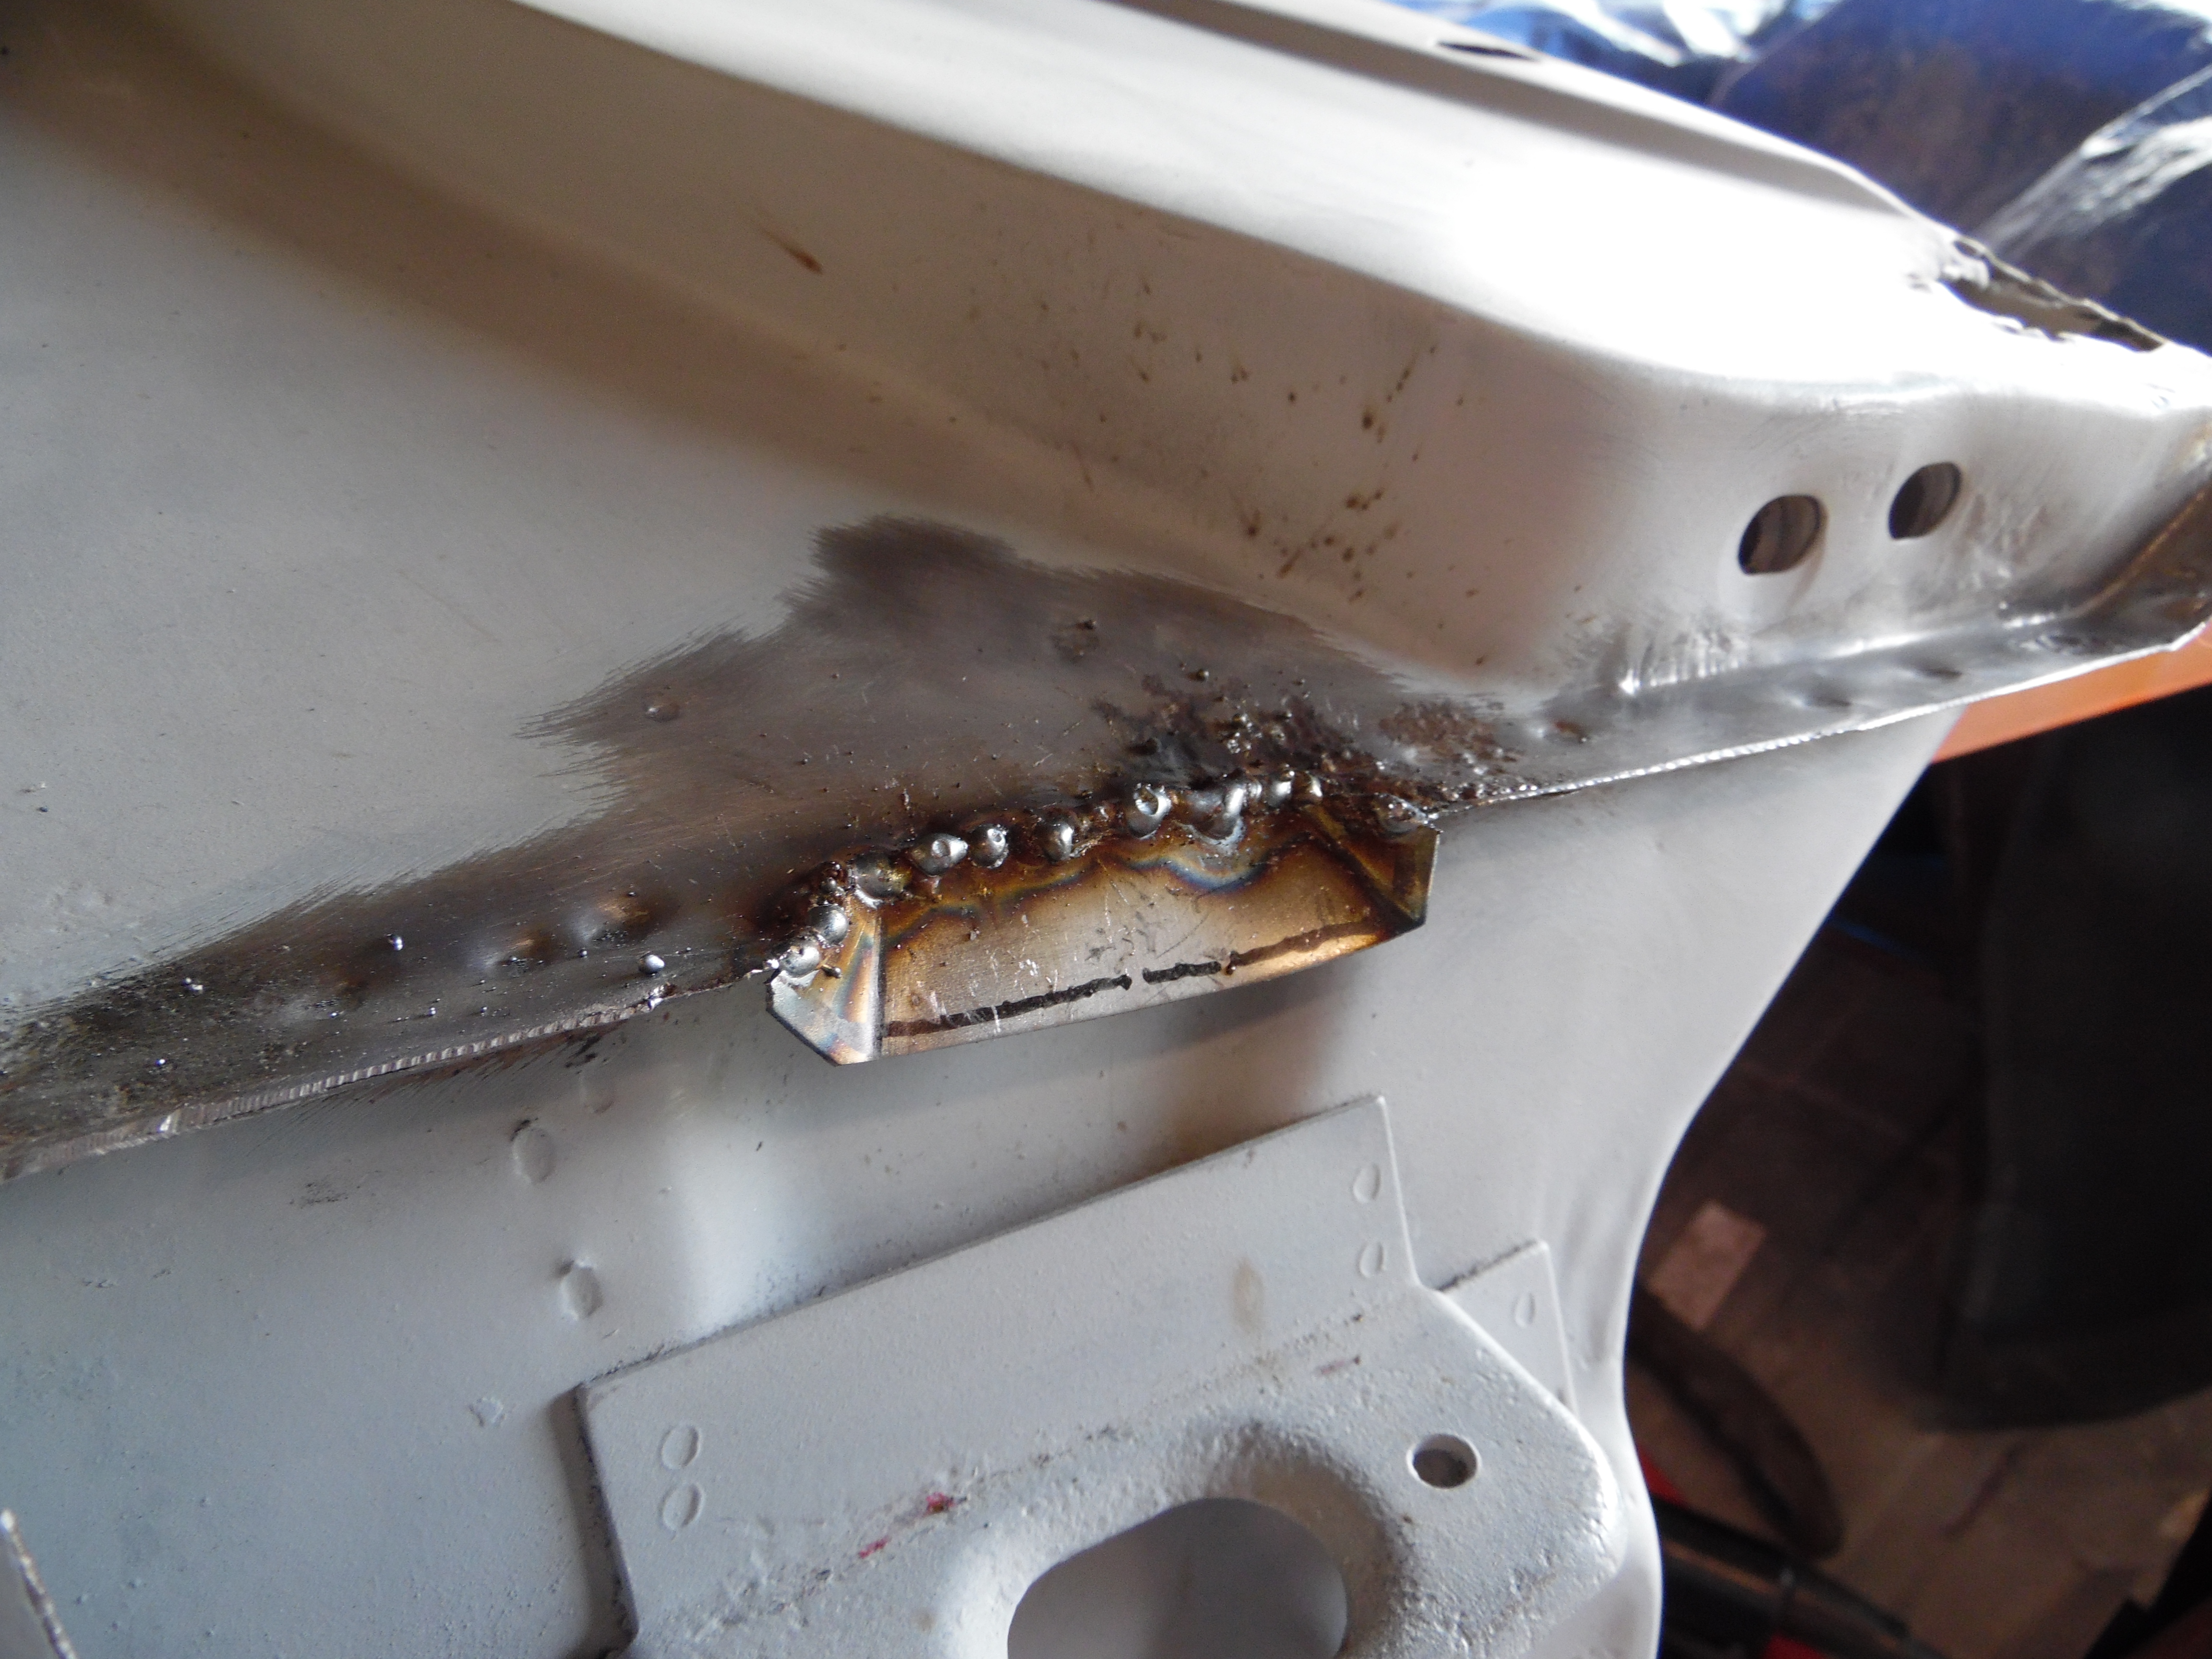 Cut out a new piece out of sheet metal and tacked it in place. Then a lot of tiny tack welds with compressed air to cool the joint. I had to do it twice because the metal was too thin after grinding it flat. 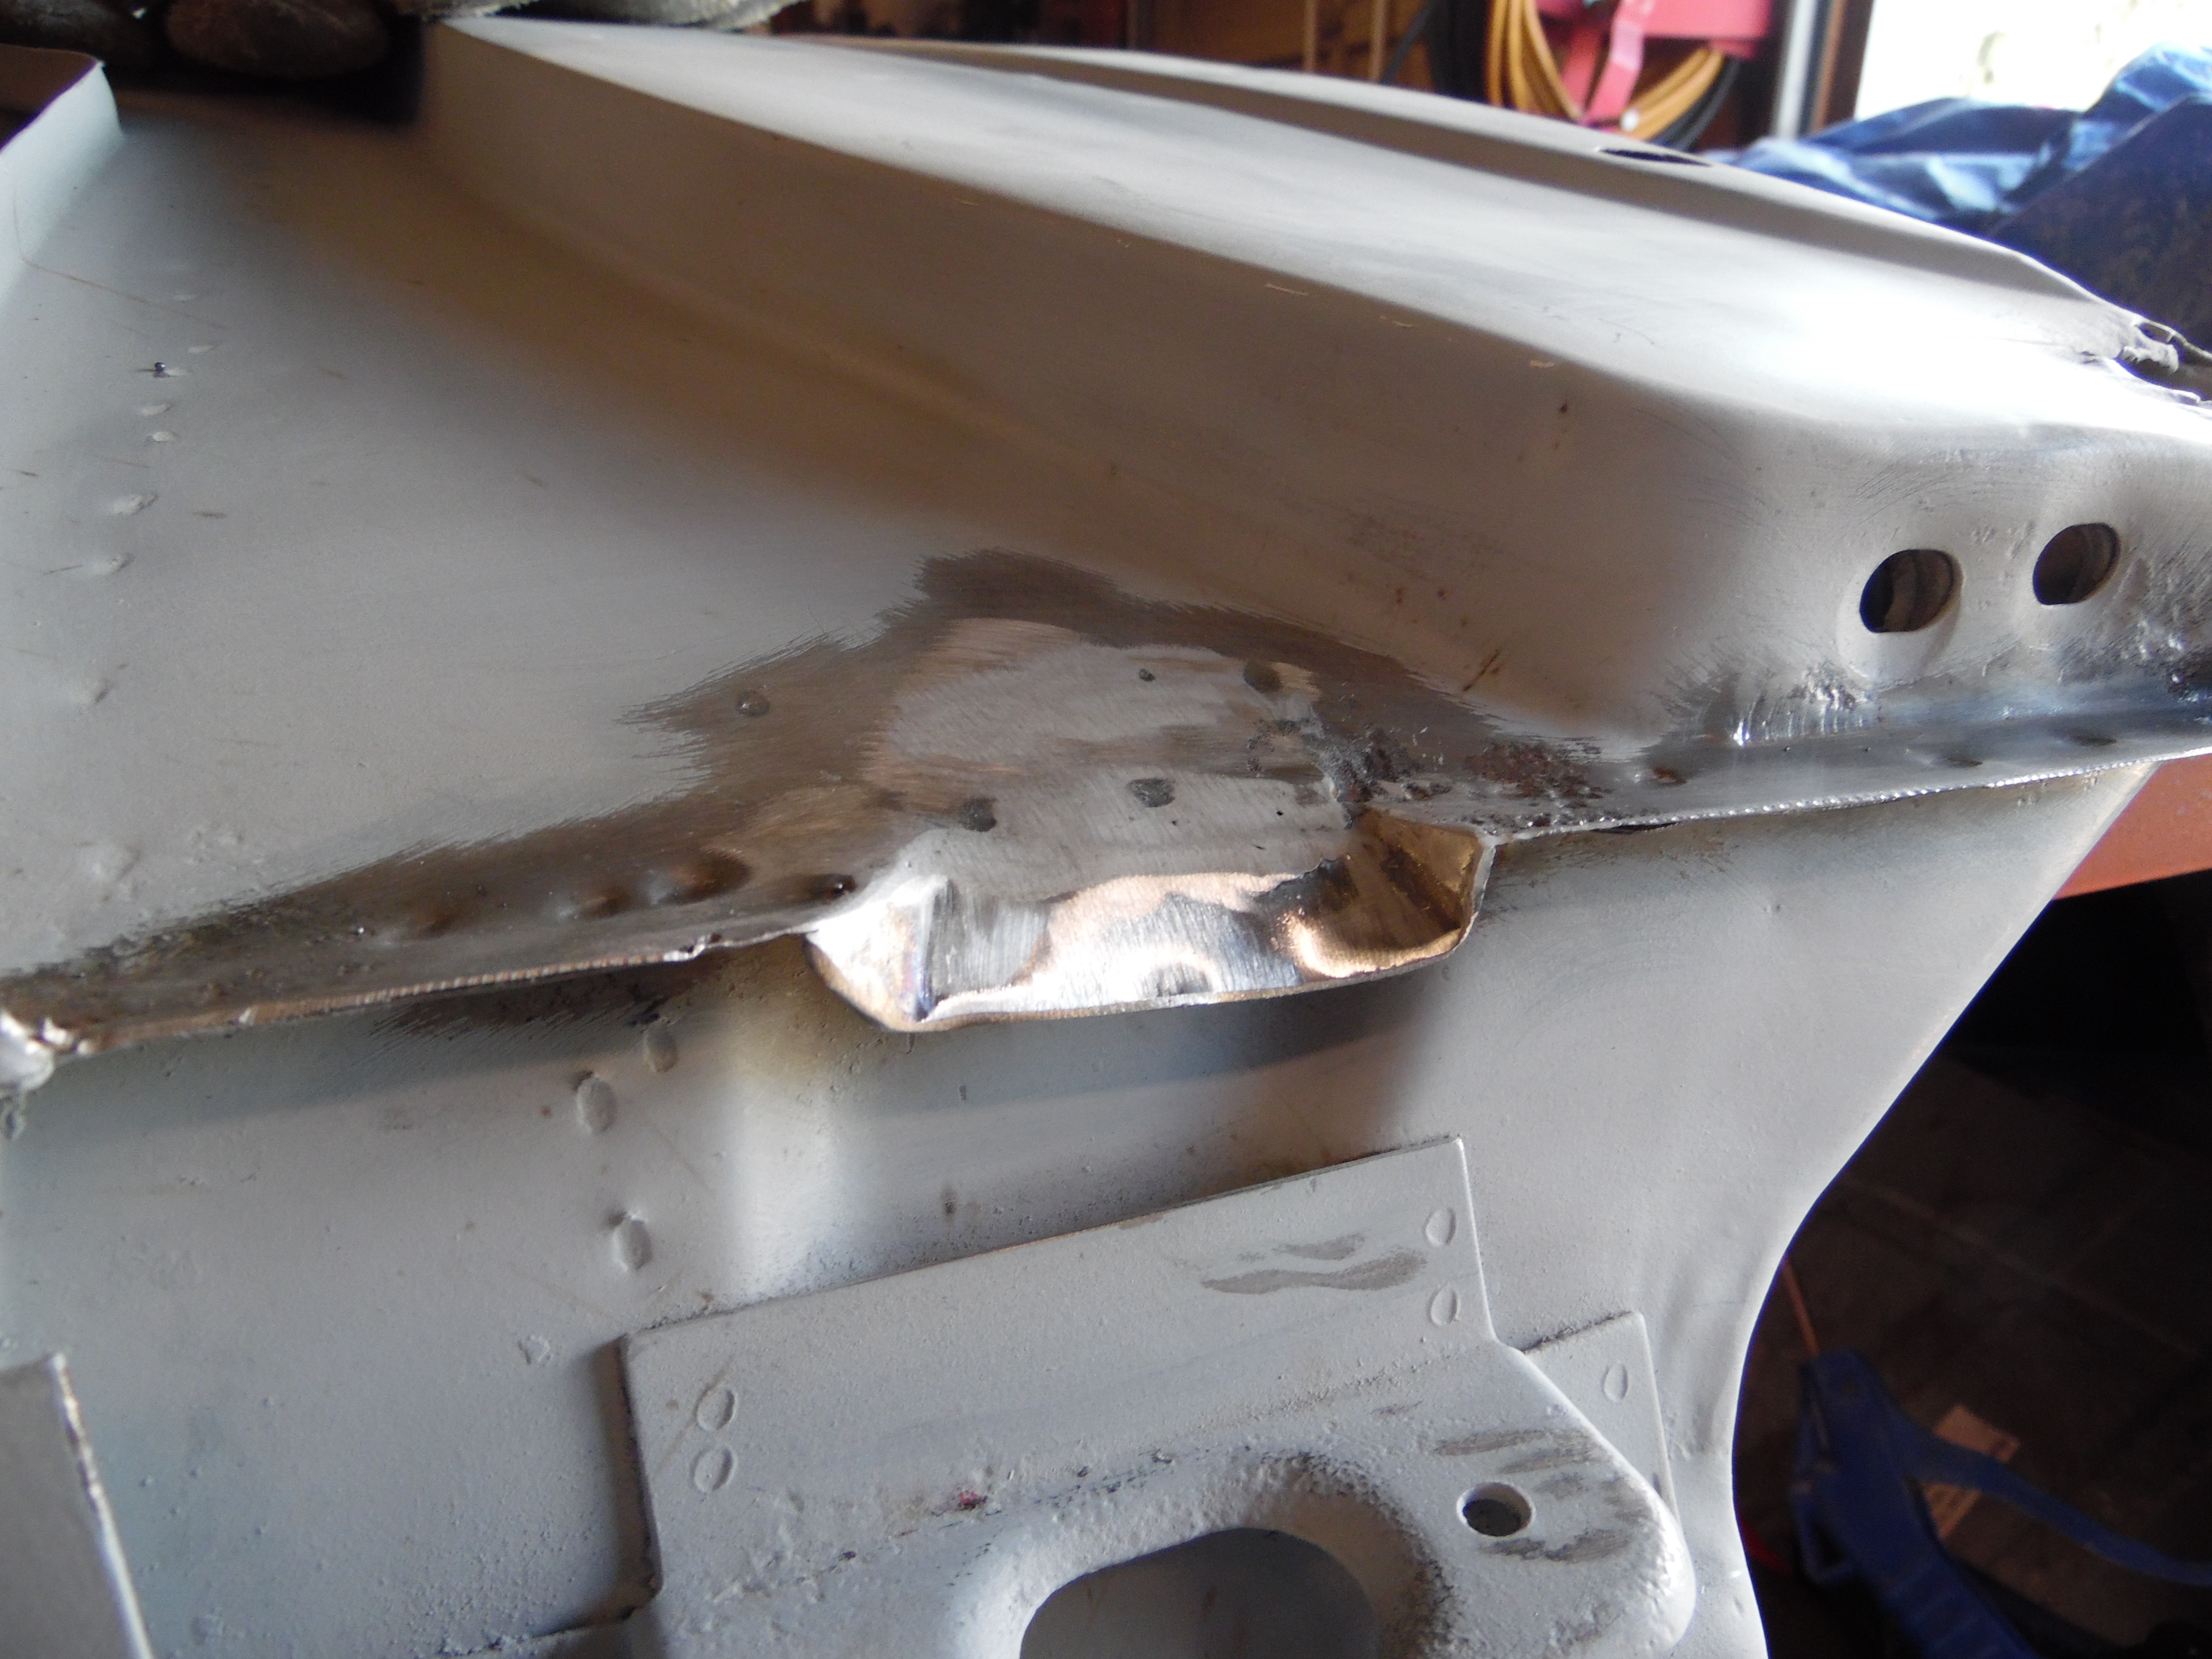 That looks a whole lot better! It's missing the vertical web for the sides, but this looks like it should now. 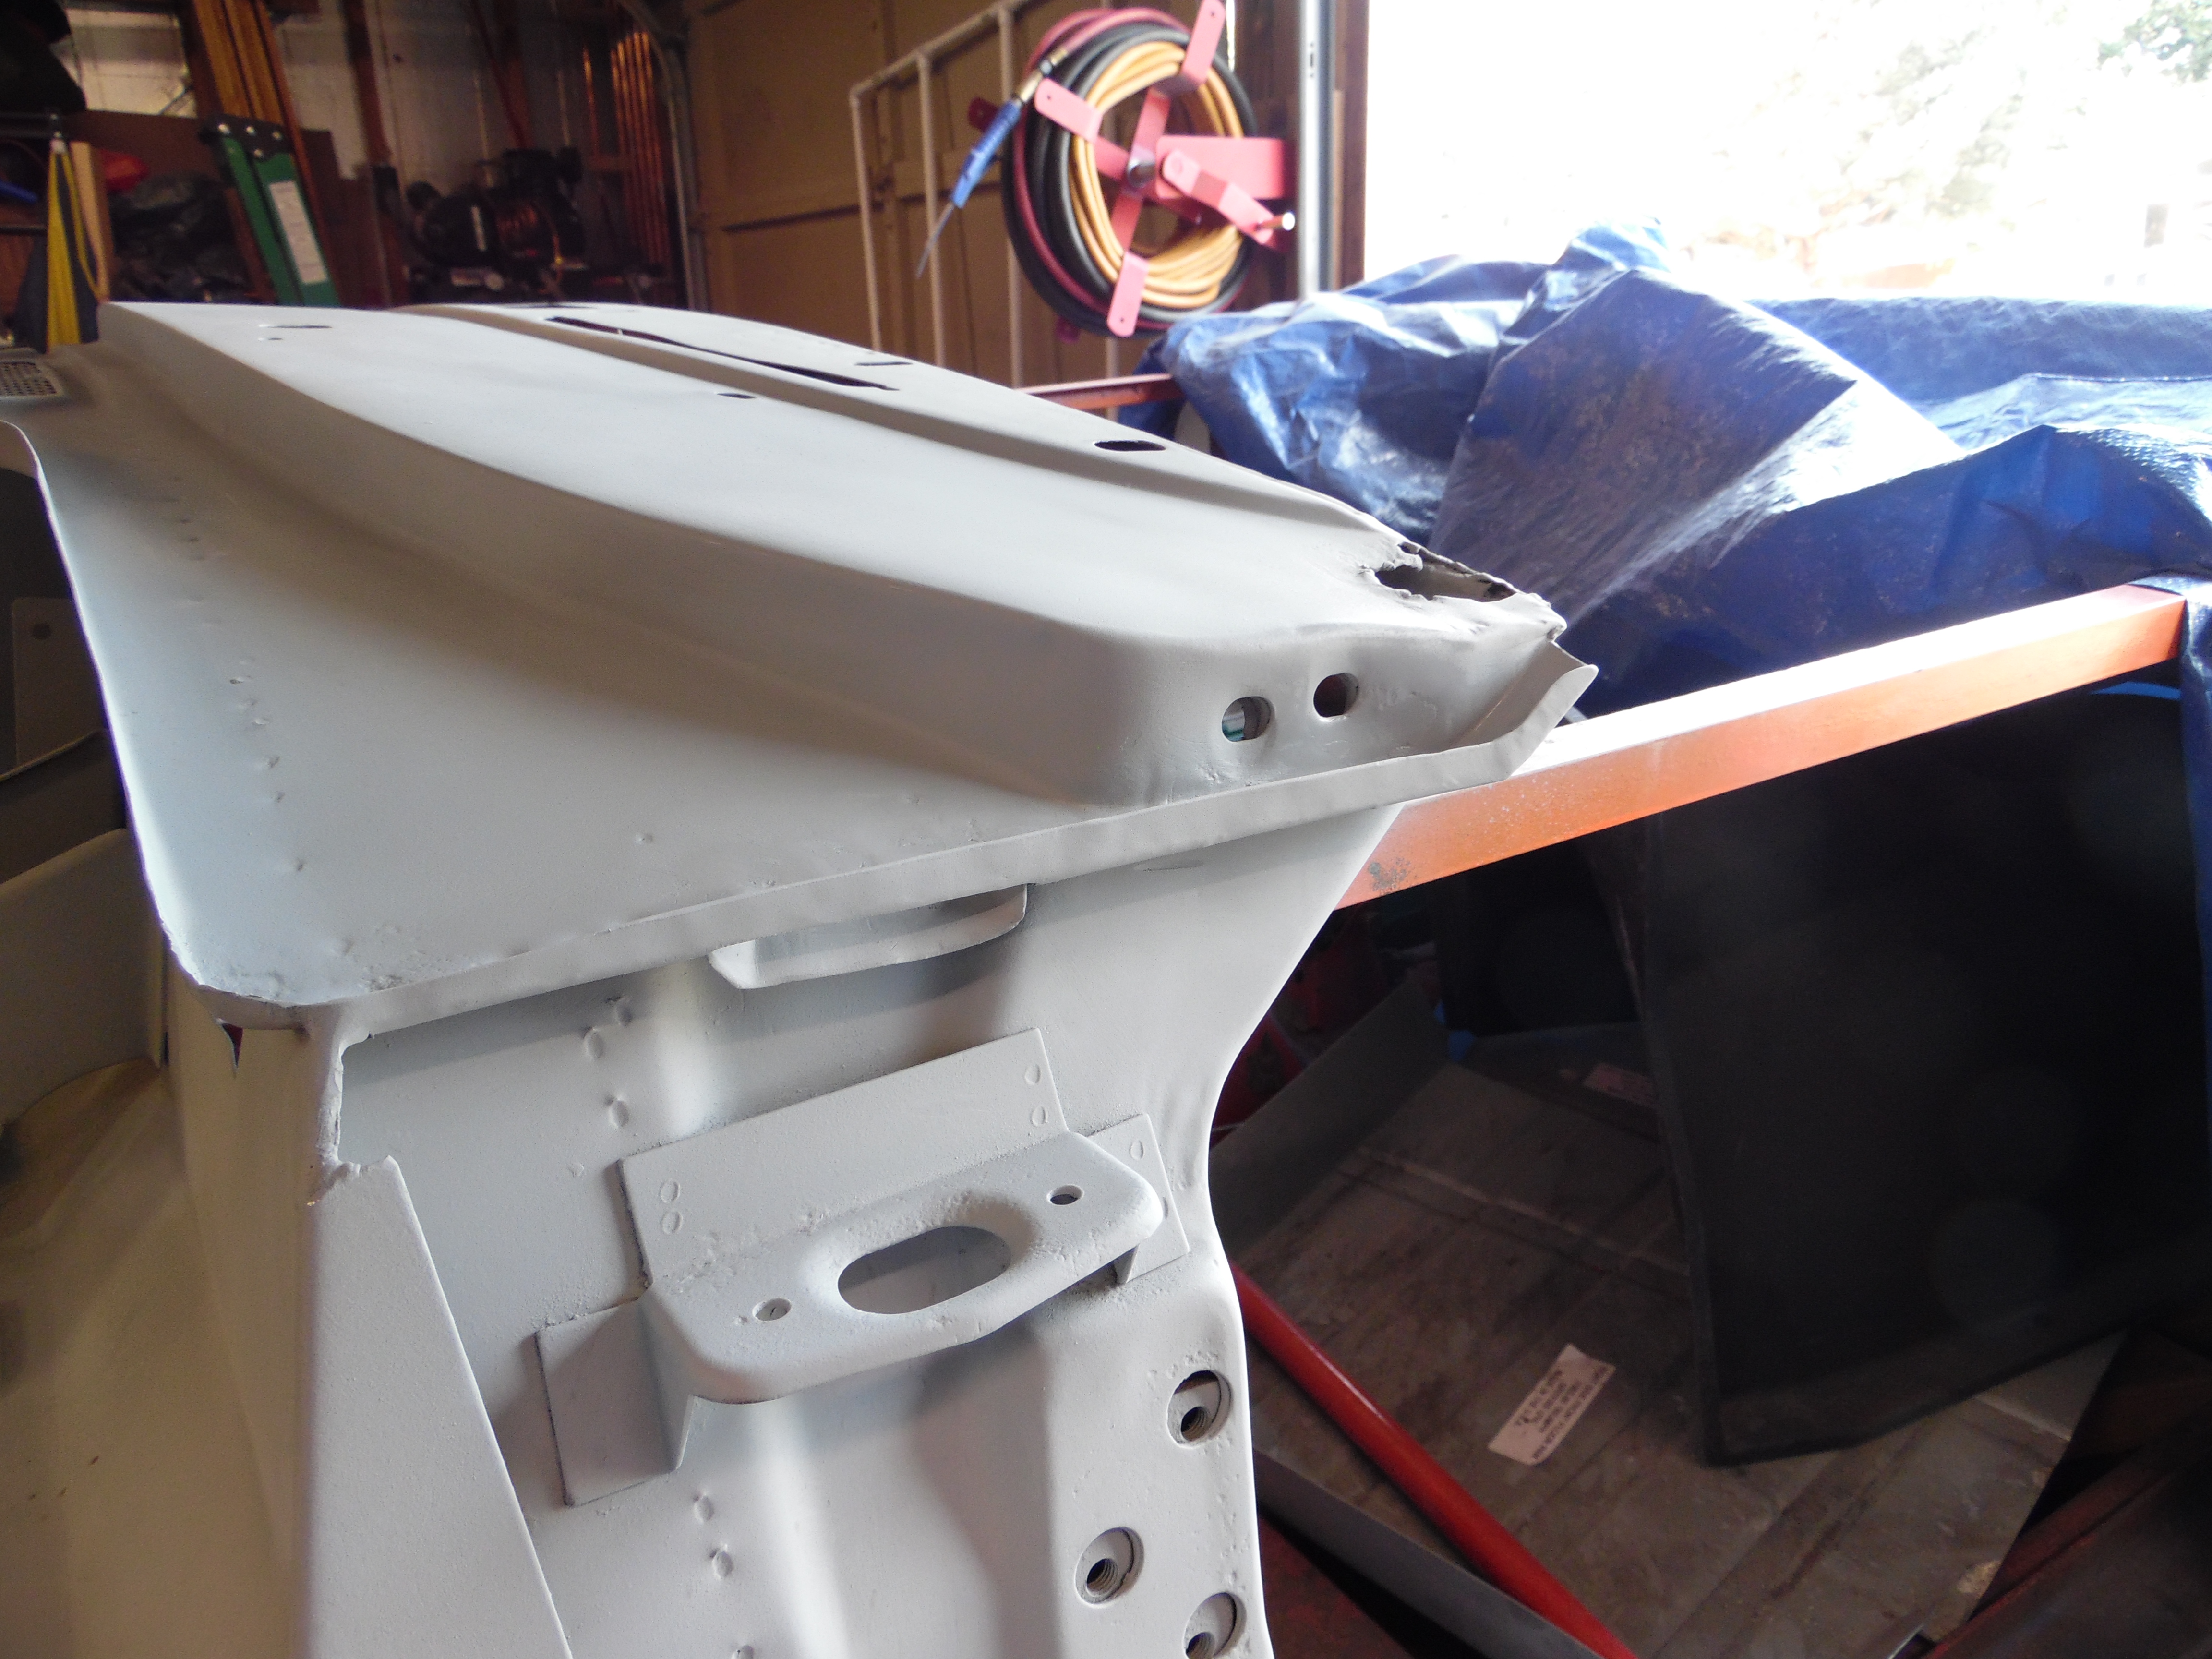 And done! Welded in the right angle piece of sheet metal. I drilled through the cowl lip with an 1/8" drill bit, then clamped the new piece to the lip from below and put in a bunch of spot welds to secure it. Cut a slot in the vertical rib to account for the corner at the door side, then welded up the cuts to make it all flush again. The end was trimmed and rounded over to match what the passenger side had. All joints had weld through primer applied to ensure no future visits from the tinworm. Several light coats of primer have been applied. I see one spot I might want to add a tack weld and grind down, but it's more for visual than prevention or repair. It's really hard for me NOT to fill in all those OEM spot weld dimples. This was a nice afternoon repair and very doable for anyone with a cutoff wheel and a MIG welder.. 08/31/15: Firewall Progress Filled another couple of rust areas with new welding to replace rotten metal, flattened some dings and got the firewall shelf ready. Smoothed out and primed. There's always more work to be done, but I can see steady progress. 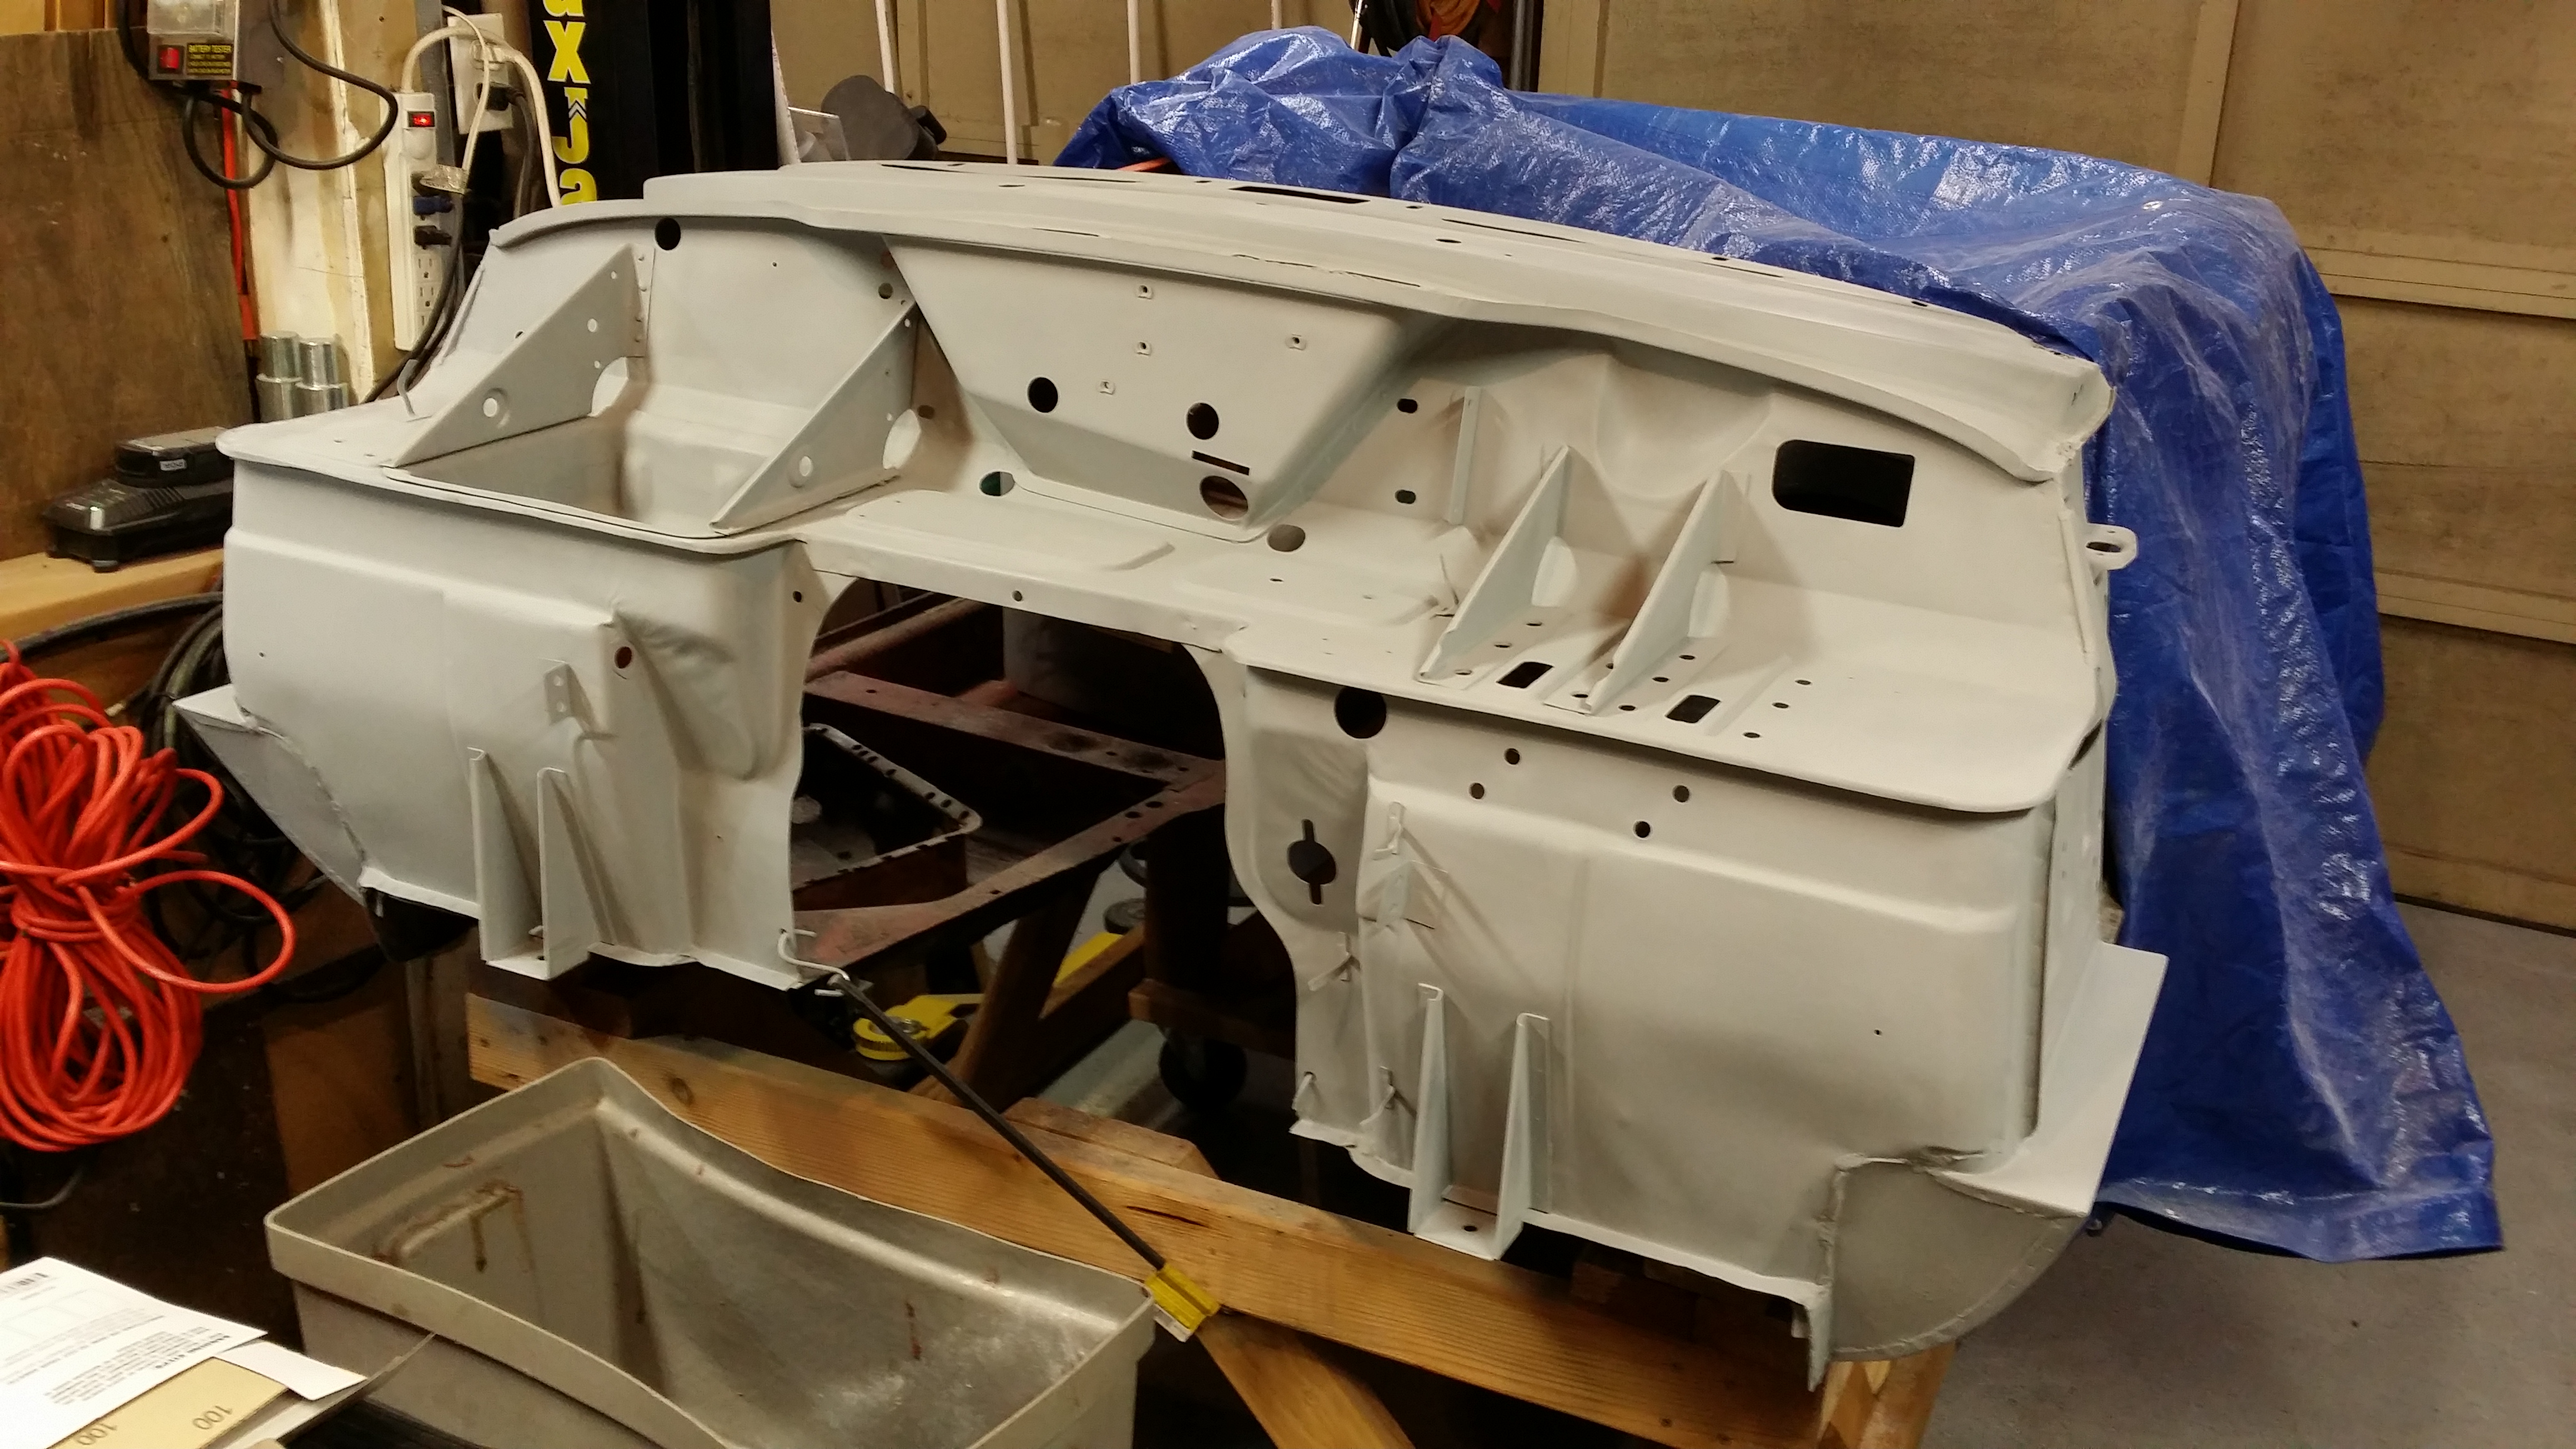 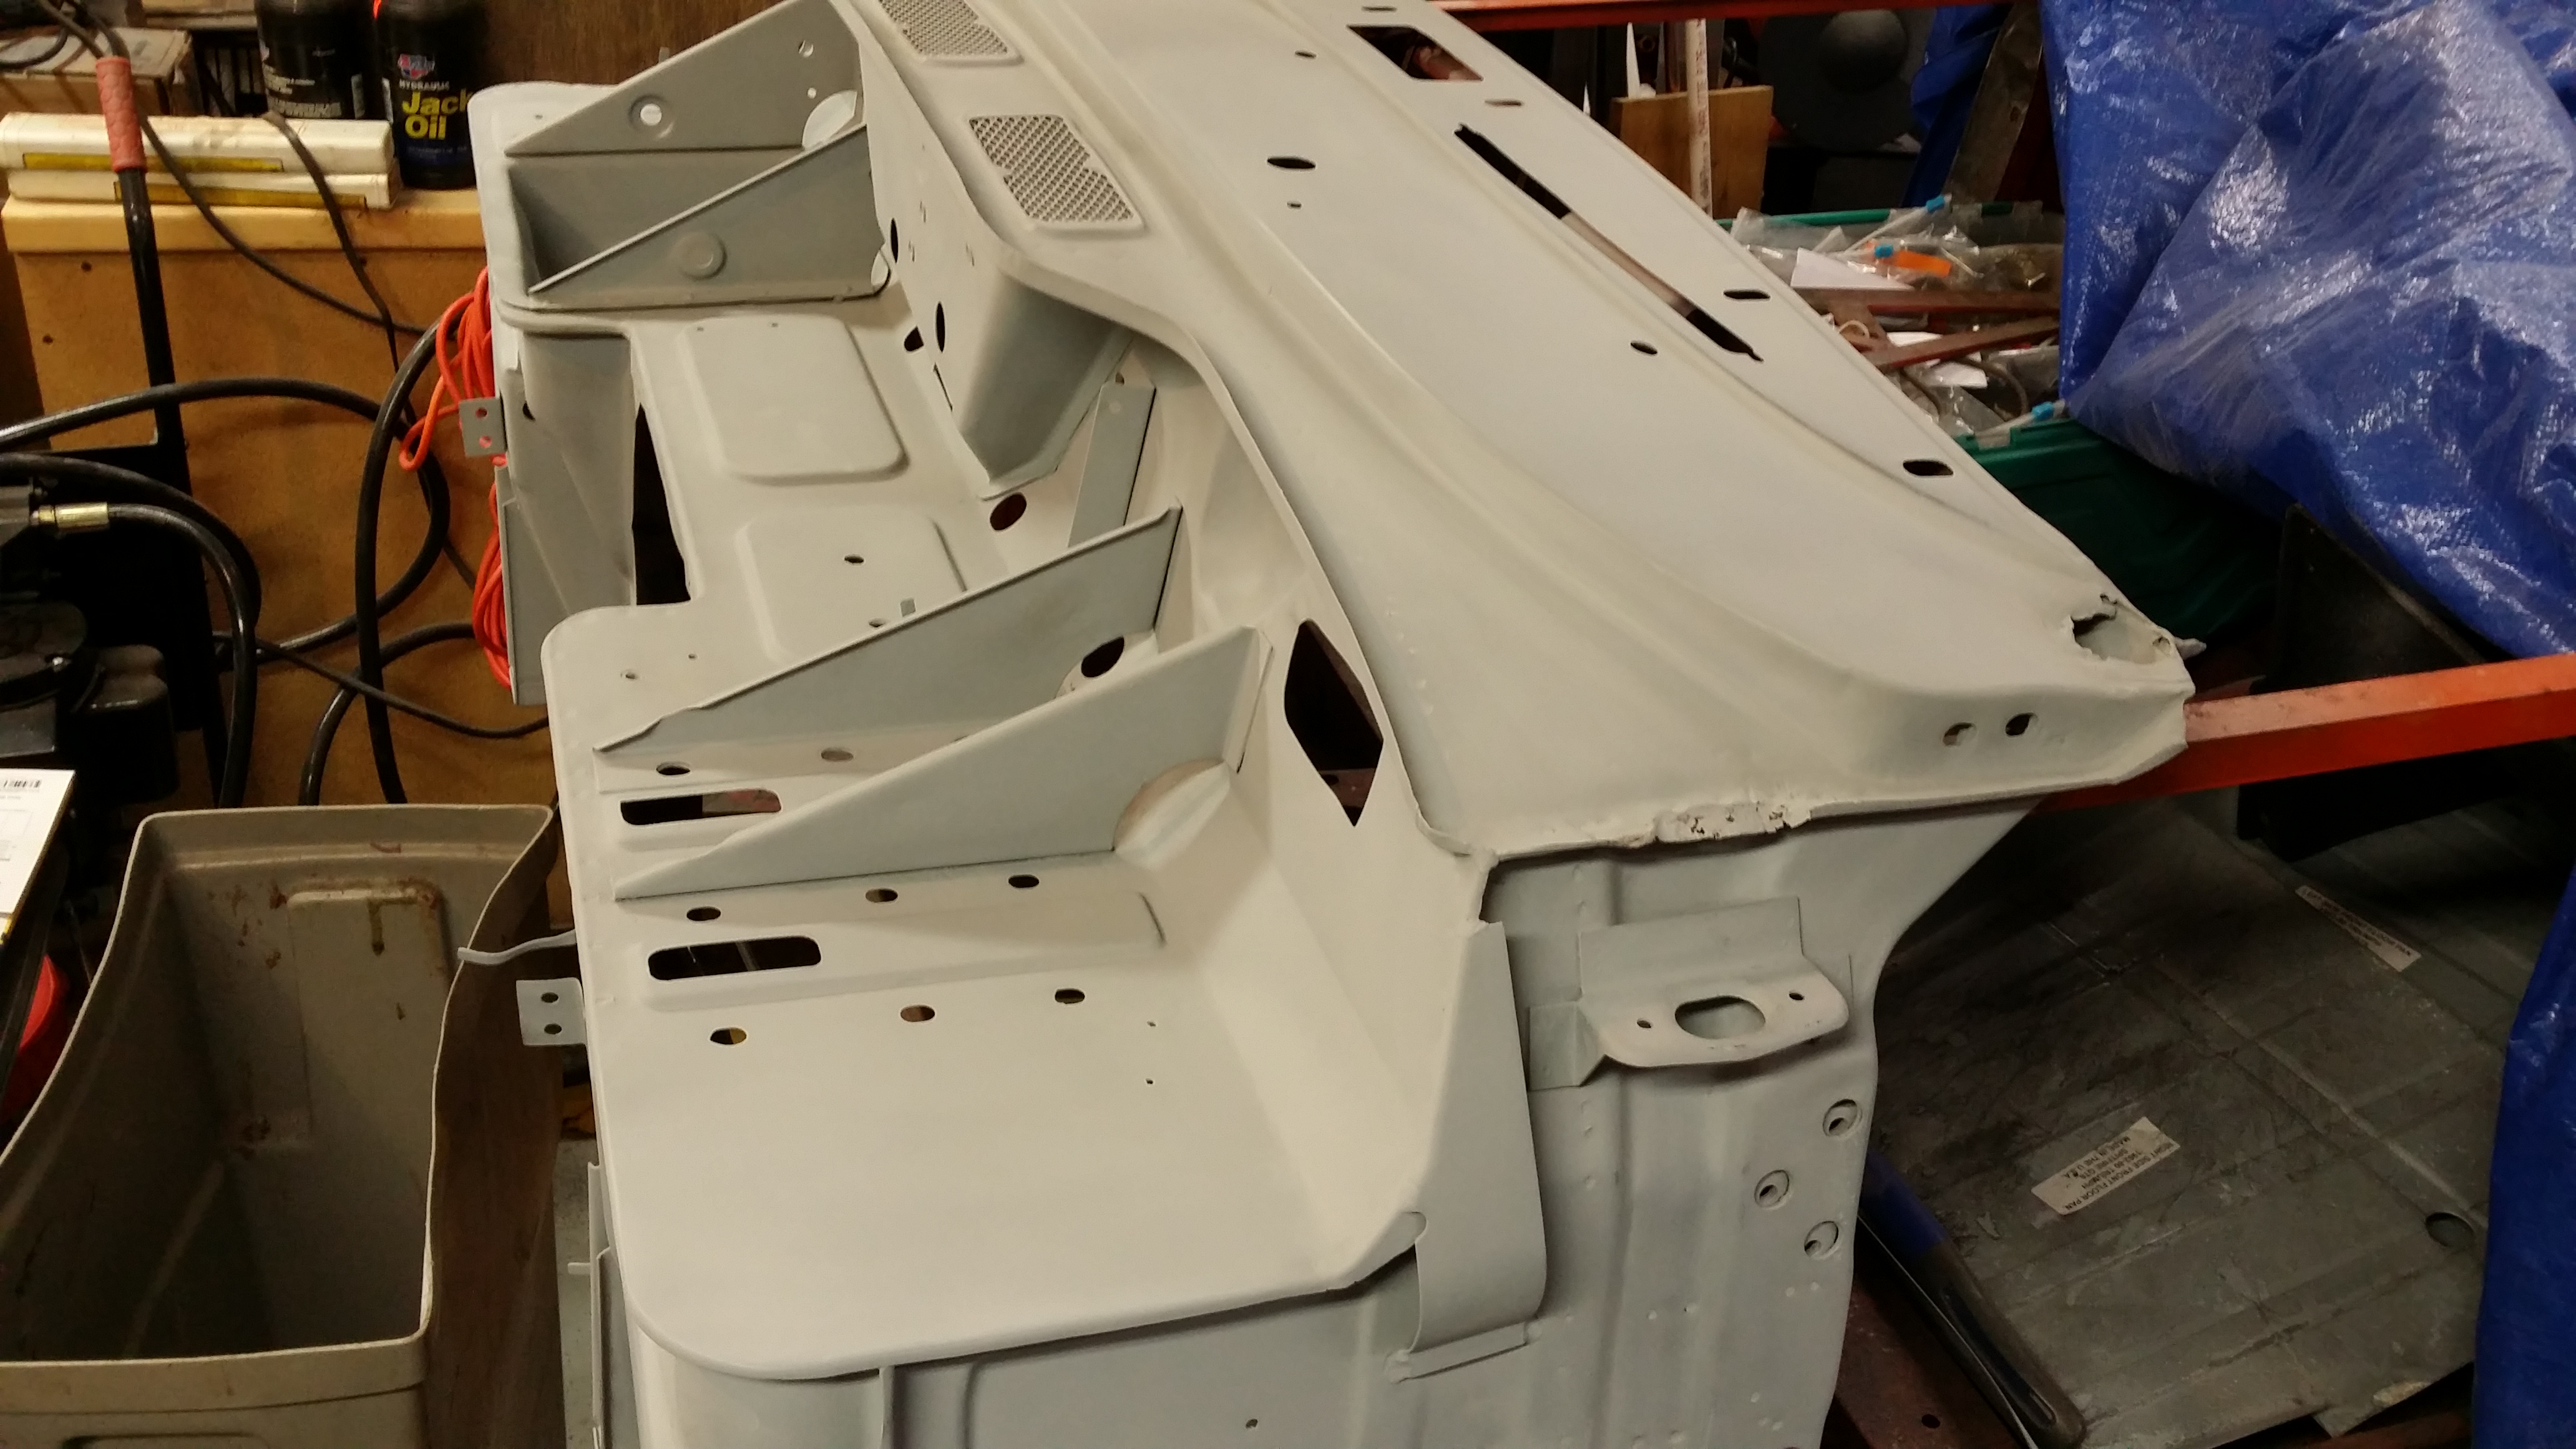 The ragged holes at the rear corners are for the windshield post mounts. The holes are torn and ragged from forceful removal attempts of the windscreen by someone in the past that then rusted. It's covered by the windshield and won't show when painted, but *I* know they are there and I won't let this stay hidden. It needs proper repair now. 08/27/15: Battery Box replacement is DONE! With the mounting surface cleaned up, I spent time to fill in all the holes left over from the spot weld cutter in the firewall and brackets. That took longer than expected and I'll be more careful in the future to only cut through the top layer of steel to save some time. A lot of welding, grinding, flap wheel sanding, welding, etc. Oh, also media blasted the brackets while off and they turned out great!  The battery box was drilled to allow new spot welds to be made around the perimeter and then those welds ground smooth. I wanted the brackets to sit on top of flush flat metal of the battery box. 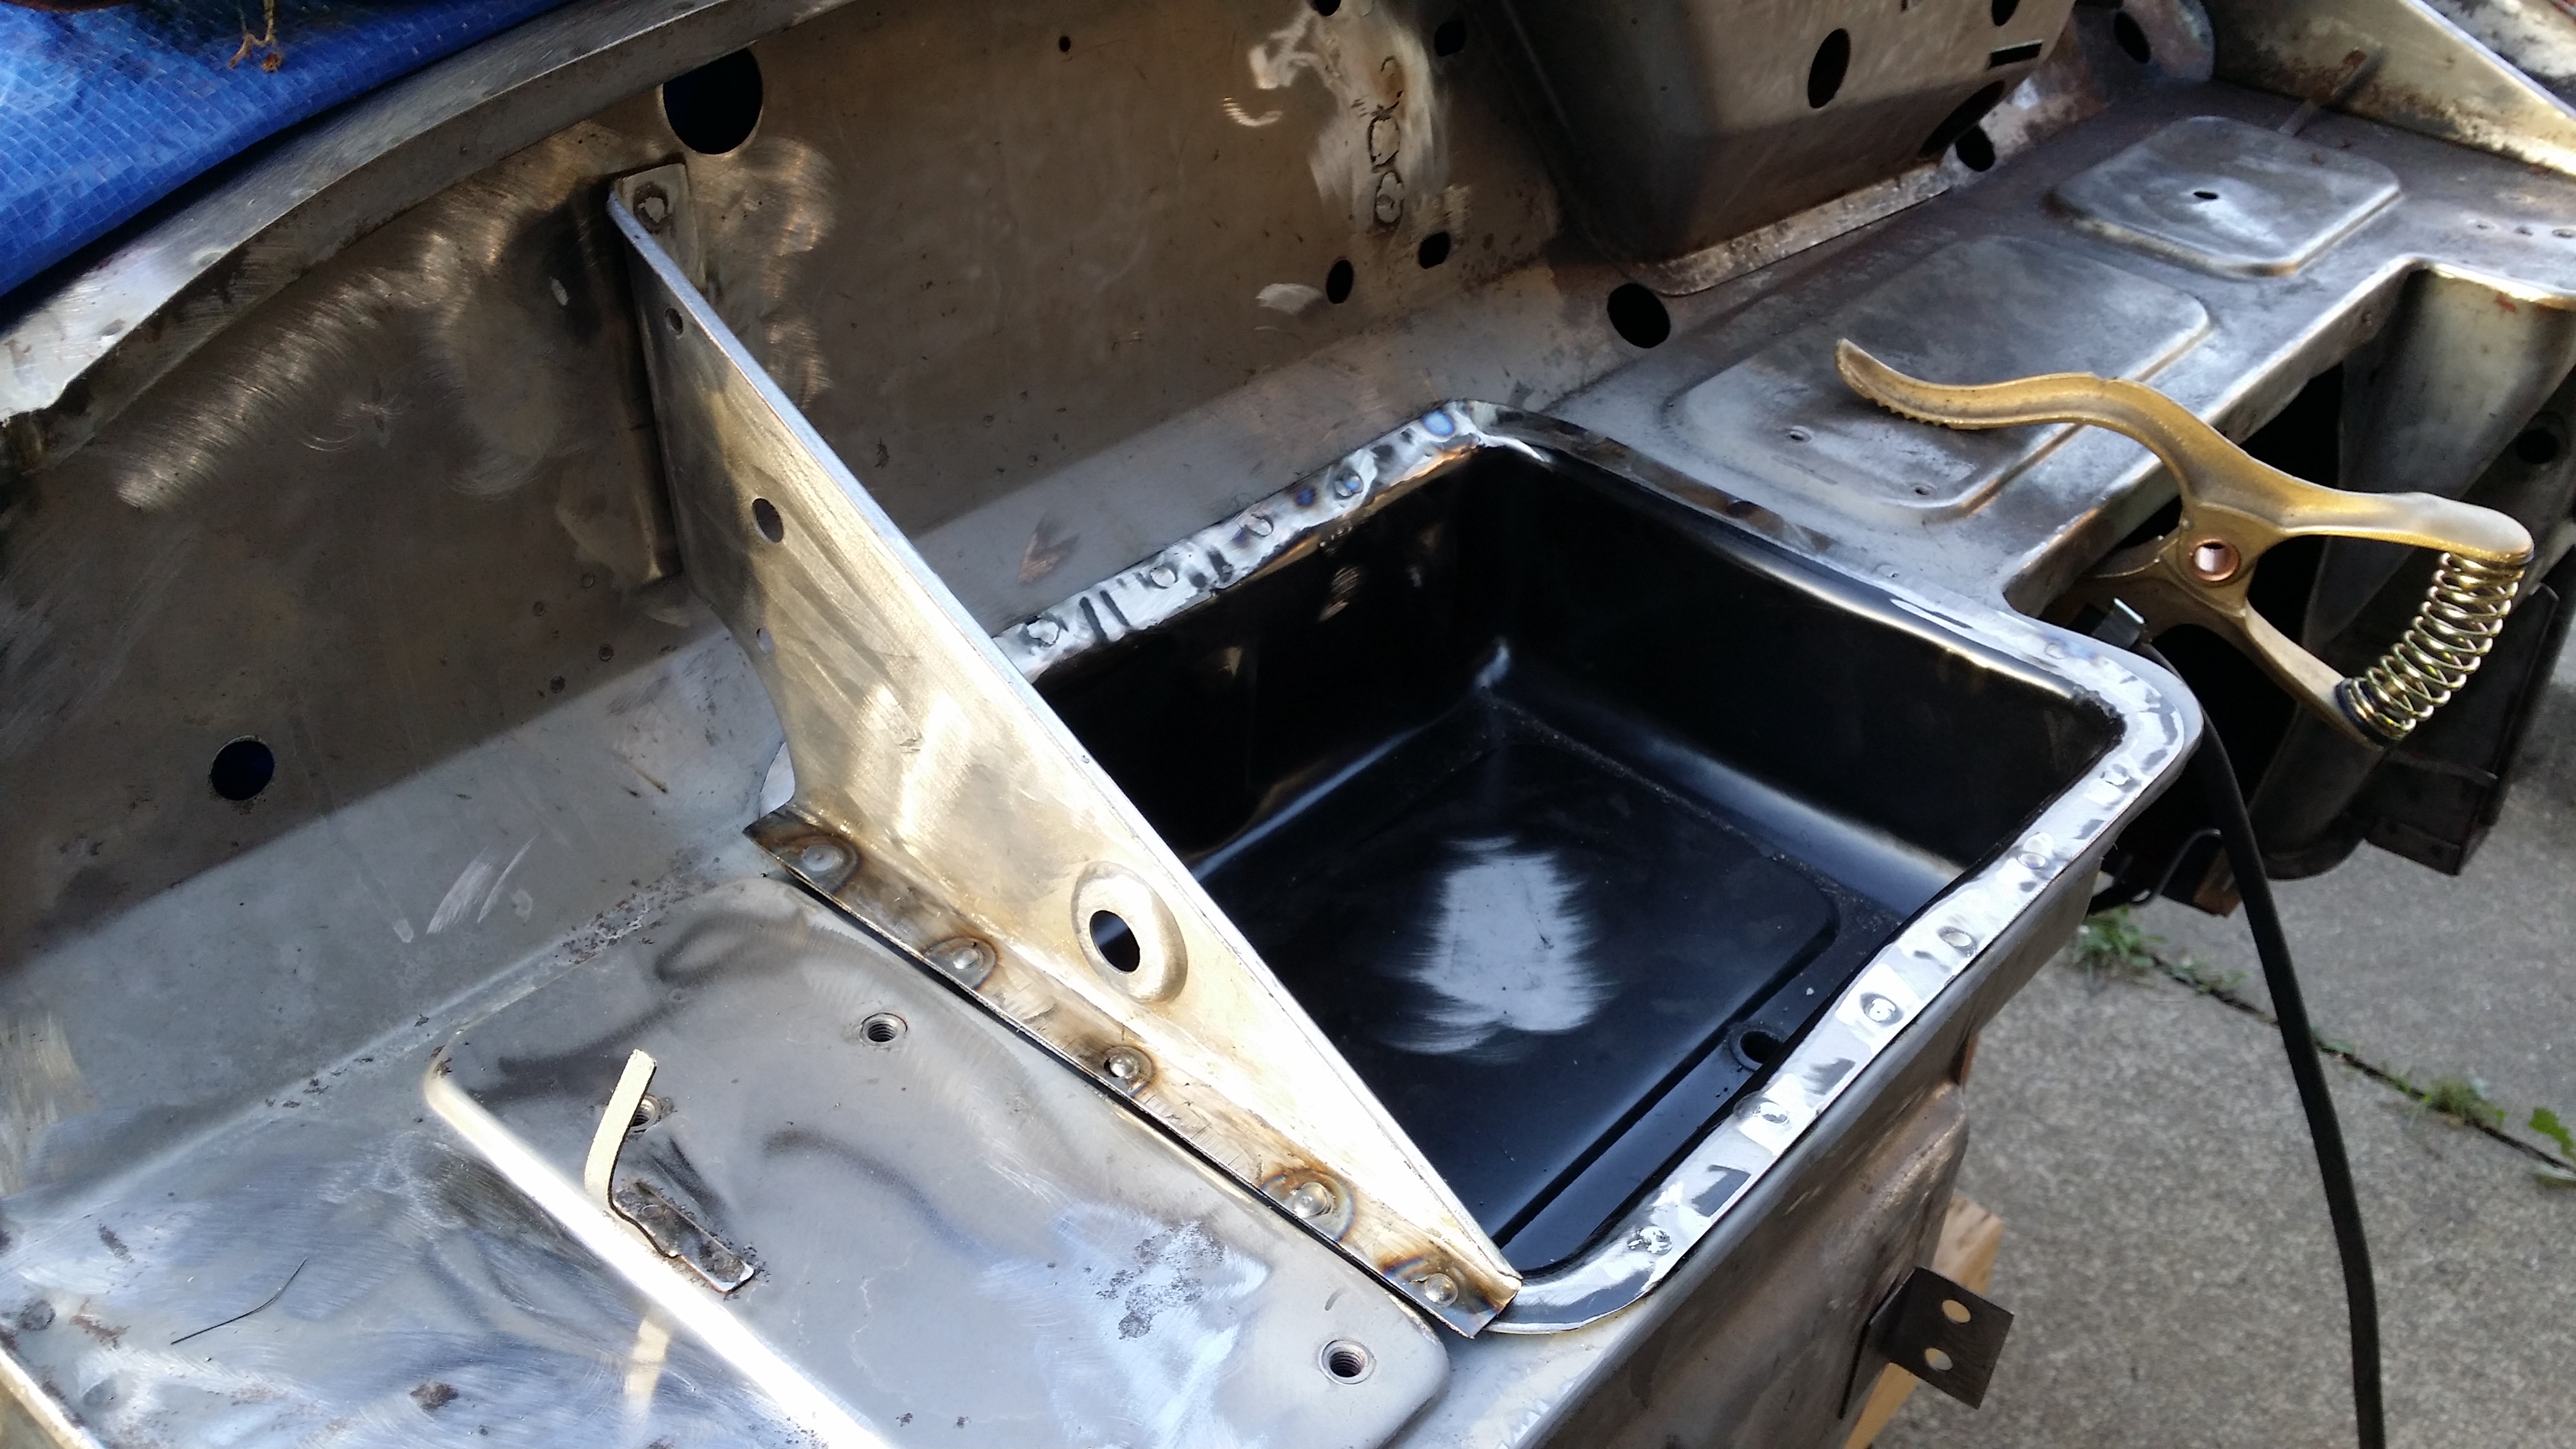 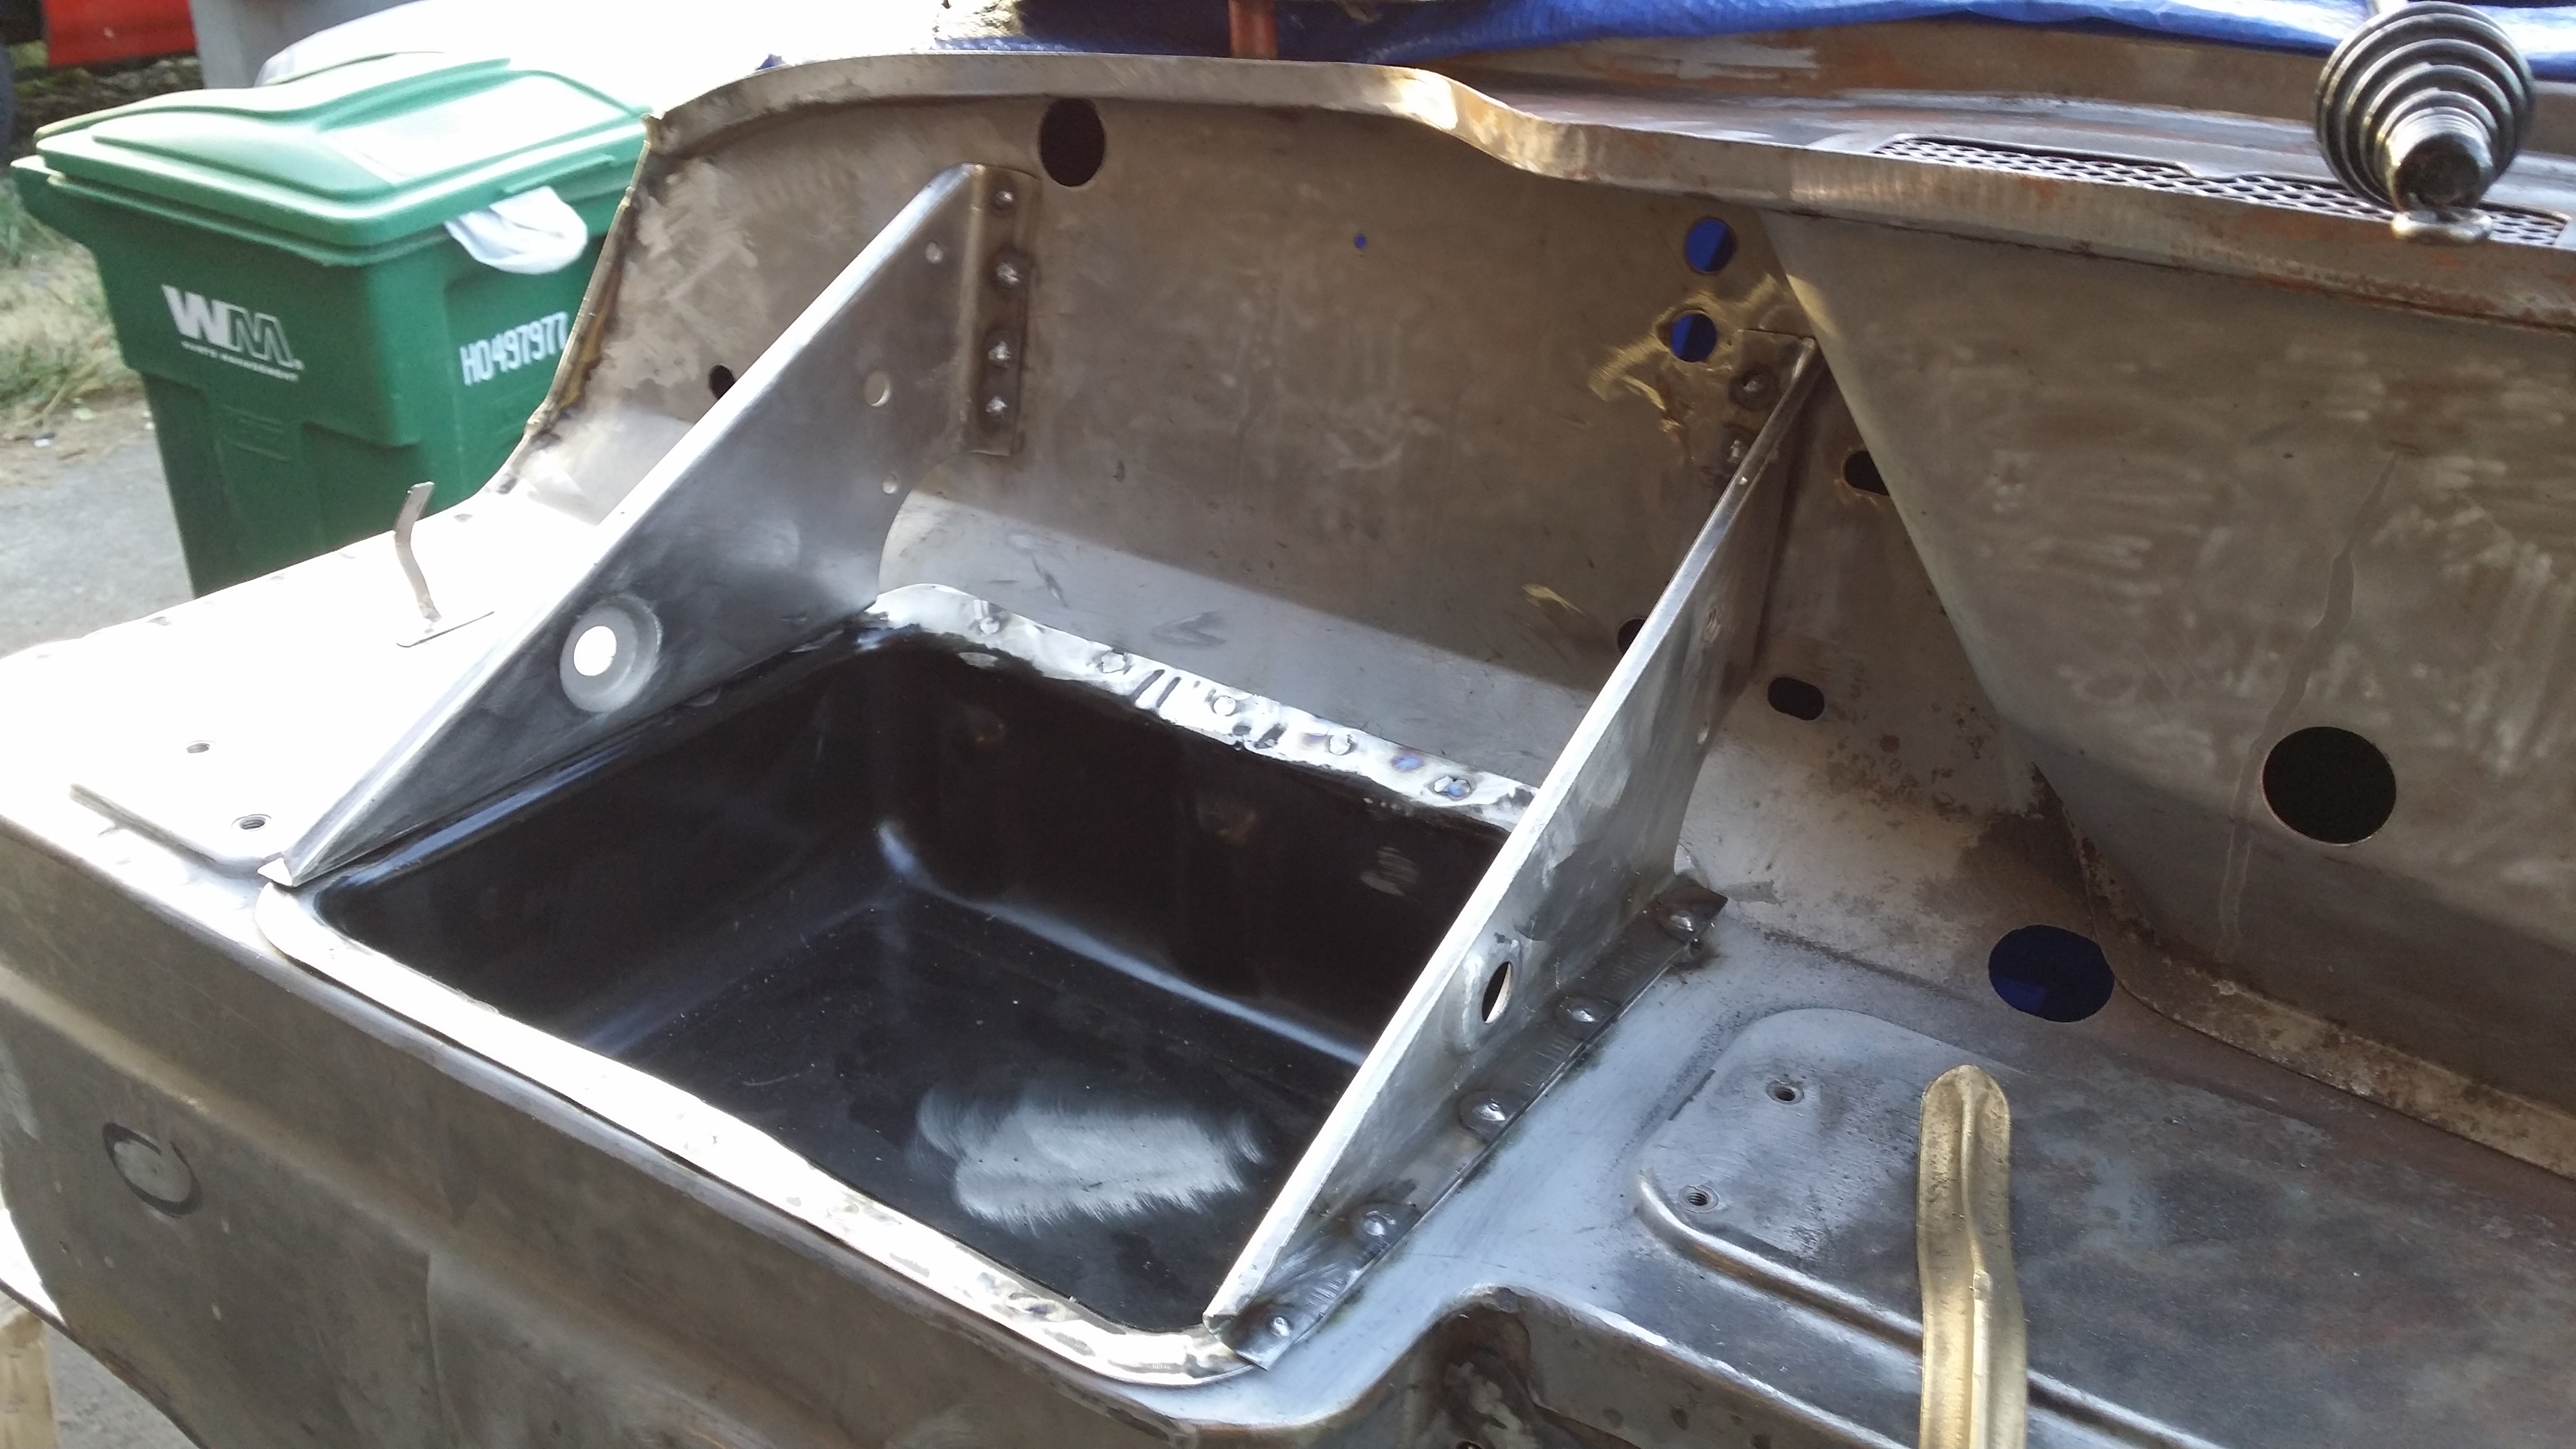 It was surprisingly fast and easy to get the parts welded back on. I was even able to get nice fairly flat slightly rounded weld spots which I don't think I'll touch. I like the look of them. Note the grey around the seams. That's weld through primer to make sure we don't have any bare metal hiding inside the seams. It's all been painted, even the box and flange underneath. 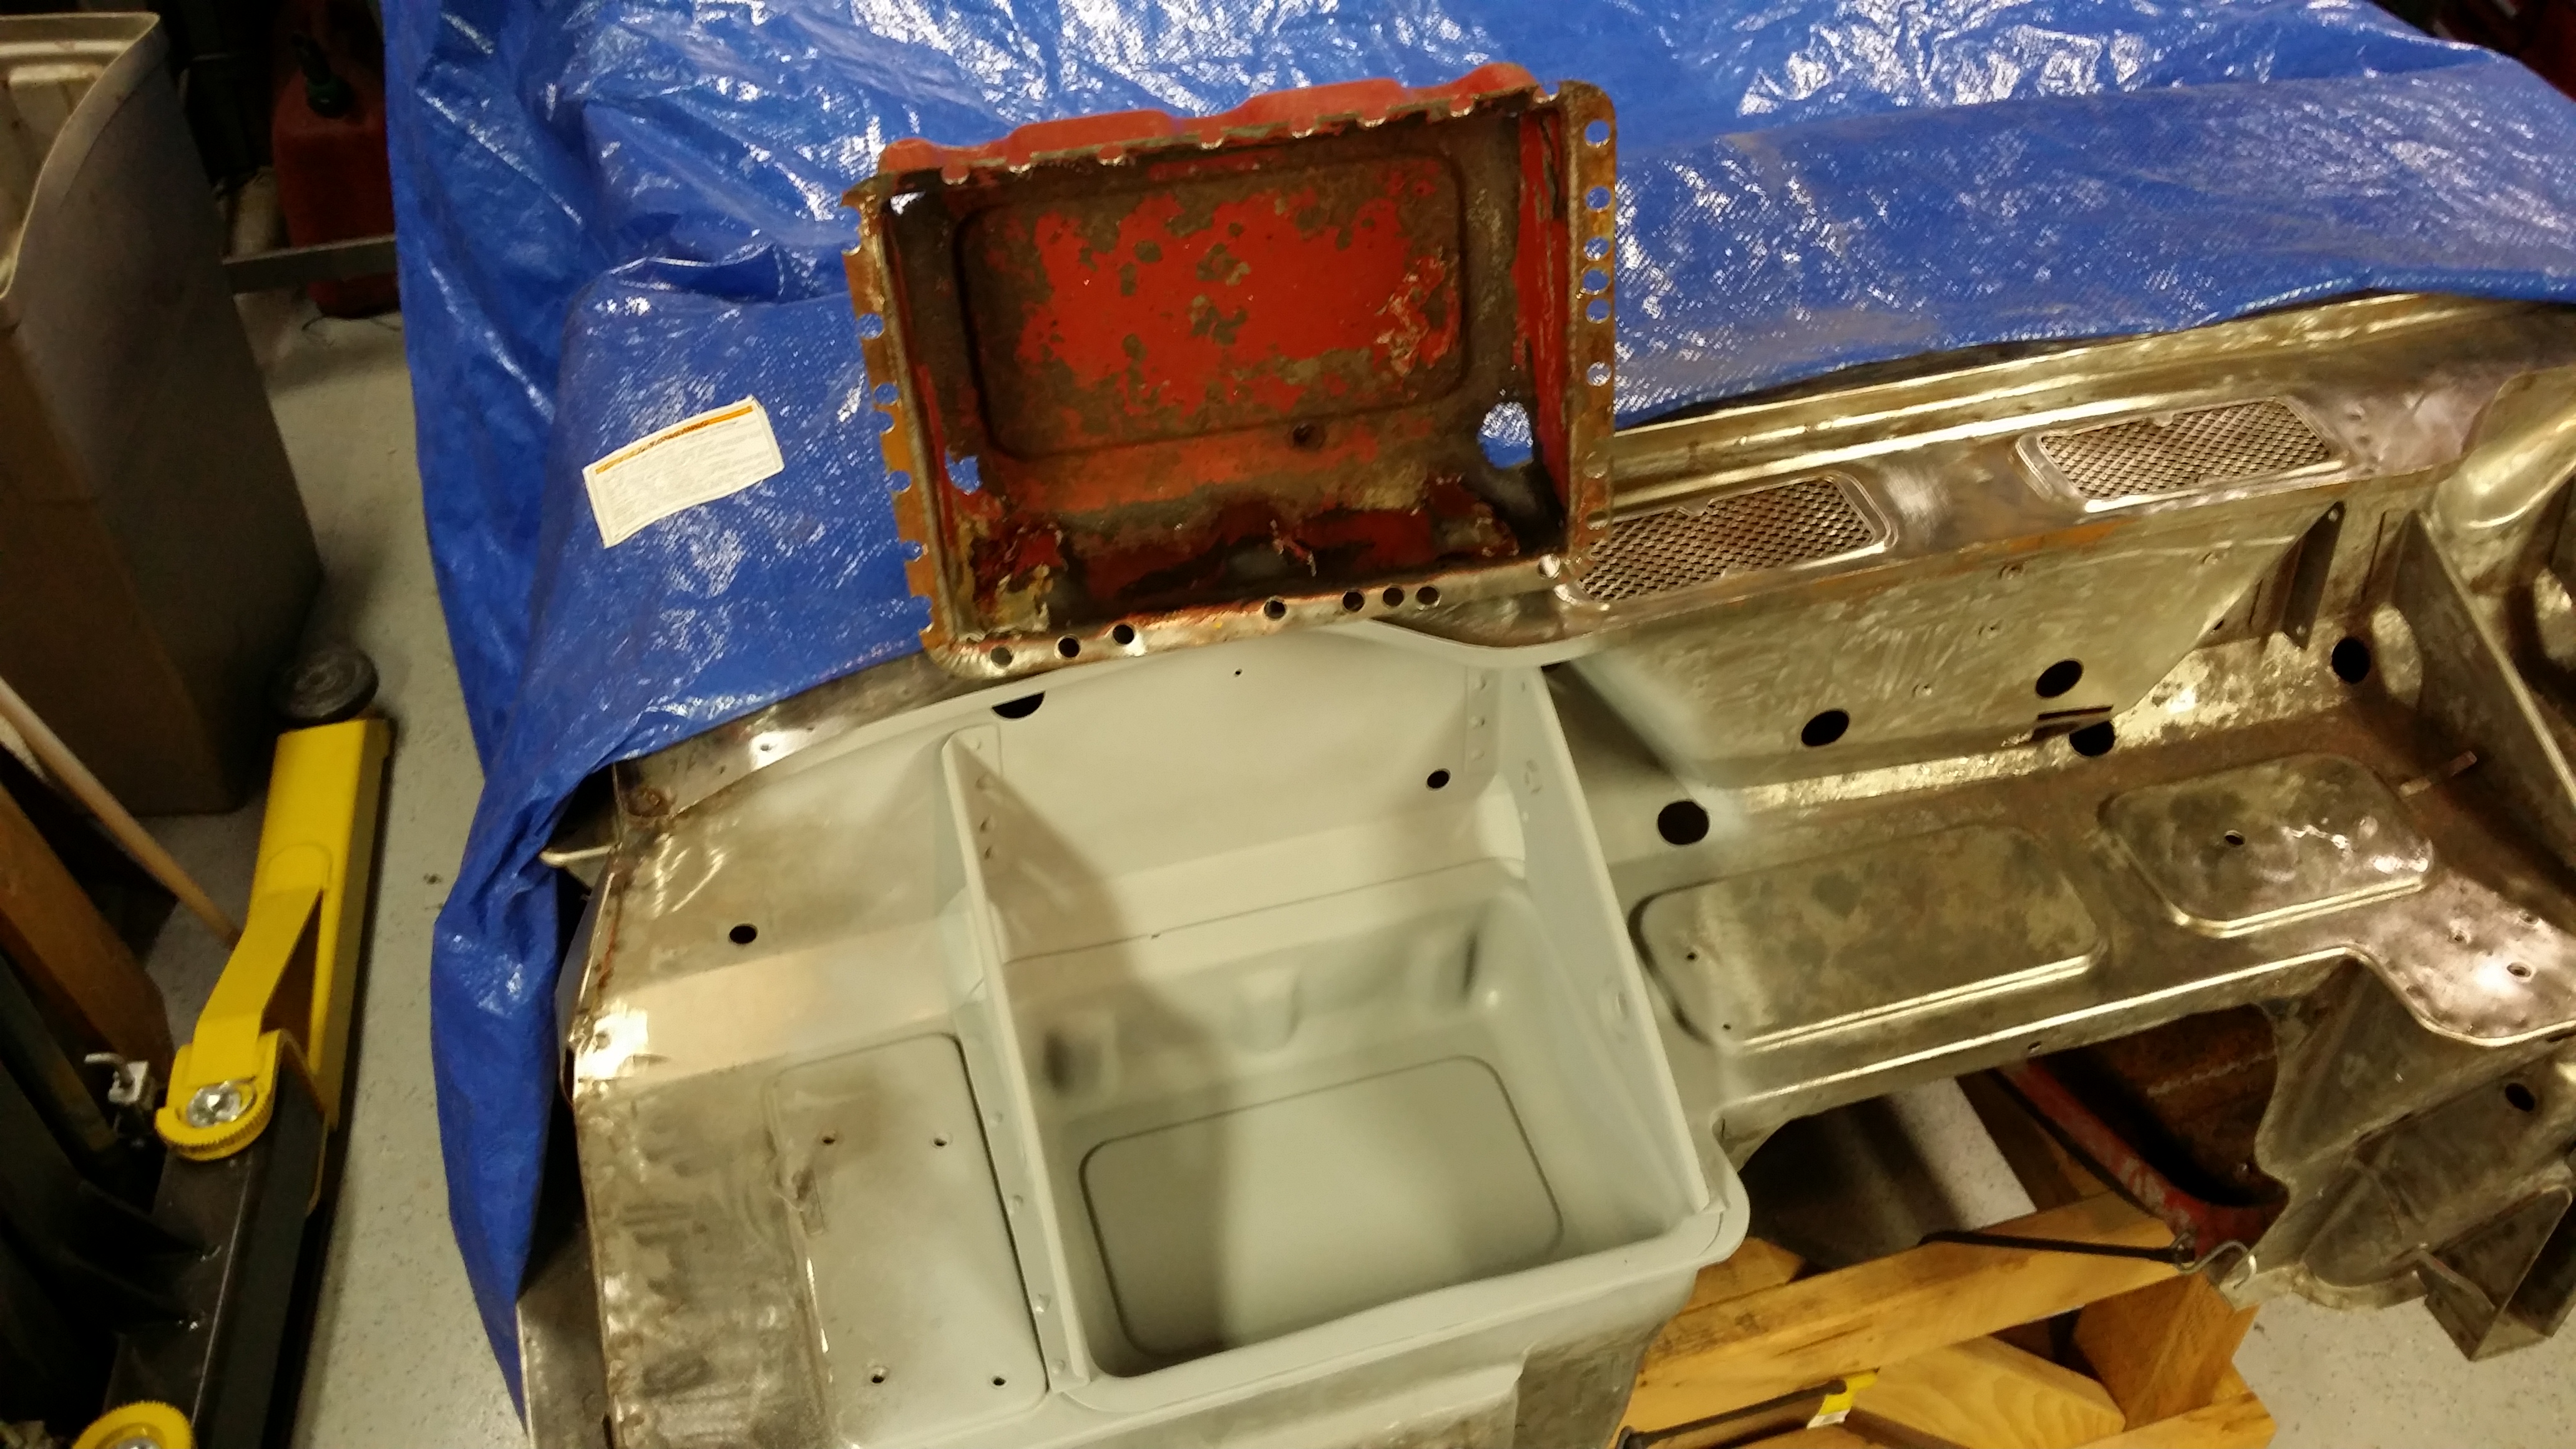 What a difference it makes between the original rusted out battery box with three of the four corner missing and the new clean solid battery box that replaced it! 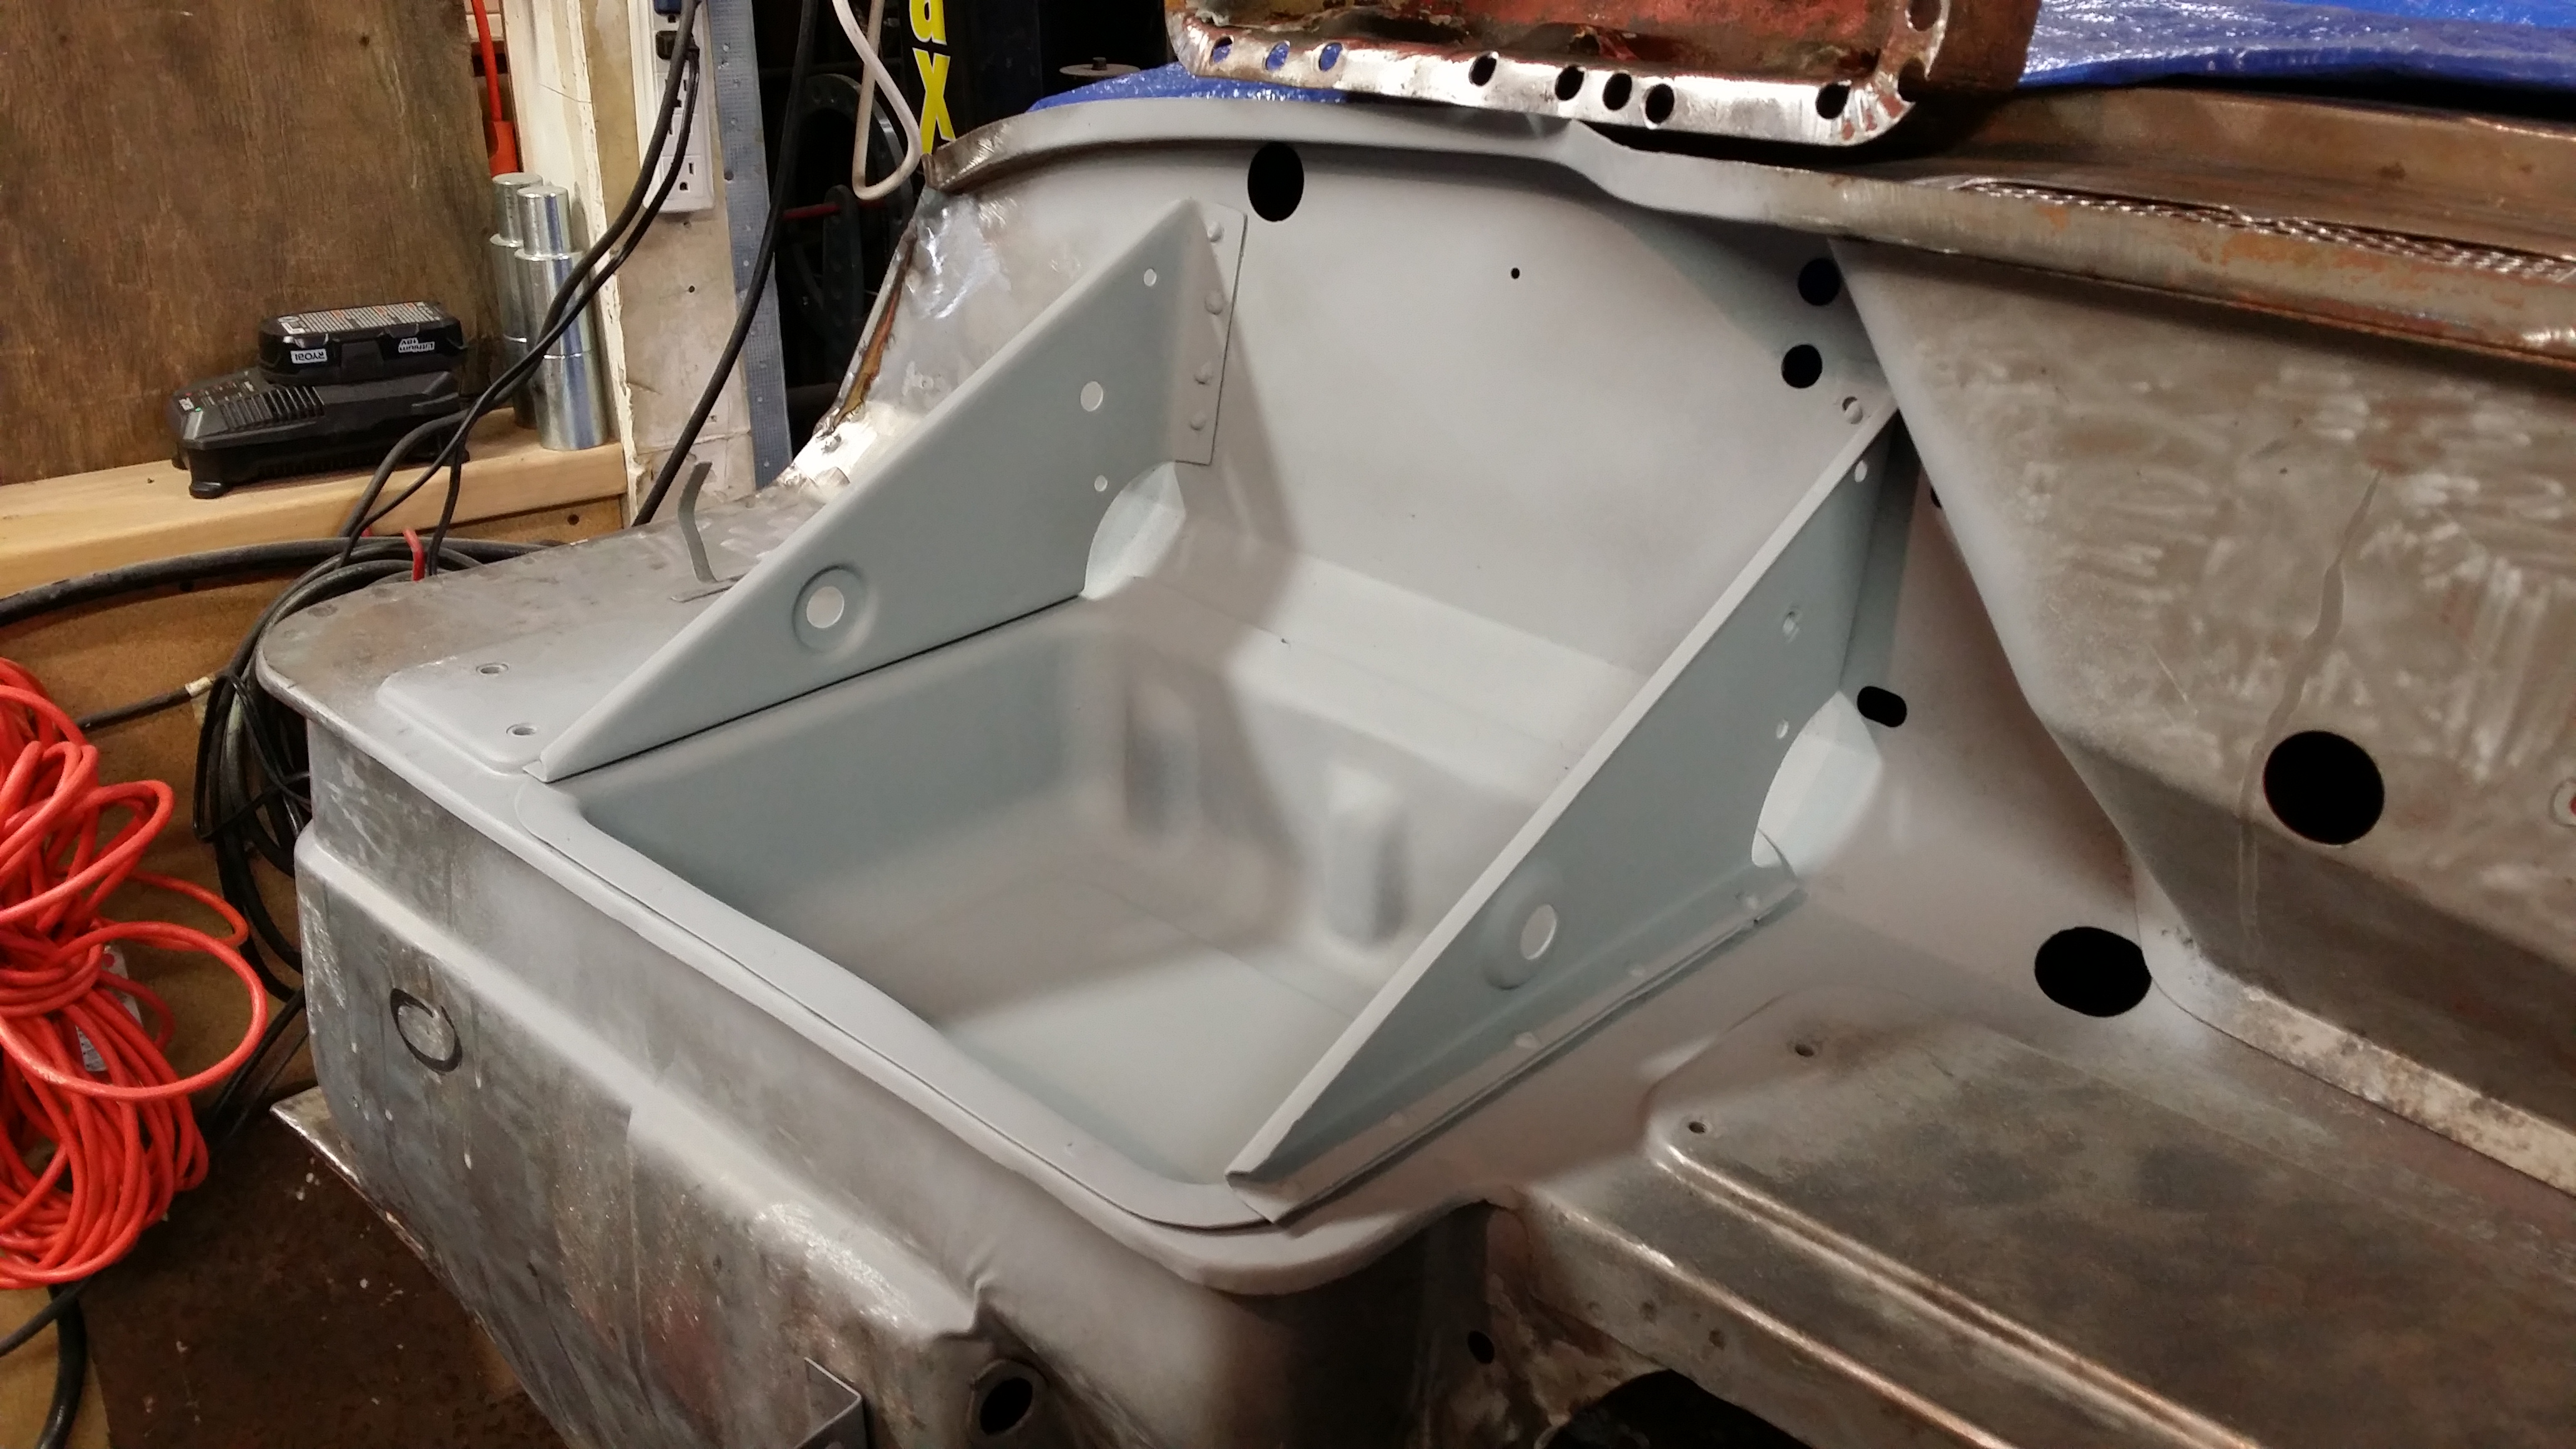 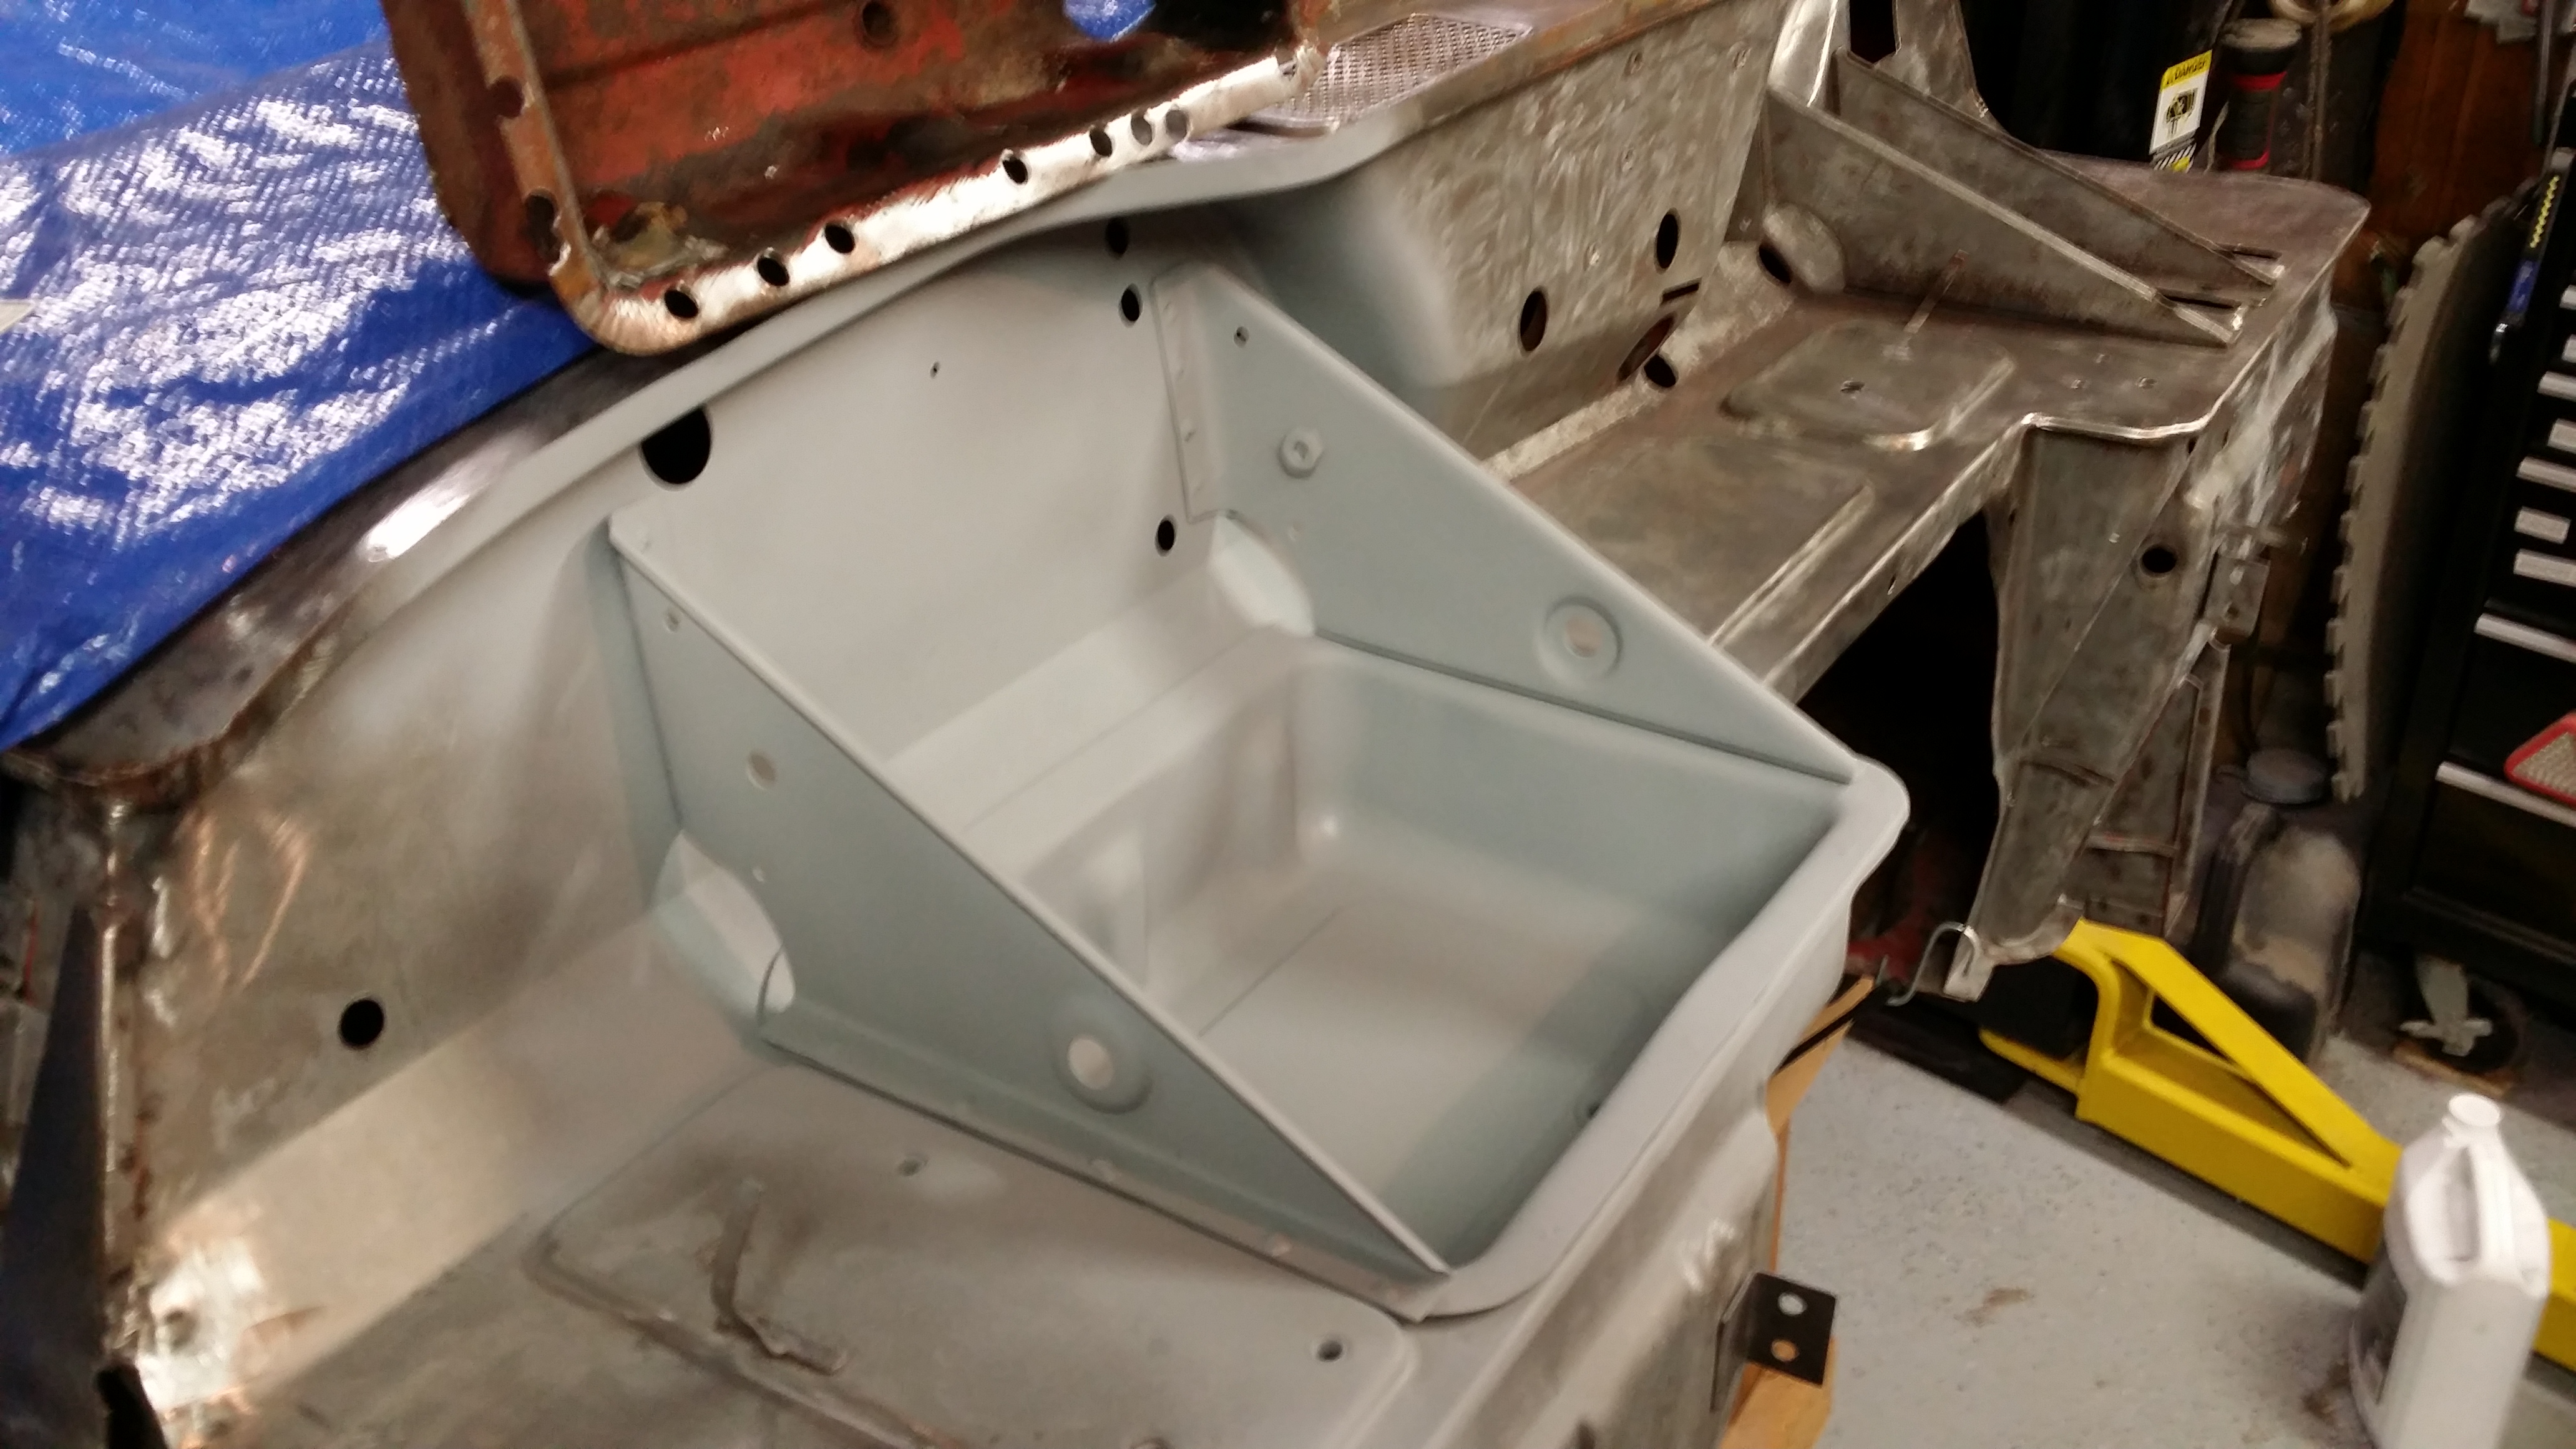 This is a huge turning point in my confidence that this restoration is going to happen. This is the first part to be repaired and put back onto the body tub instead of continual tear down and cleaning. With this, I can get a glimmer of hope of what this car can be like once again. The rest of the firewall is pretty clean and will need priner and some glazing putty for the shelf. There were some metal tears around the transmission tunnel cover mounting flange, but a quick hit with the welder fixed those right up. I look forward to getting some primer on the rest of the firewall to see more progress. BATTERY BOX REPLACEMENT: DONE! 08/23/15: Progress resumes. Security / Volunteer gig is over. I'm now free to work on the Spitfire again and started work on the battery box removal. The battery box is held in place with spot welds and sandwiched between the firewall shelf and two brackets. Using a 3/8" spotweld cutter picked up from Harbor Freight, this task is made a lot easier. 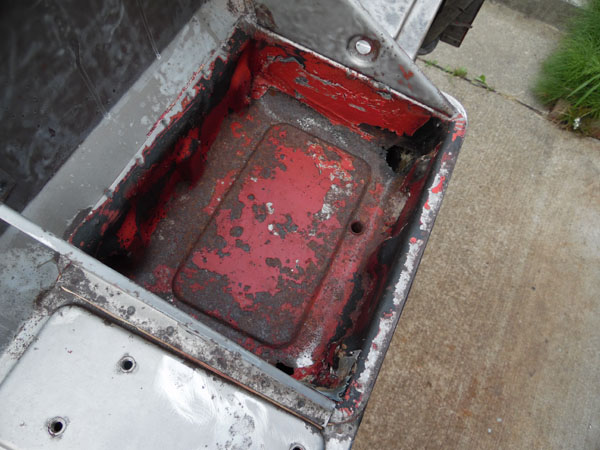 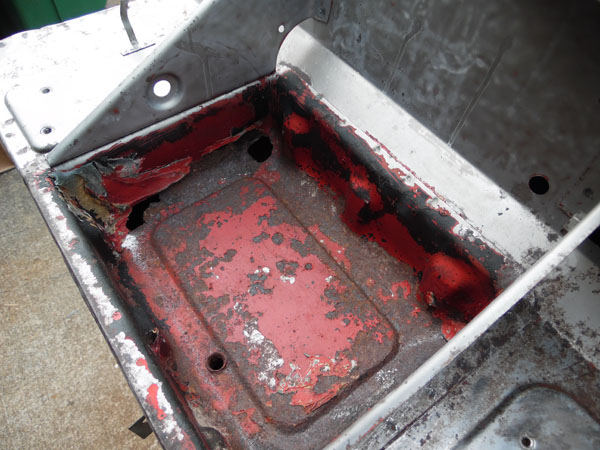 As you can see, it really needs to be replaced. There shoulld only be ONE hole for drainage, not four. Someone had previously tried to repair it with fiberglass which peeled free without any effort, telling me it wasn't a good repair. Thankfully a replacement battery box is only about $60, and if you have a welder, this isn't a horrible project. First you have to mark out where the exisitng spotwelds are. I used a paint marker. 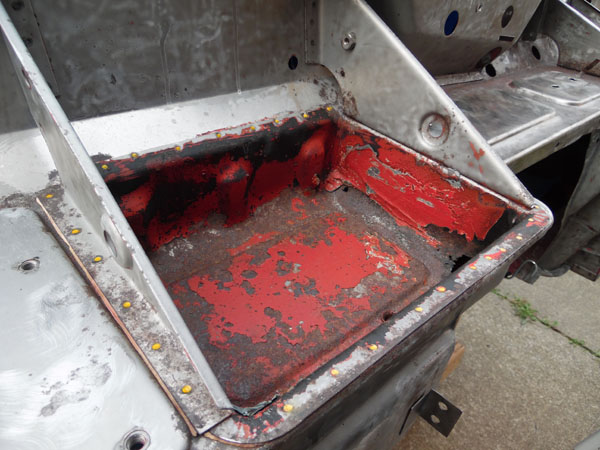 Then I used a center punch and an 1/8" drill bit to drill a small divot in teach weld to help keep the spot welder on center. It has a spring loaded pin that will help keep it in one spot, but it can really want to walk if you don't give it something to fit into. 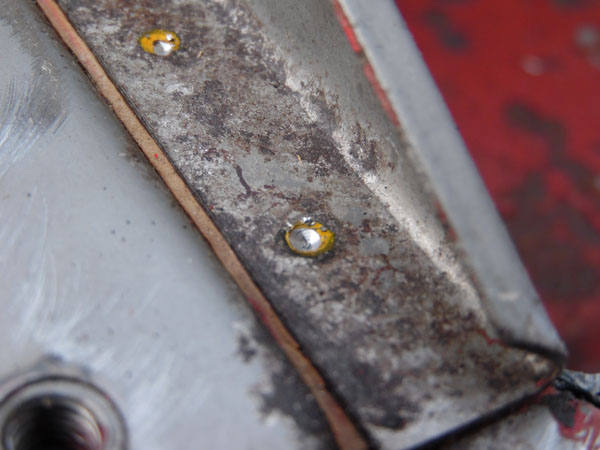 Next up the actual spot weld drill bit itself. It cuts a 3/8" ring around the spotweld. It's essentially a tiny hole saw. 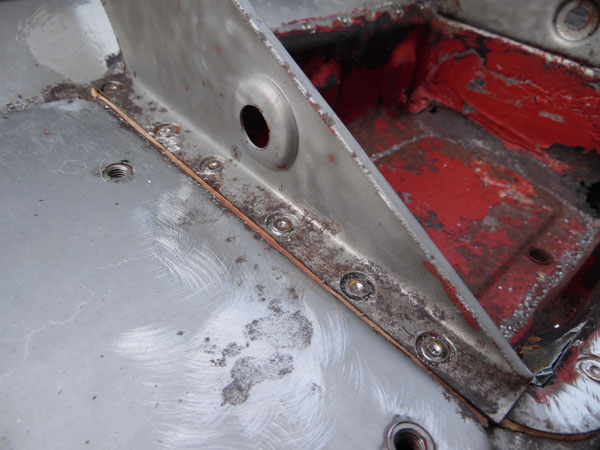 It's easy to overdrill this and go all the way through. When I drilled through the top layer of the bracket, a small puff of rusty dust announced the breach. 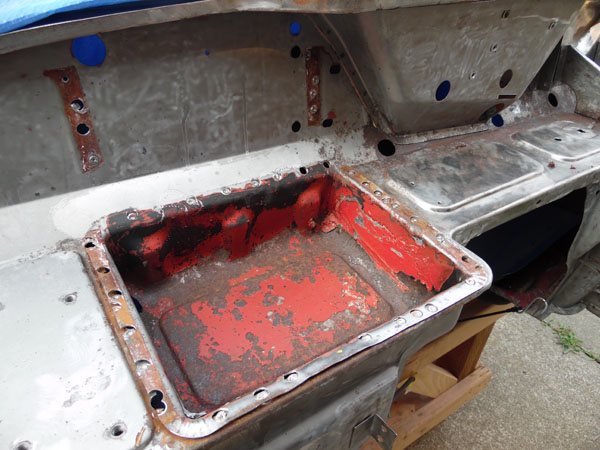 I wasn't originally planning on removing the brackets, thinking I could just bend them out of the way, but decided to do a full job of doing it right, so I removed the brackets. A small chisel set at the seam helped separate the box from the shelf, or identify spot welds I had missed. It was actually quite quick to remove. Maybe 20 minutes got me to this point. 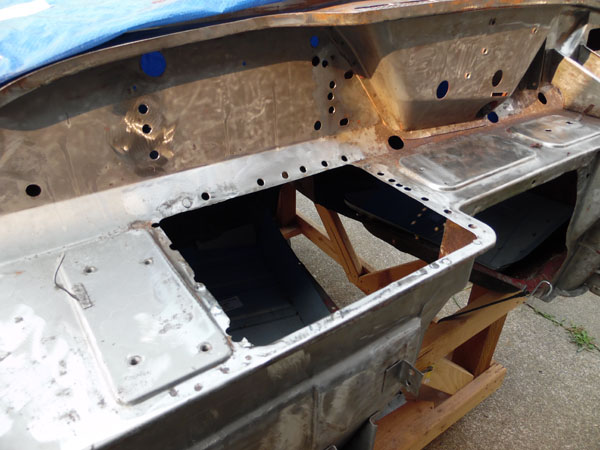 I was grinding down the weld remains and decided I'll just drill them out entirely and weld the holes shut. Not all need to be done as the box flange will cover a lot of them, but I want to do what I can. Cleaned up the flange here which is ready for welding. 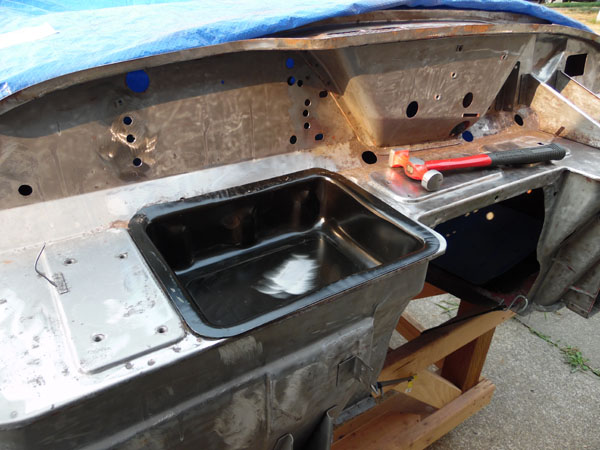 Couldn't resist test fiitting the new box. The rear lip will need to be bent up more to match the shelf angle at the back, but that doesn't appear to be much of an issue. I'll need to drill out some holes in the battery box for new spot welds. As this covers most of the existing holes, I might just fill those that are near the edge. It all is covered by 'massaging the metal'. Welding is in the future! This would be the first part to go BACK on the car, which turns the project from disassembly to repair and reassembly. Truly a turning point. 08/13/15: Stalled Progress. Isn't this how it works for all projects? I got a lot done in a short amount of time, then had to put everything away when other events took priority. For me, it was two comic conventions where I am an artist and dealer. Drawing these silly comics provides the funds to keep the projects like the Sptifre going, so those take precedent. I'm nearly caught up with all that work and by Monday, August 17th, I will be FREE of all my obligations for nearly nine months to which I can work on the Spitfire and other projects. I have been looking forward to this a long time. I got all the sheet metal parts to do the repairs to the body tub. This should prove to be interesting indeed. I'm still debating on replacing the entire rear valance or just part of it. That's a lot of spot welds to remove, but they are accessible so I'm very tempted. 06/24/15: Flattening dings and dents. I have run across several instances of body filler and have been digging them out. In most cases, I was able to reach behind the fender with hammer and dolly and be able to restore the proper contour to the fender. Even in some of the worst places like around the backup and turn signal lamps in the rear valence, I was able to get those areas corrected and back to normal. There is a great book from the 50's called The Key to Metal Bumping and it talks about how the dents form and attacking them in reverse from the outside in. It's a good short read and while very dated (they recommend using those handy asbestos blankets for welding!), the concept is strong and still applies. I was able to use the approach in my repairs and I'm very impressed with how fast it went and the results. 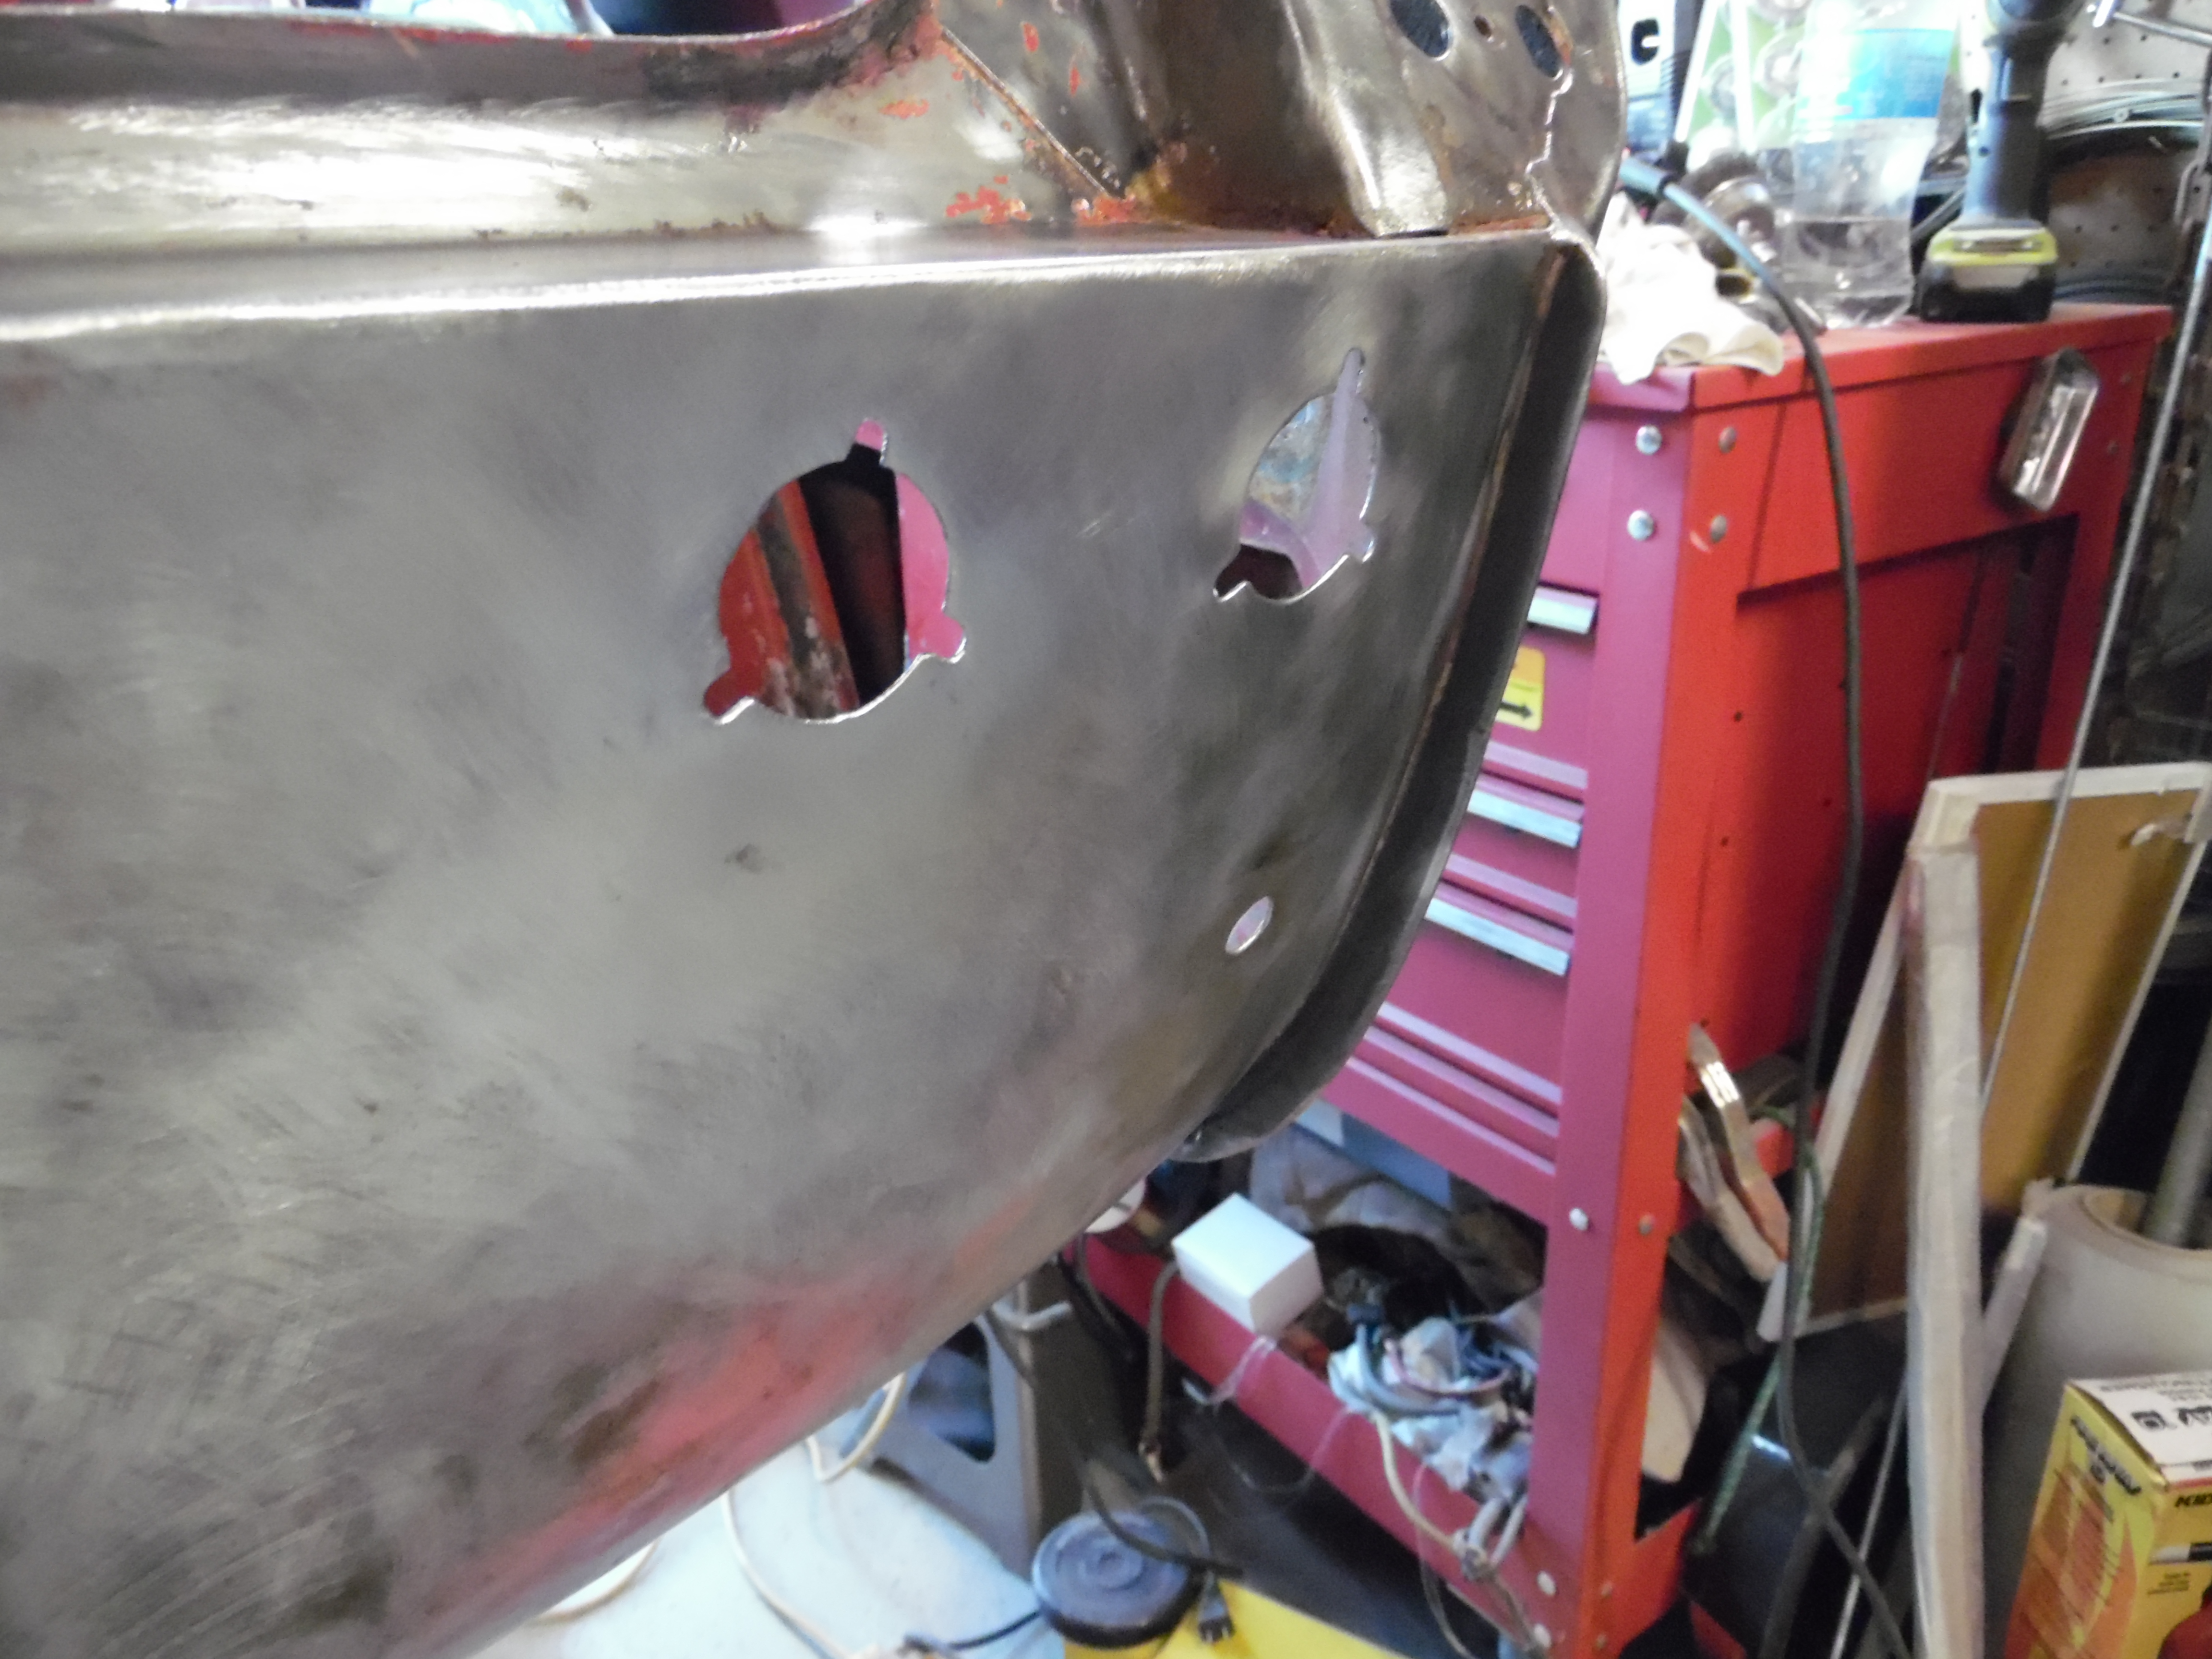 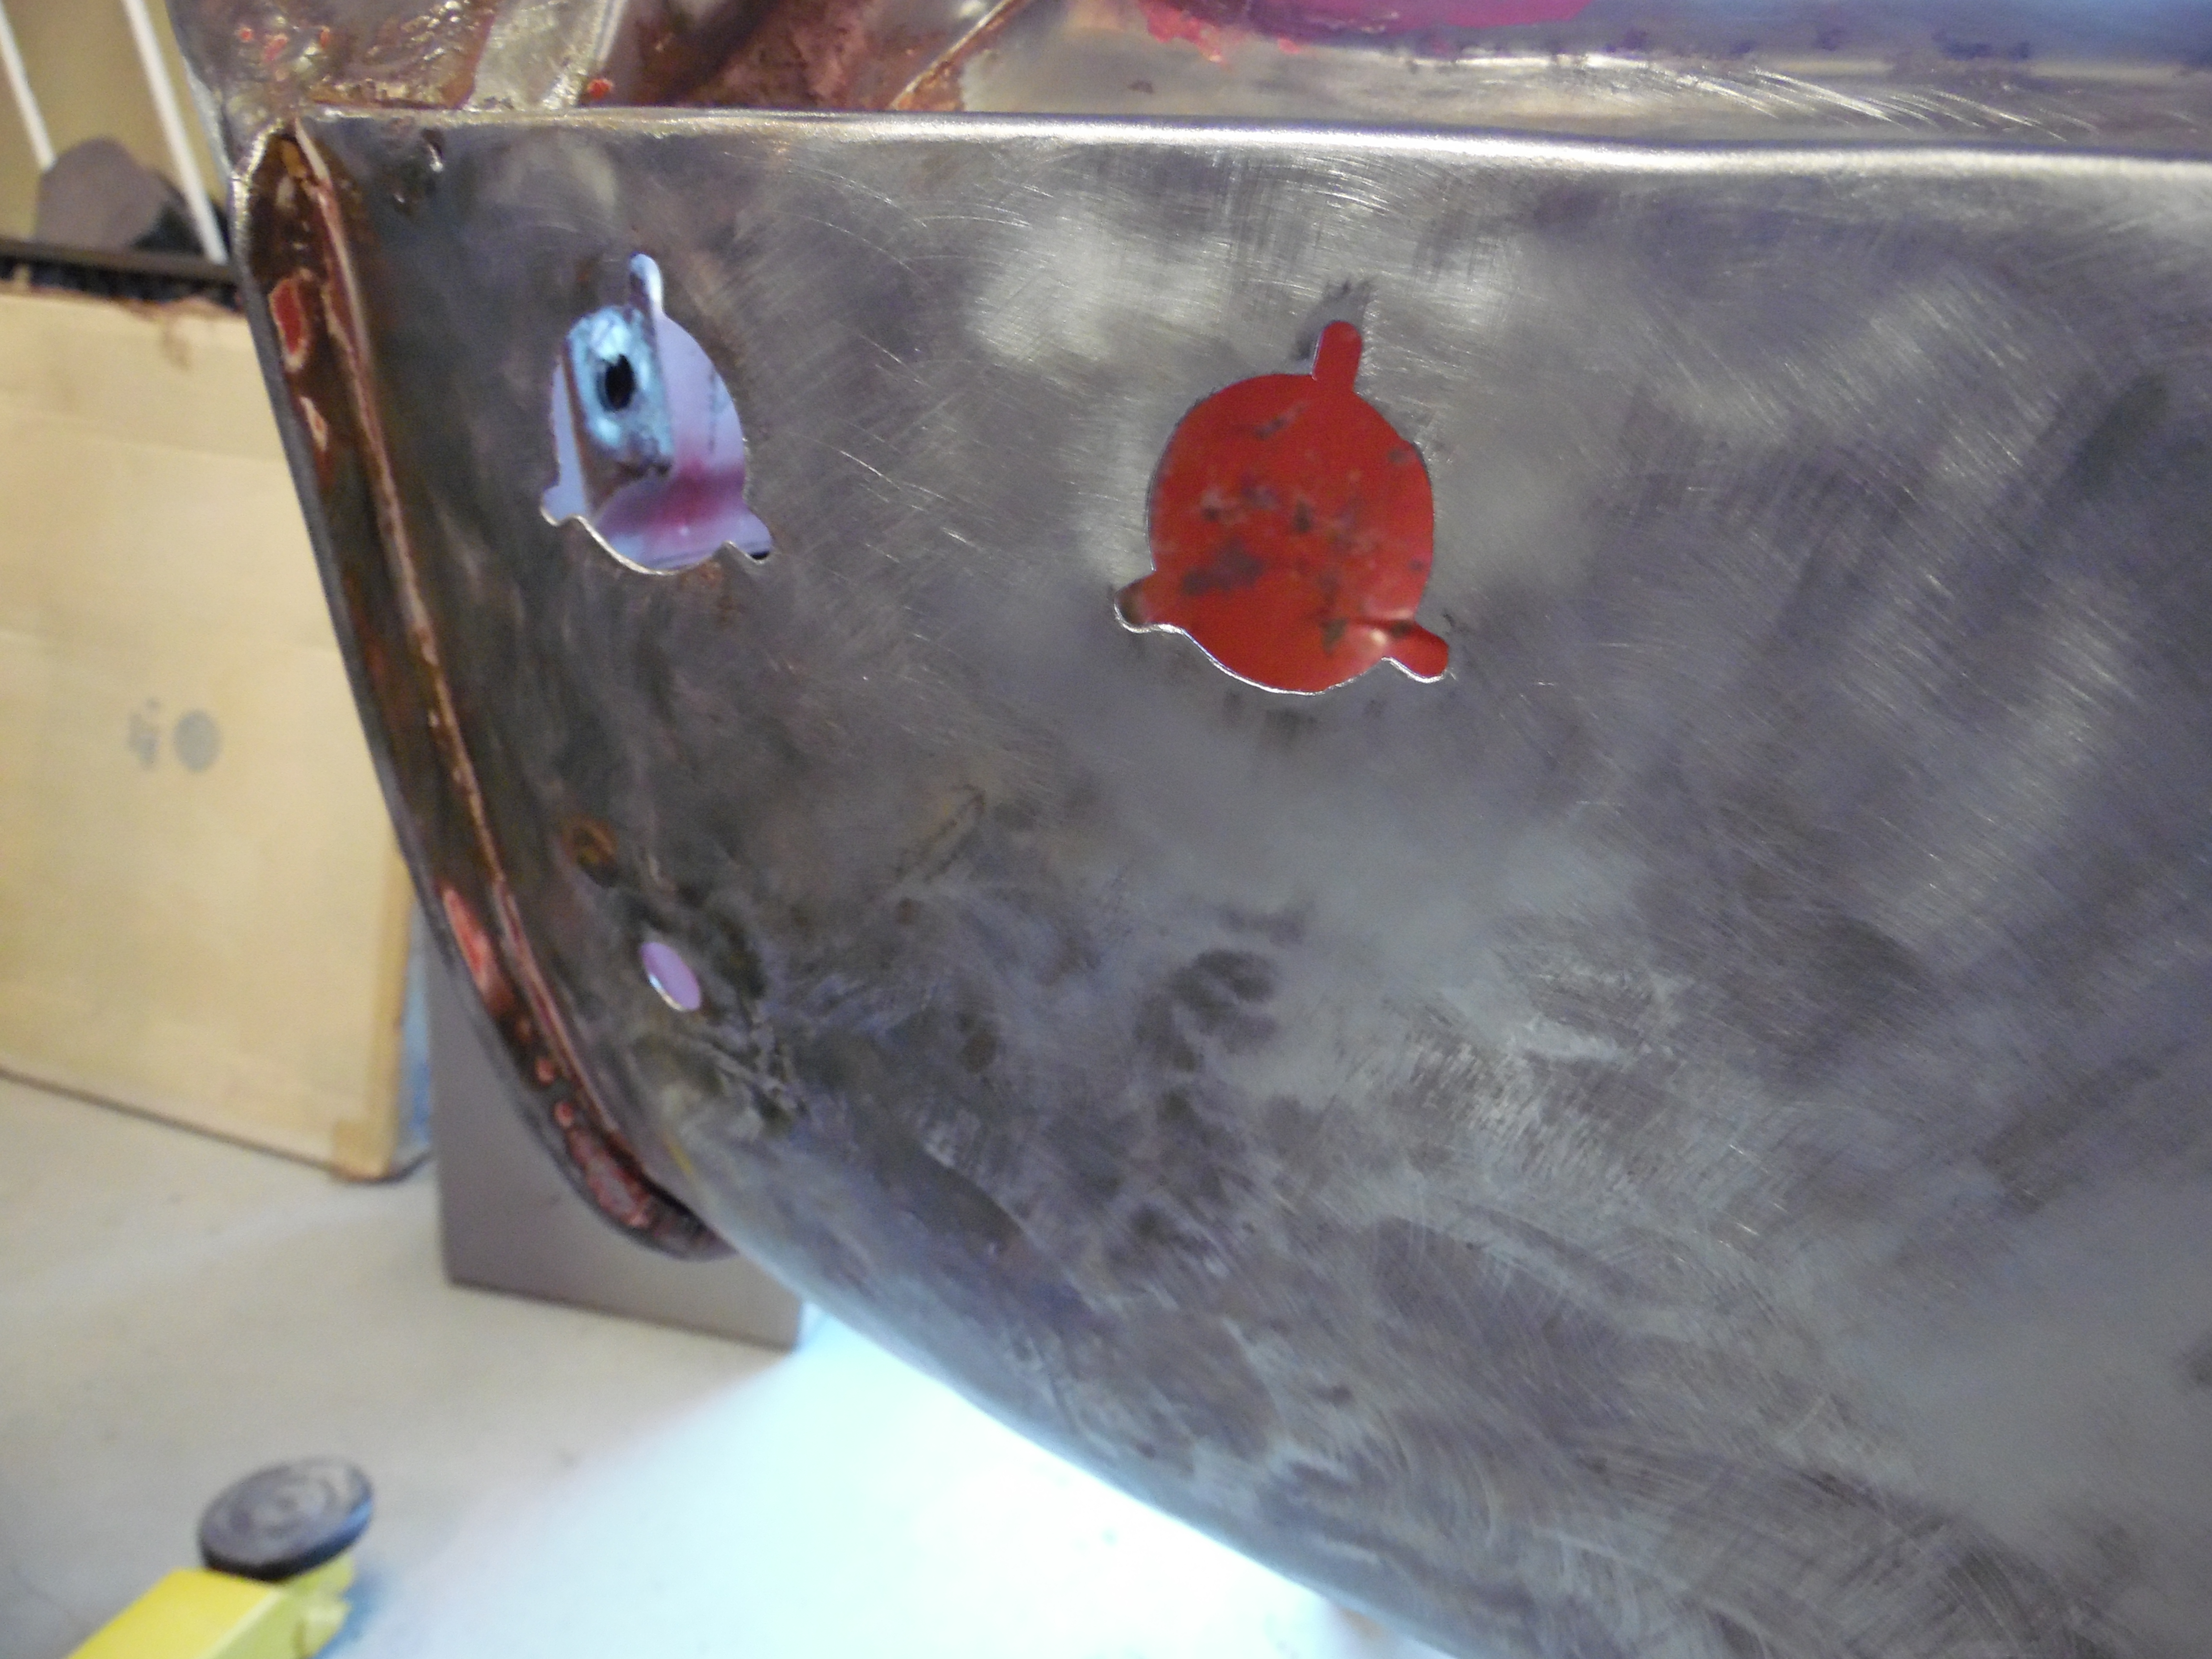 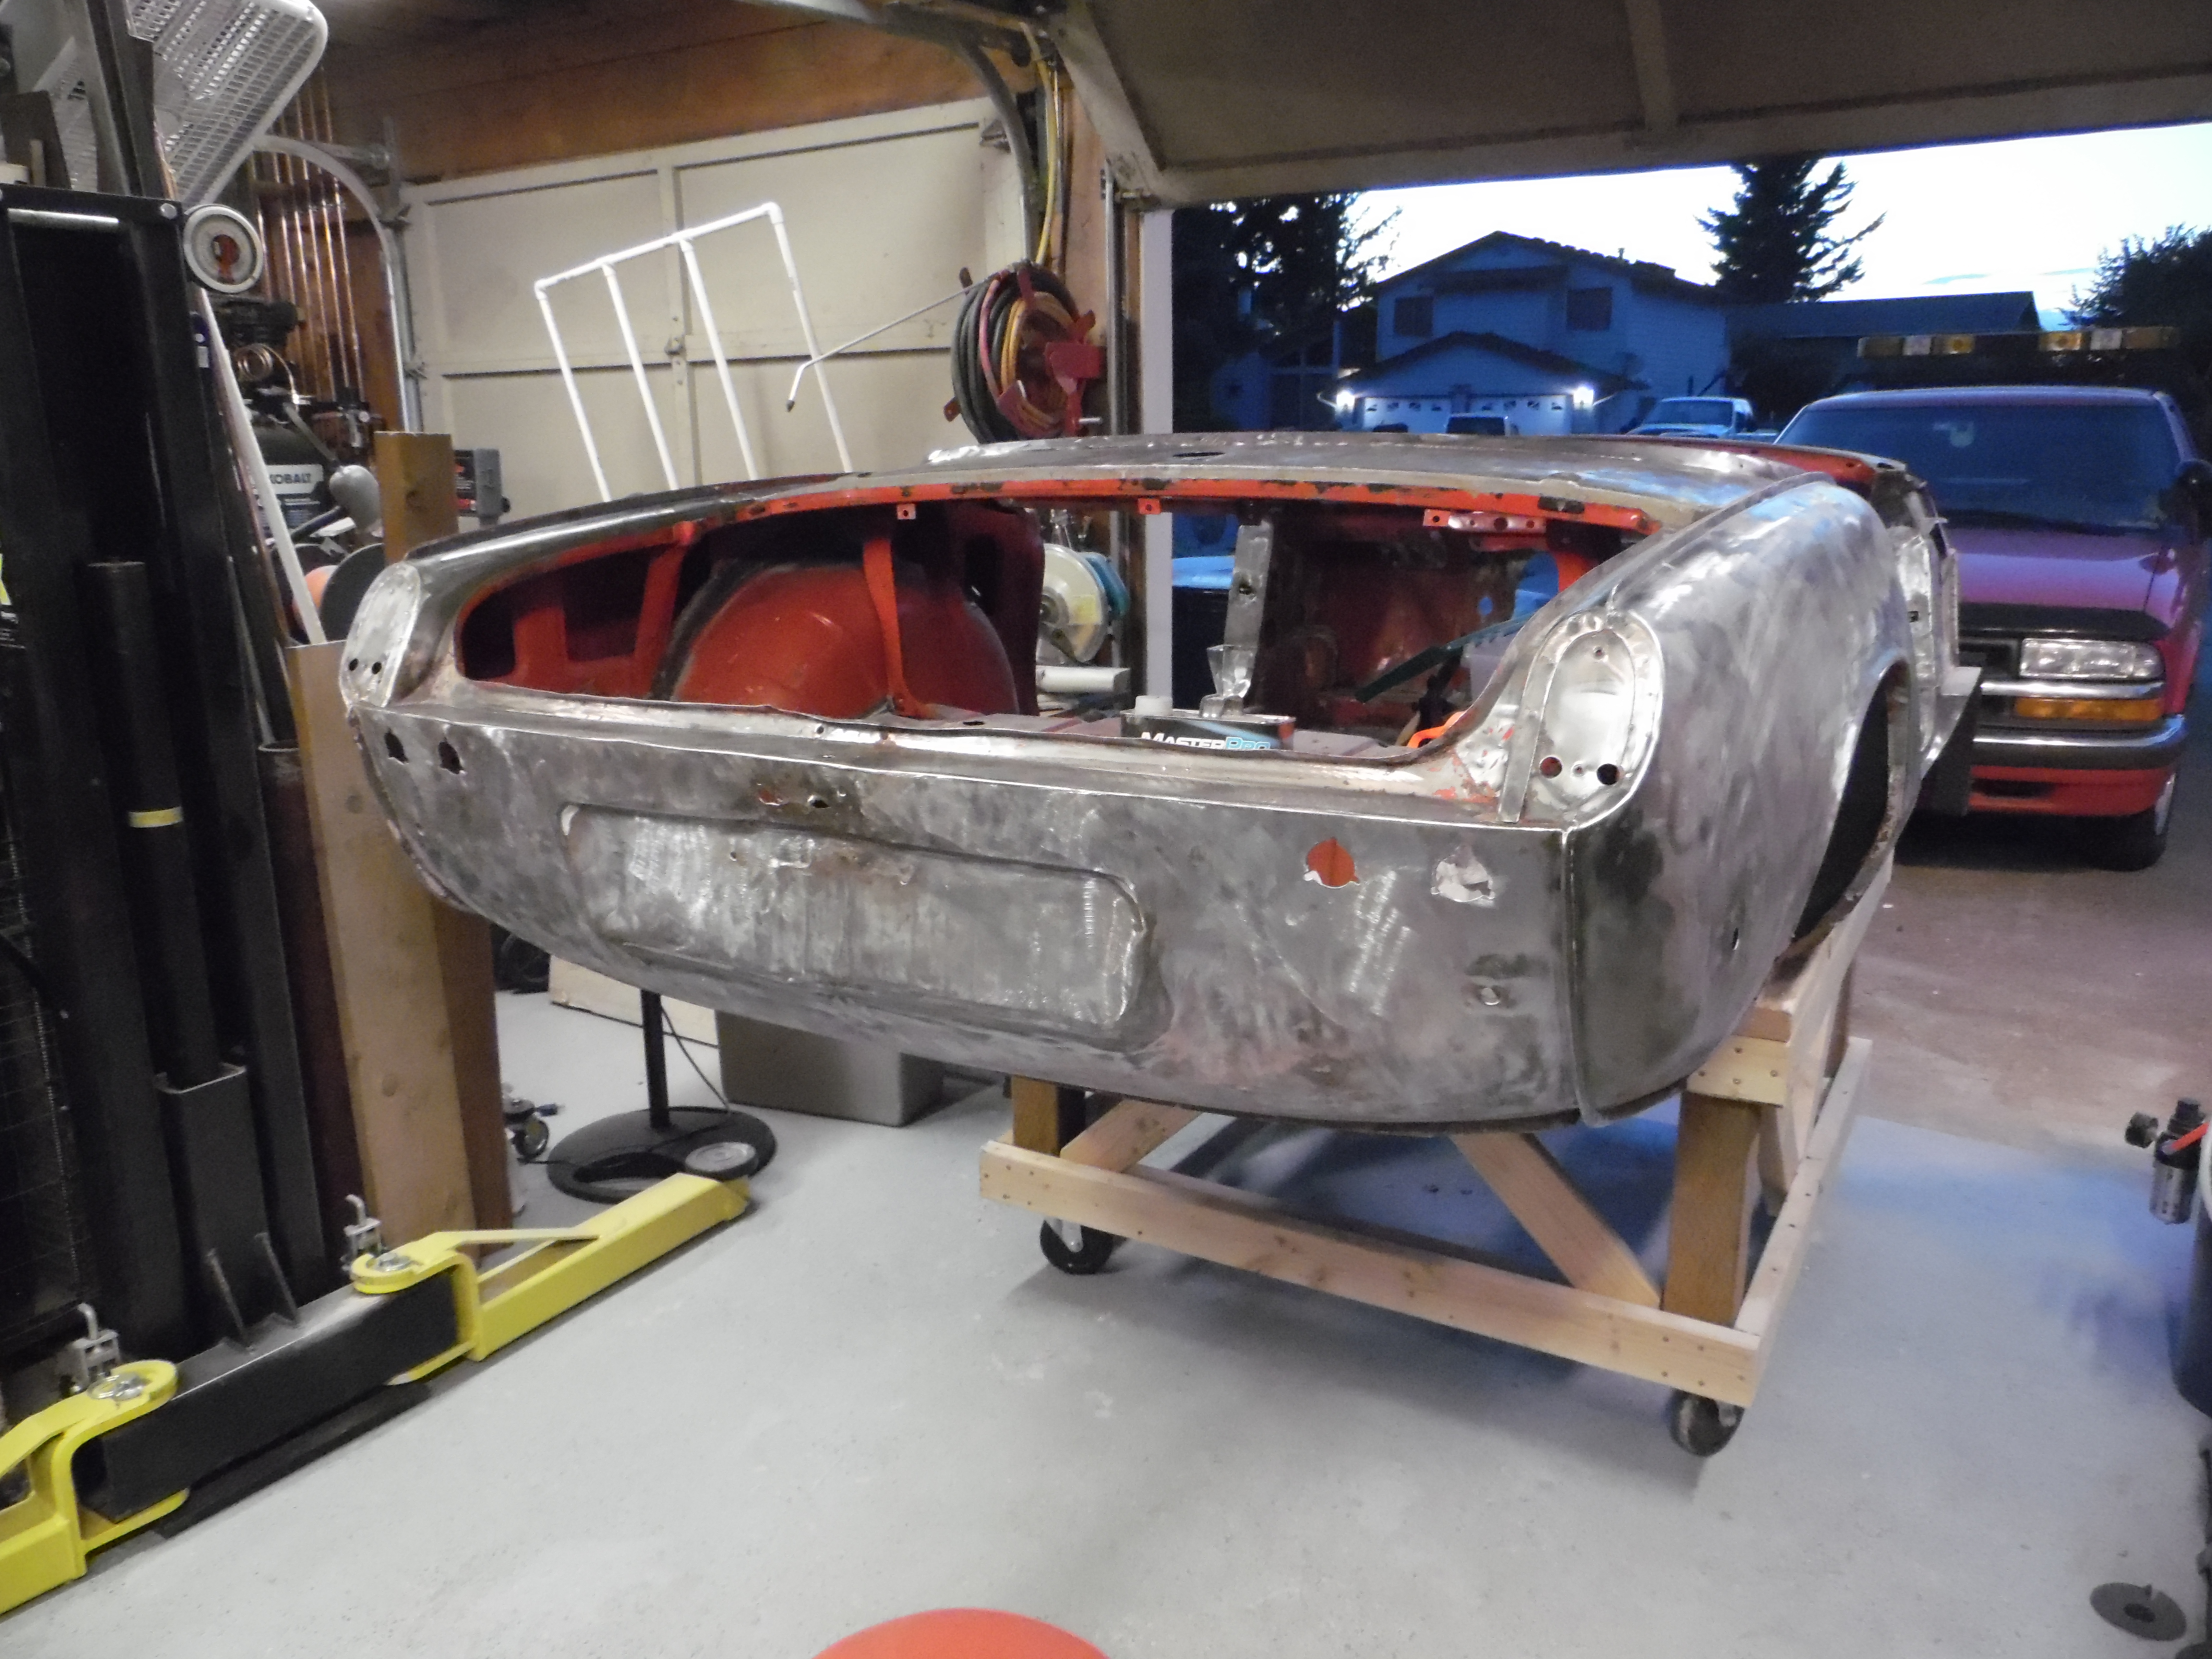 Both of these light areas were pushed in and creased in a couple of directions. The bumper mounts were the high spots with all the metal pulled away from them. I'm pleased that they don't show damage at all now and will only require a light skim coat of filler to feather out the finish. Unfortunately I found more rust in the rocker panel on the right hand side, which I had somewhat expected. I may have to cut a 3" or so size strip nearly the full length to replace. If it is too bad, I'll have to replace the rocker panel and sill. The left hand side seems odd in having no rust at all. 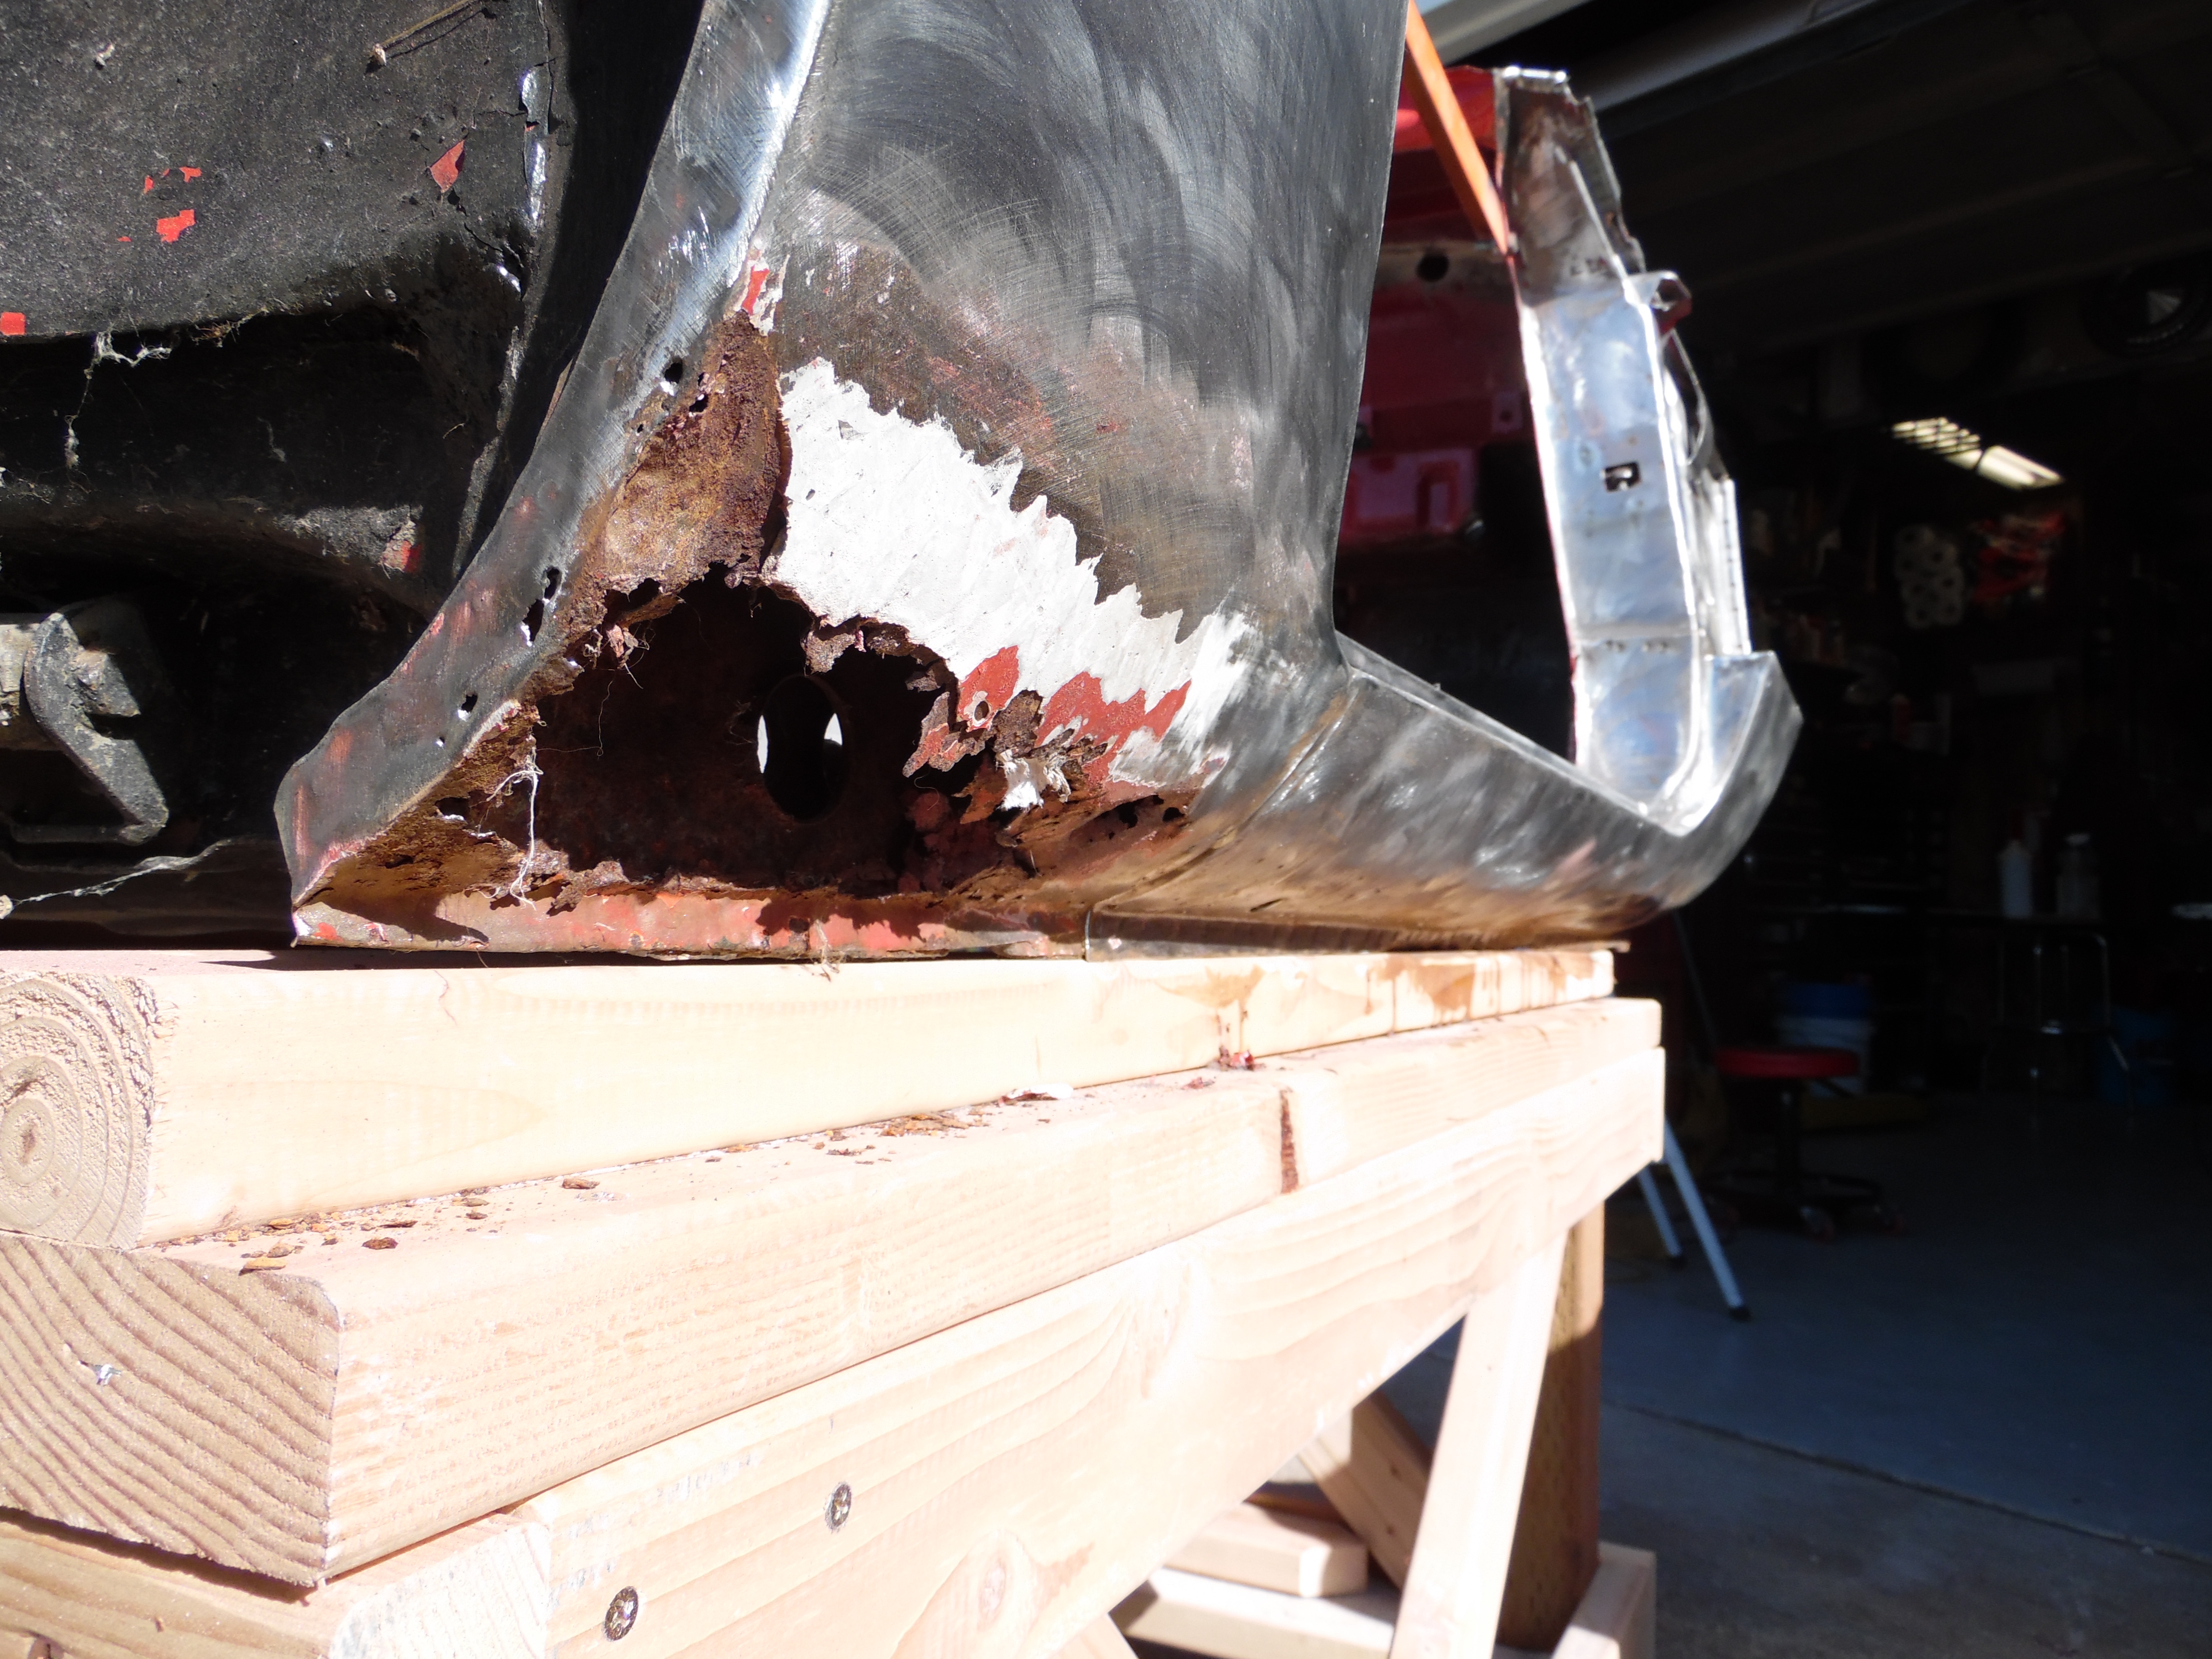 I have this patch panel so this doesn't bother me as much.Inner fender is in good shape. Rear boot area around the latch was messed up badly, bent in and the reinforcing bracket inside twisted badly as someone had done a lot of prying to get things in shape but failed. The license plate light mount had hid a lot of the damage, but it's out in the open now. I drilled the spot welds out of the bracket and flattened it to the proper shape, and worked the area with hammer and dolly around the rear valance and license plate mount. That's all good now, but it does have rust and damage, so I'll have to cut out and replace some of that. I'm thinking I might buy a replacement panel ($250) and use that for the bottom part that is rusted out, and this area around the latch. Good access and easy repair. 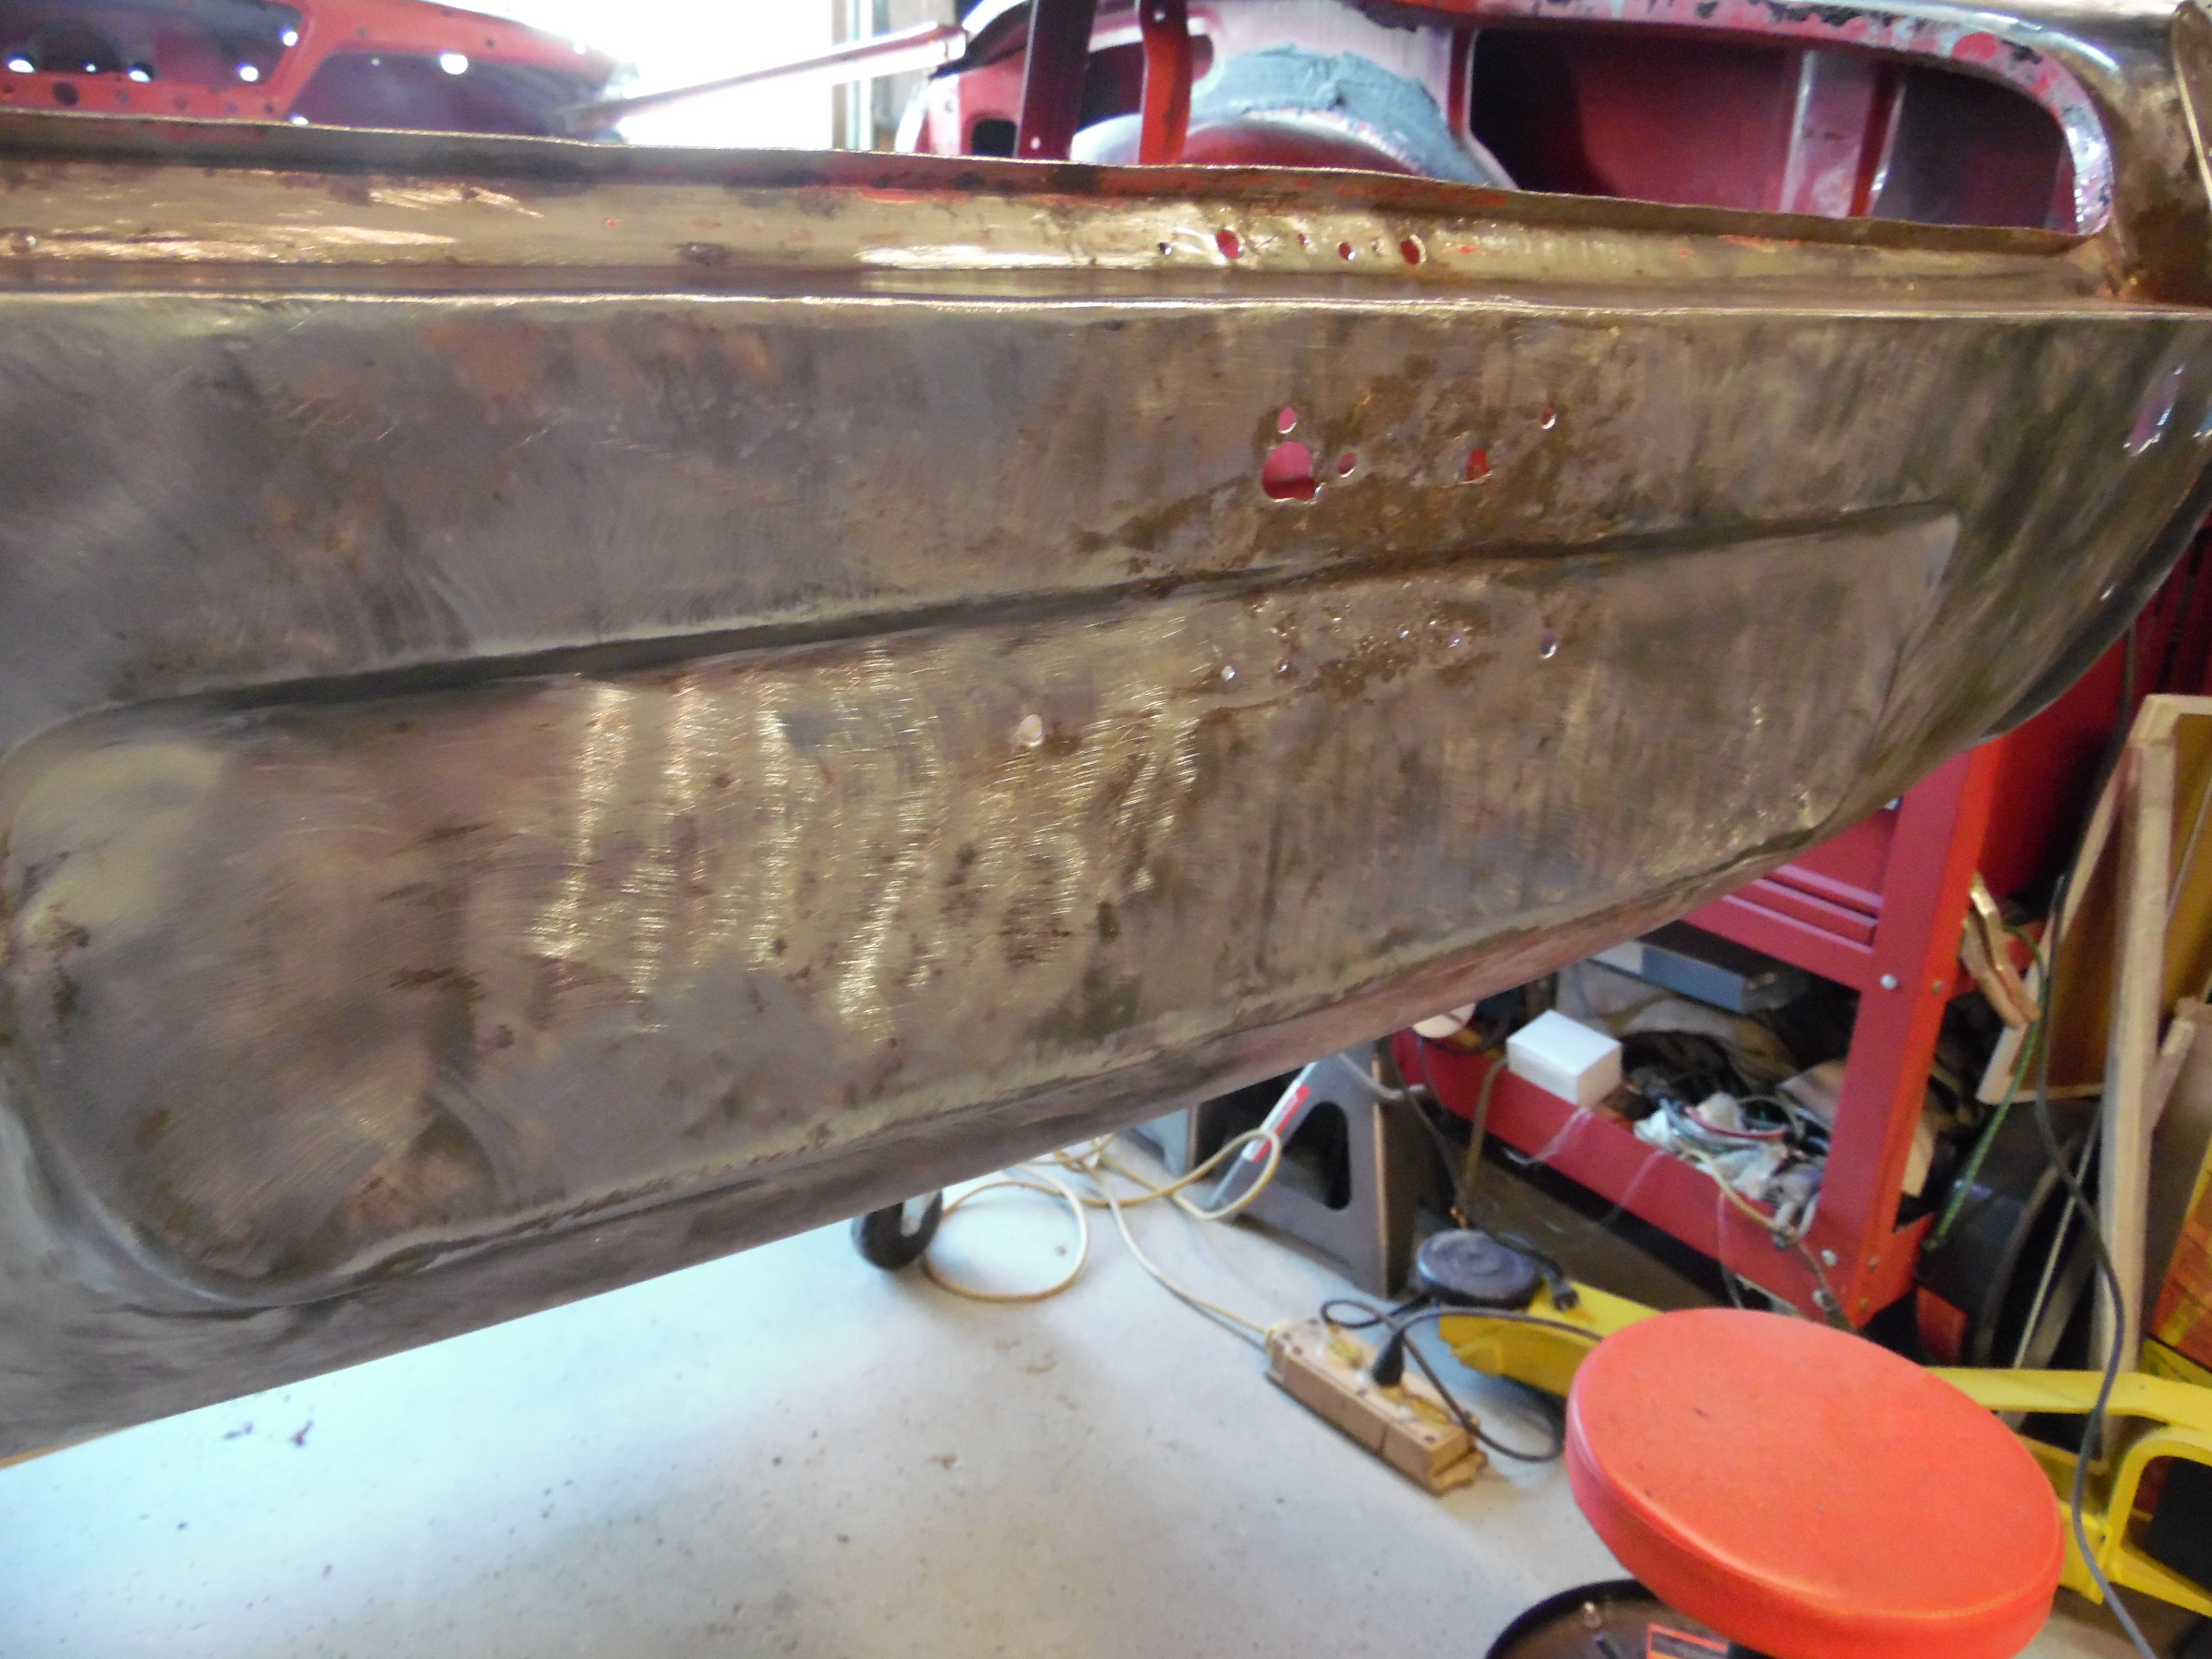 06/21/15: Bye Bye Bondo Spent a good four hours with the chemical stripper and wire wheel in a right angle grinder to remove all the remaining paint from the body tub and cowl. Made excellent progress, but also discovered that while the rear valance can be repaired of all the collision damage that someone decided to fix with body filler instead of proper hammer and dolly work, there is just too much rust at the bottom and I'm considering the time versus price of replacement panel. The replacement panel is $250. This metal working is going to take a good 20+ hours. This makes it no longer worth my time and I think I want to go with a replacement panel, even though that might be an adventure with removing all those spot welds. 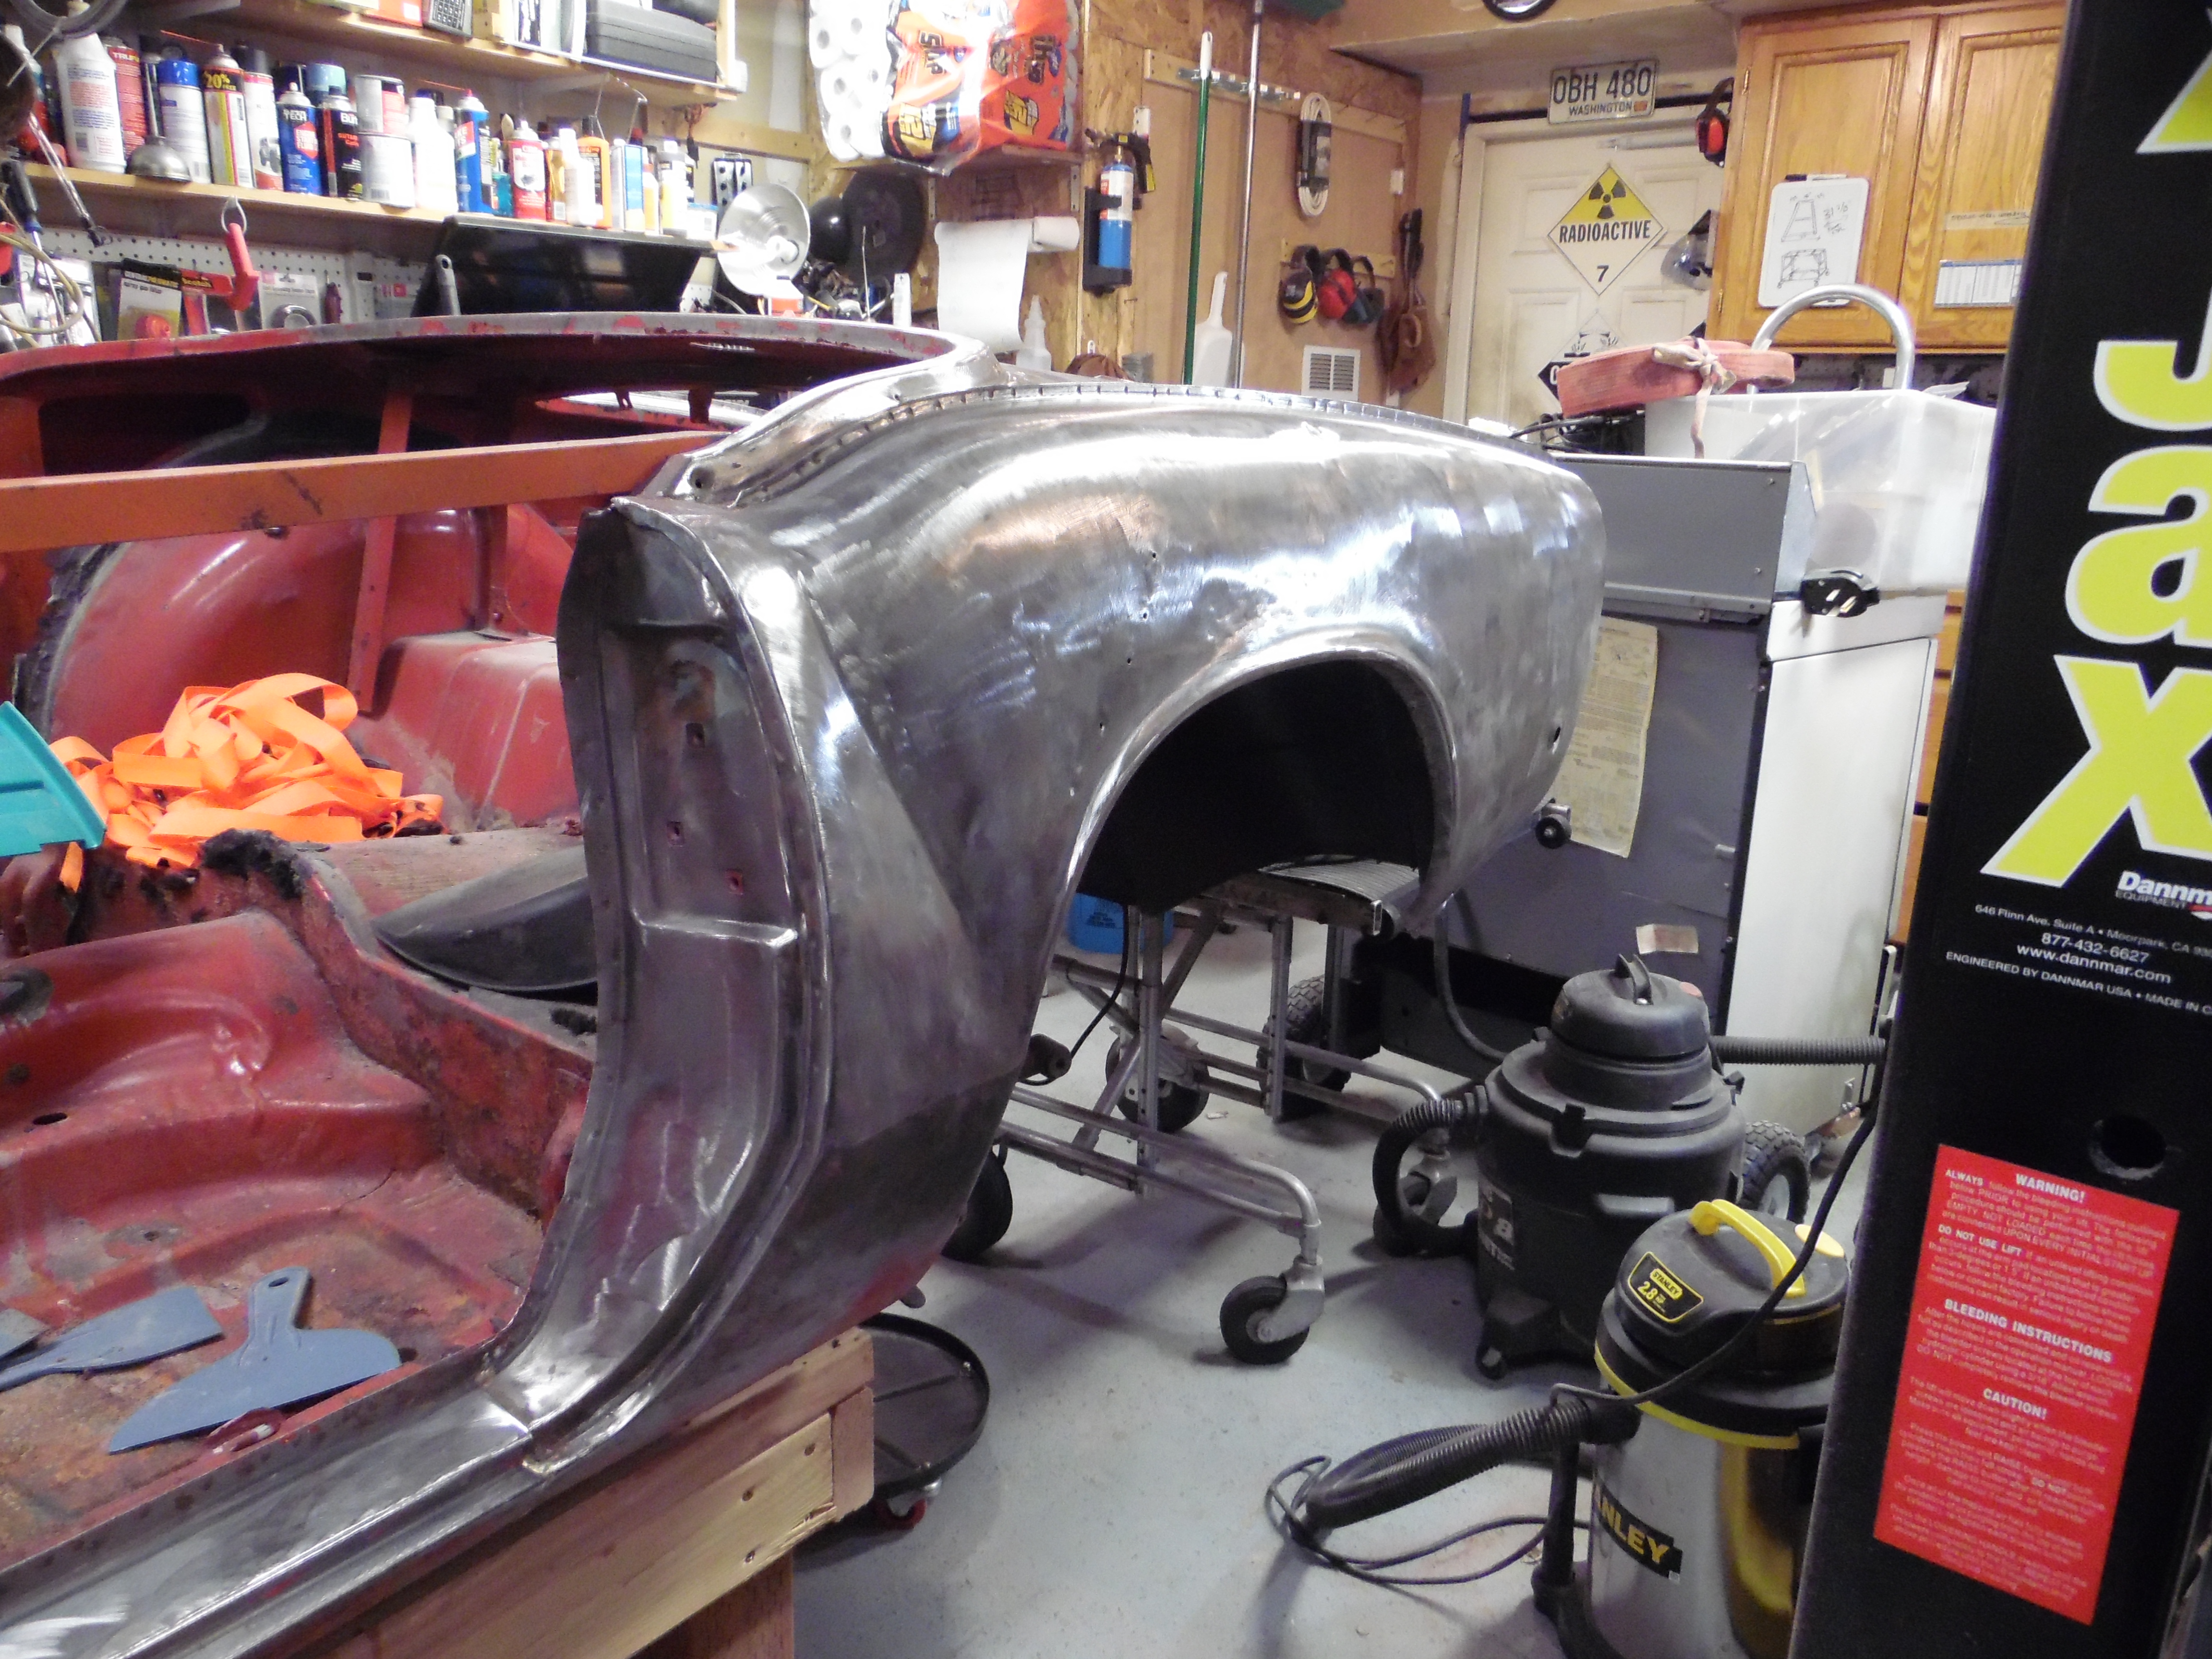 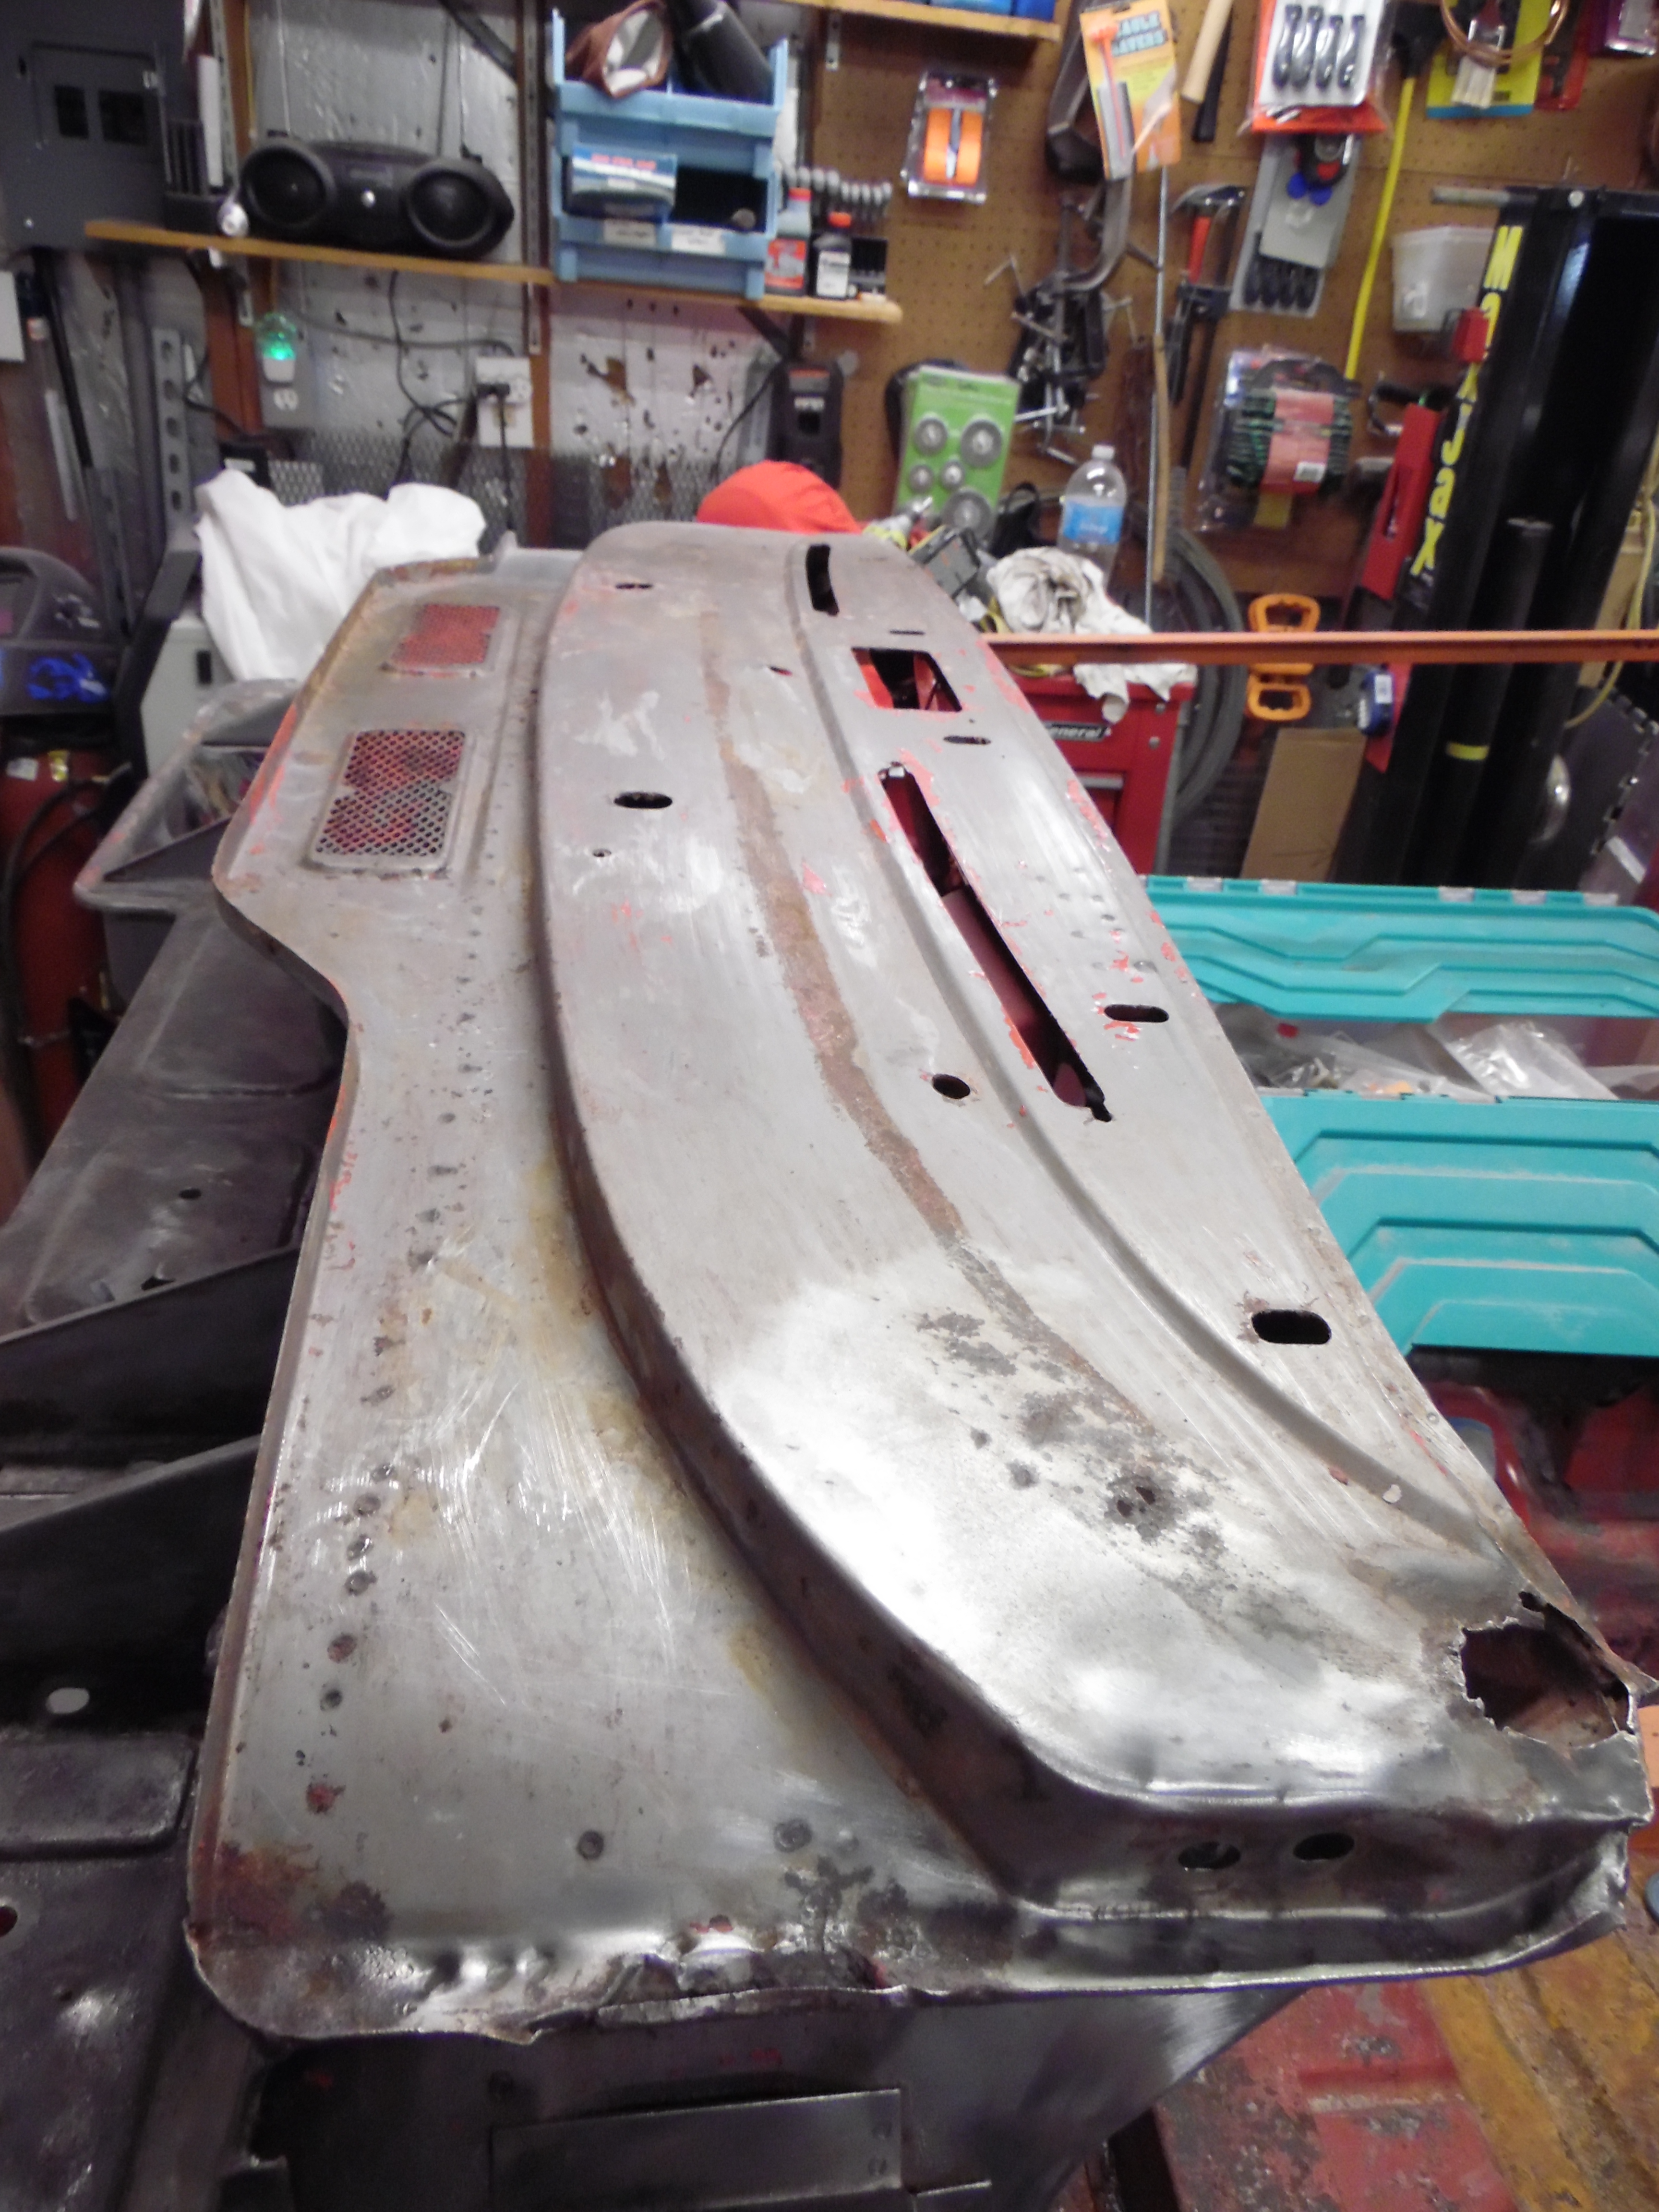 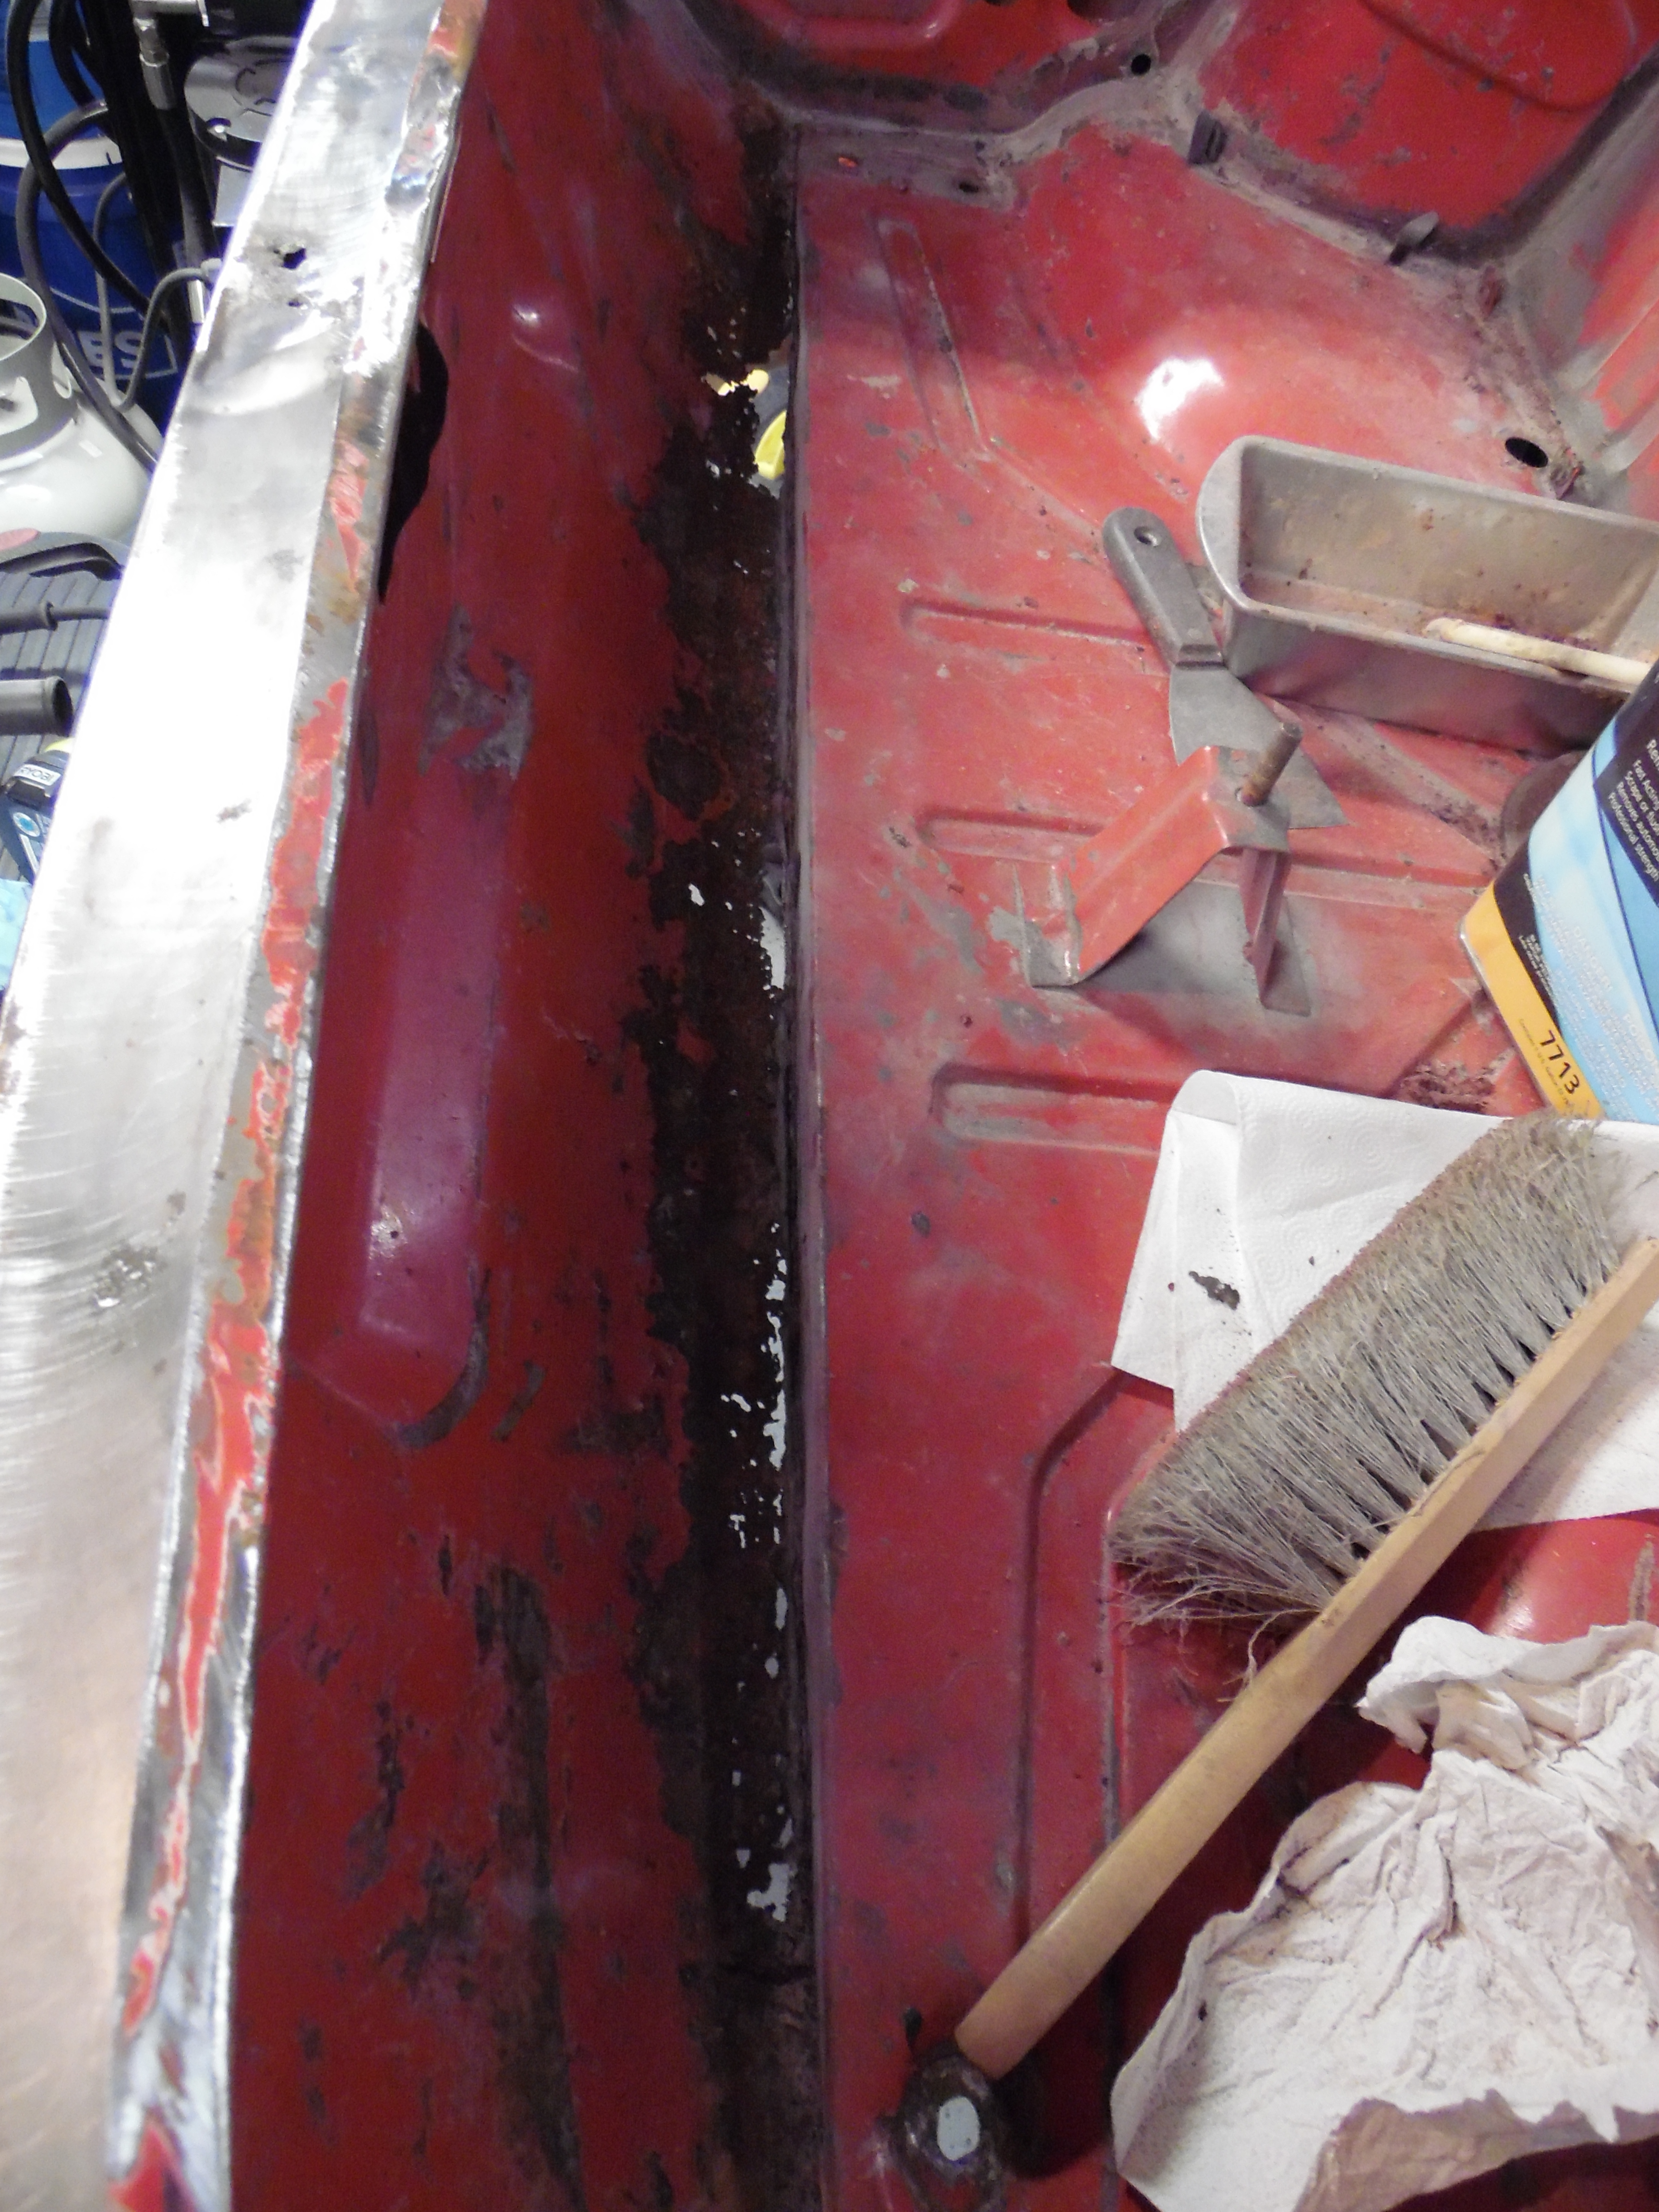 06/17/15: Gotta get naked. Passenger side rear wing/fender is now stripped. There is defintely body filler all over the rear half of the body tub, but none of it has to be there. All the panels are accessible from both sides and will be relatively easy to remove the dings and dents with hammer and dolly. 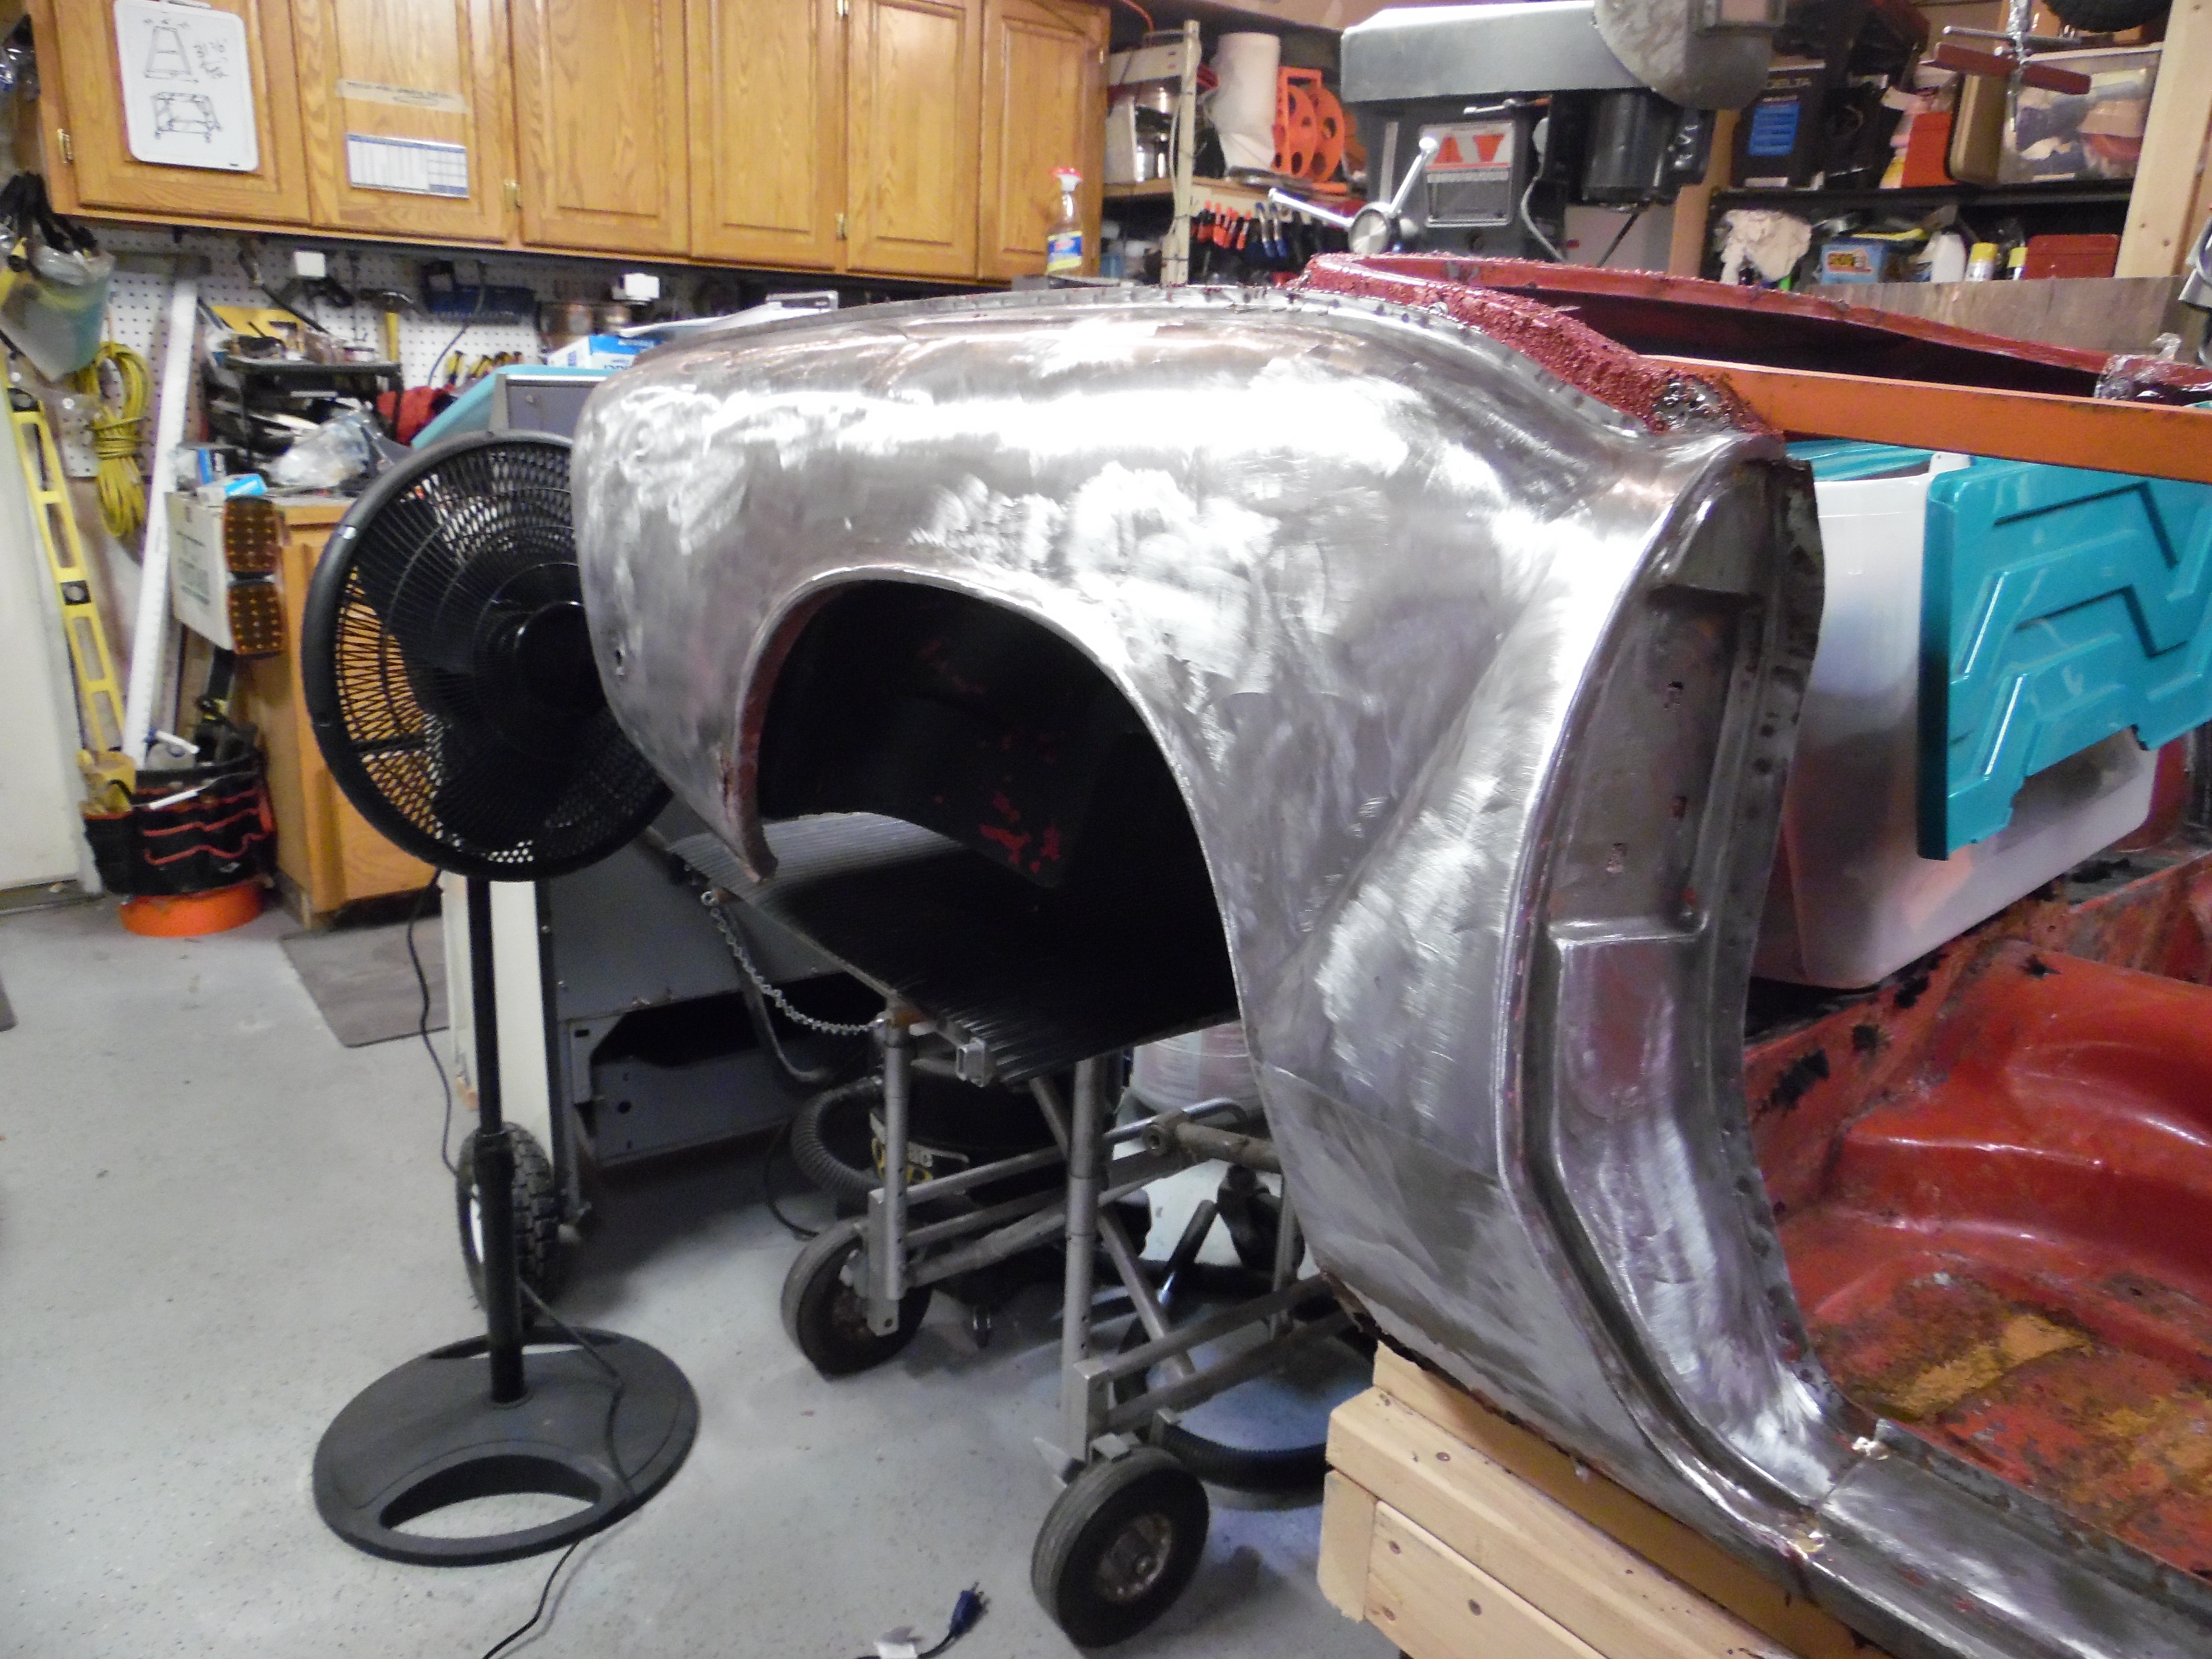 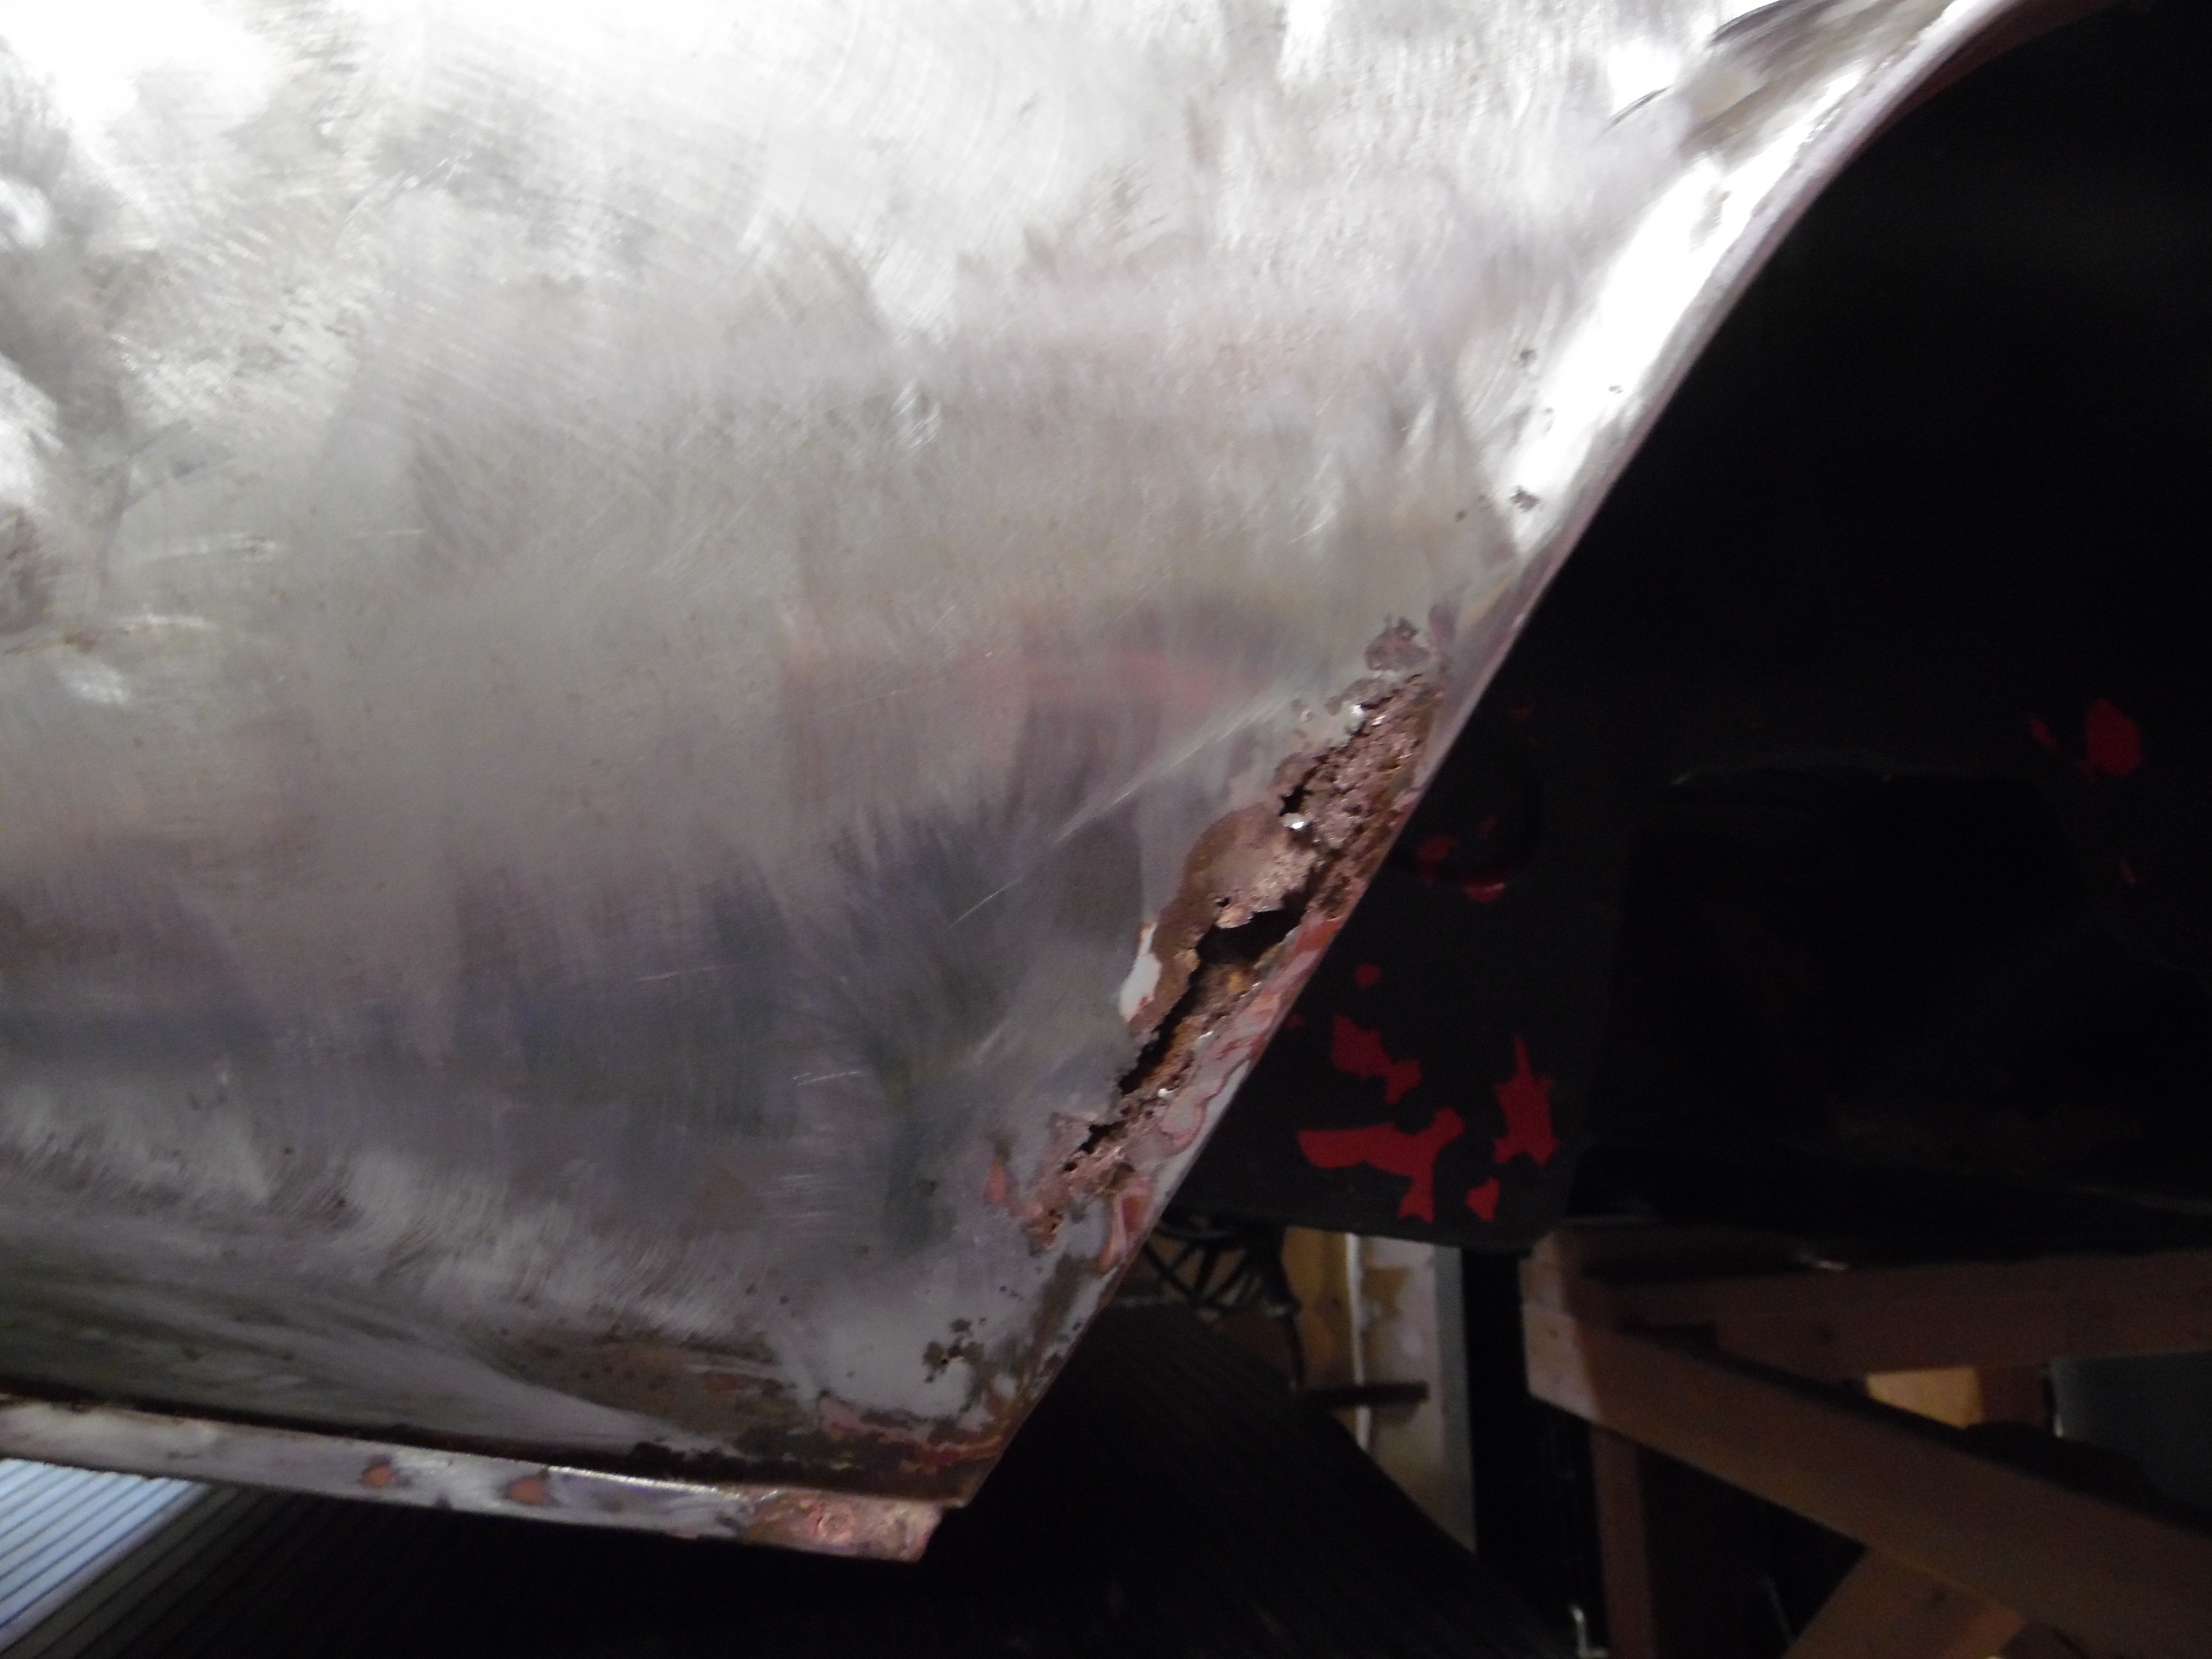 The rust cancer is evident, but thankfully pretty limited . Good metal is only an inch away and I think I can cut this out and replace it with new metal as it's a relatively easy shape to fabricate. The rest of the section is in decent shape and I can avoid having to buy a patch panel. The back of the car is a mess where it has been hit before and badly repaired. Still digging body filler out. 06/16/15: Taking it all off 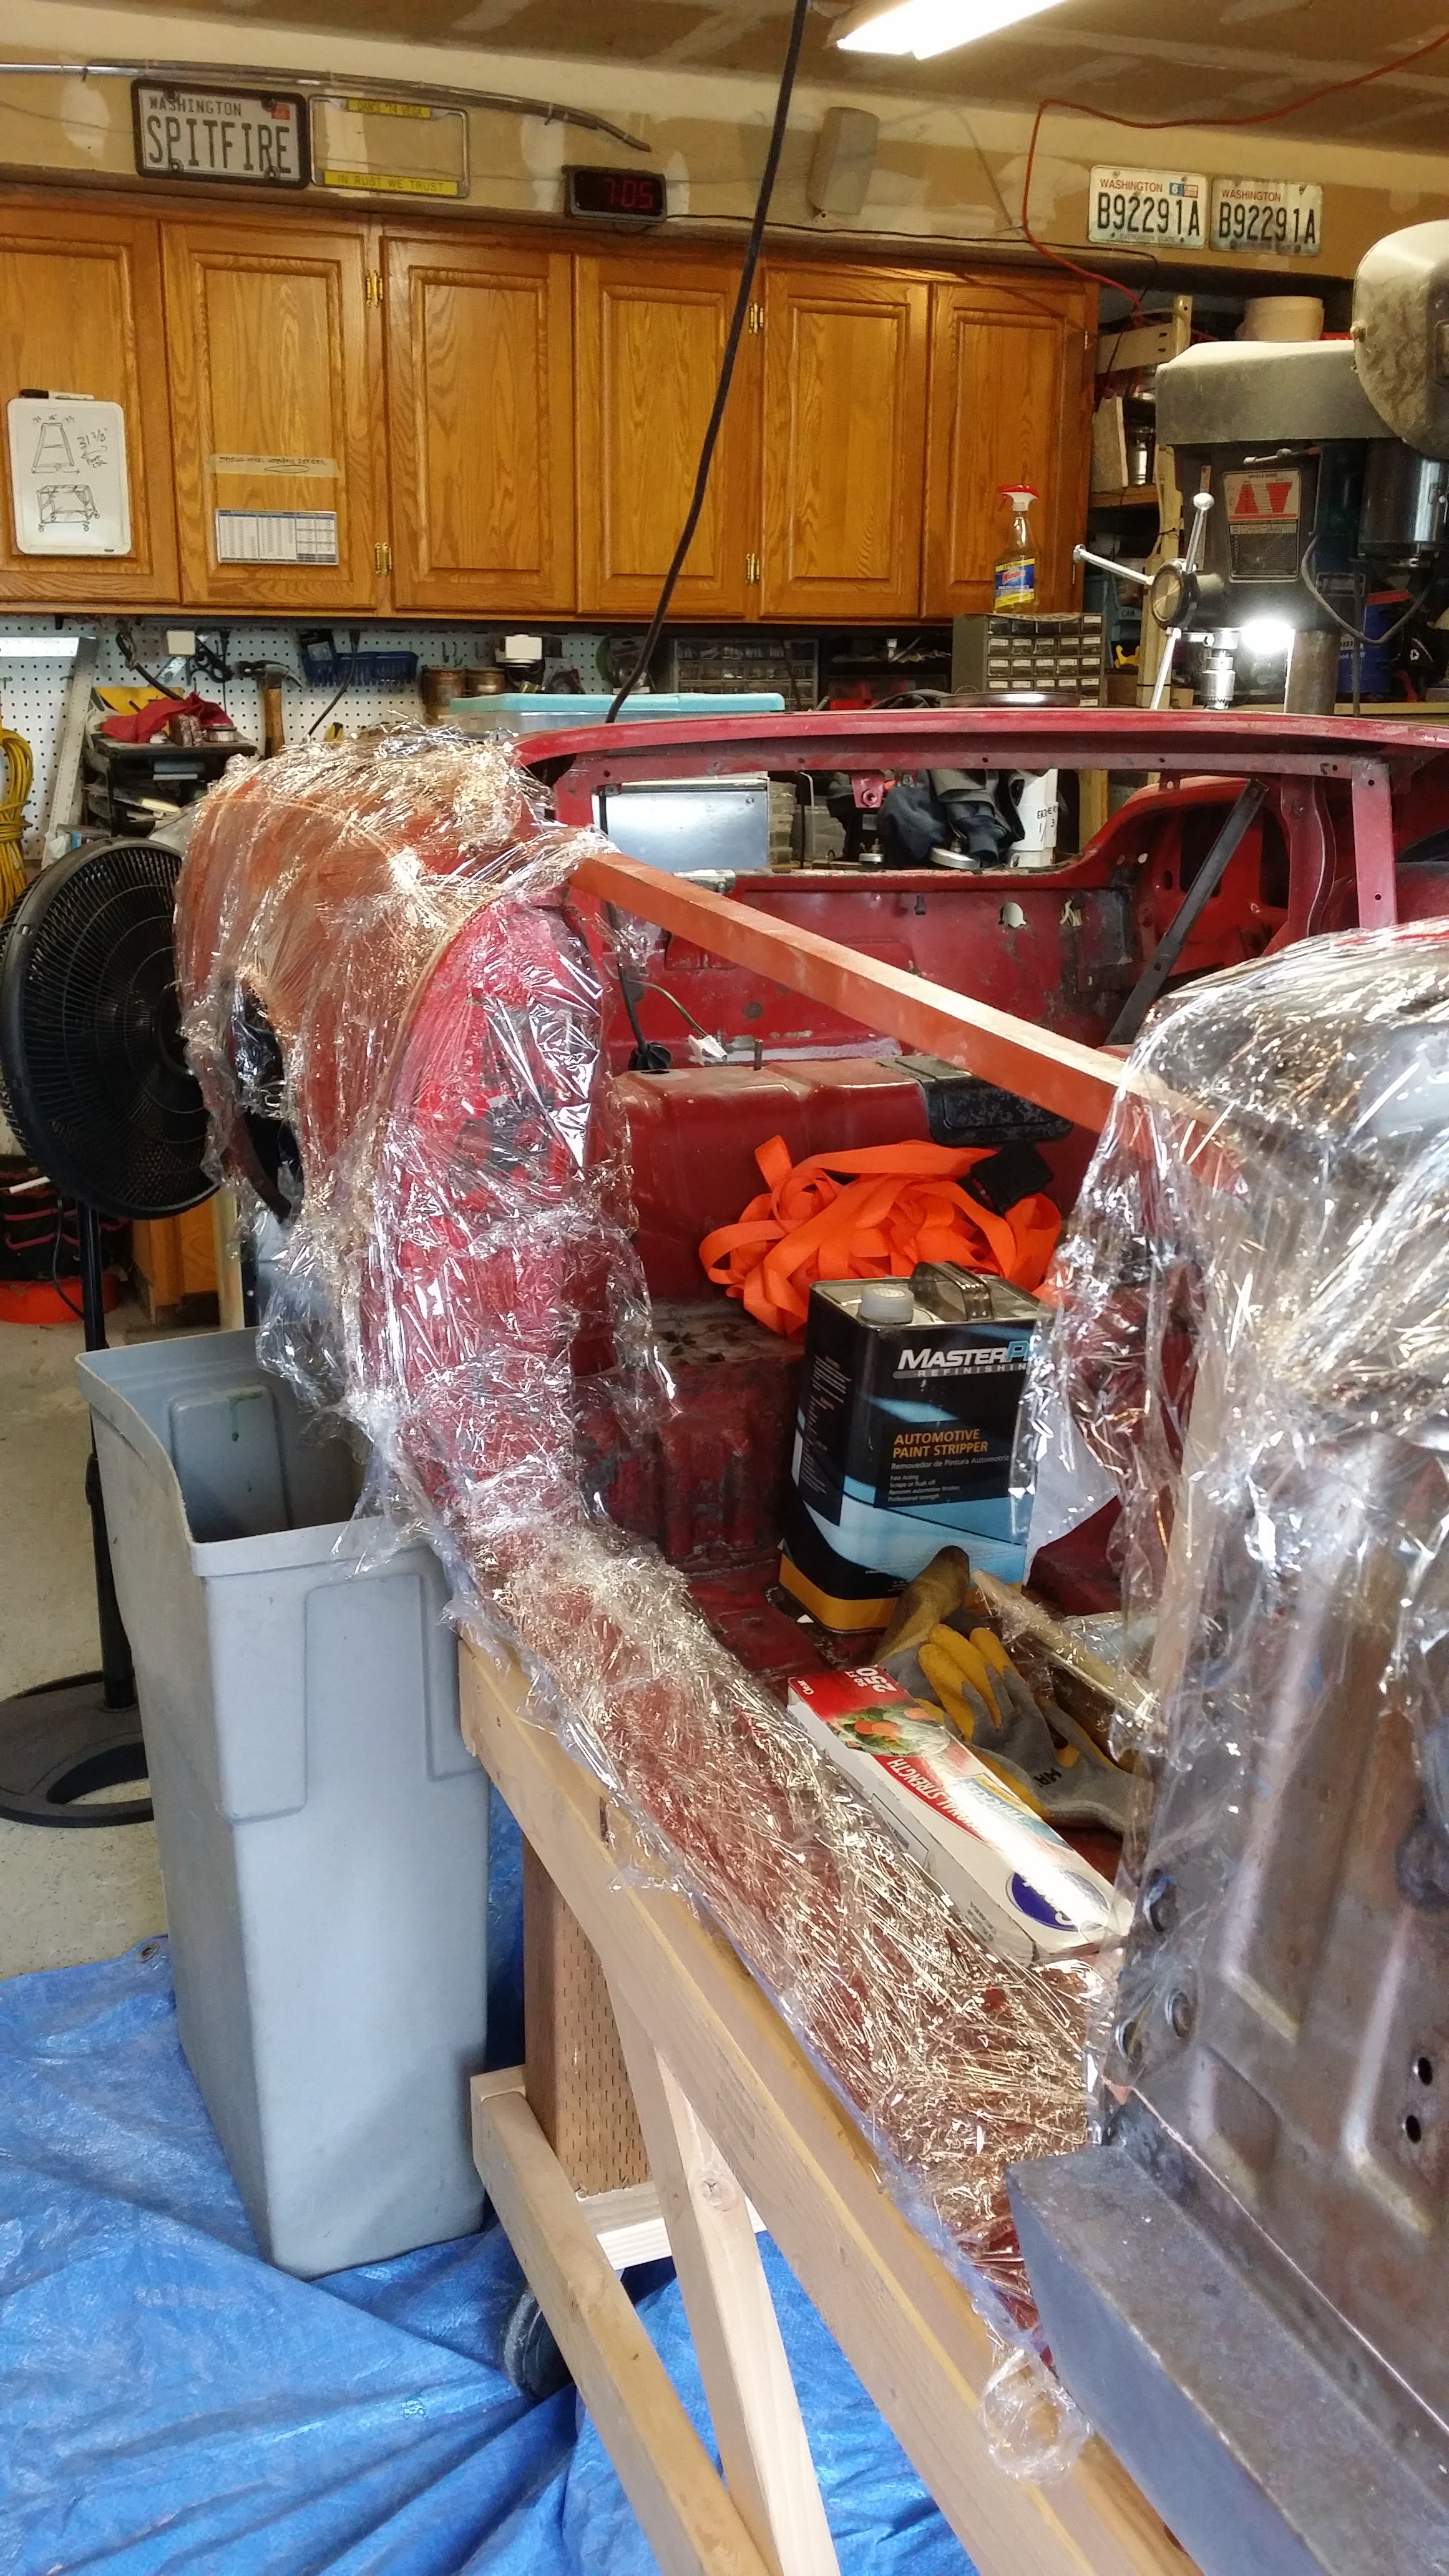 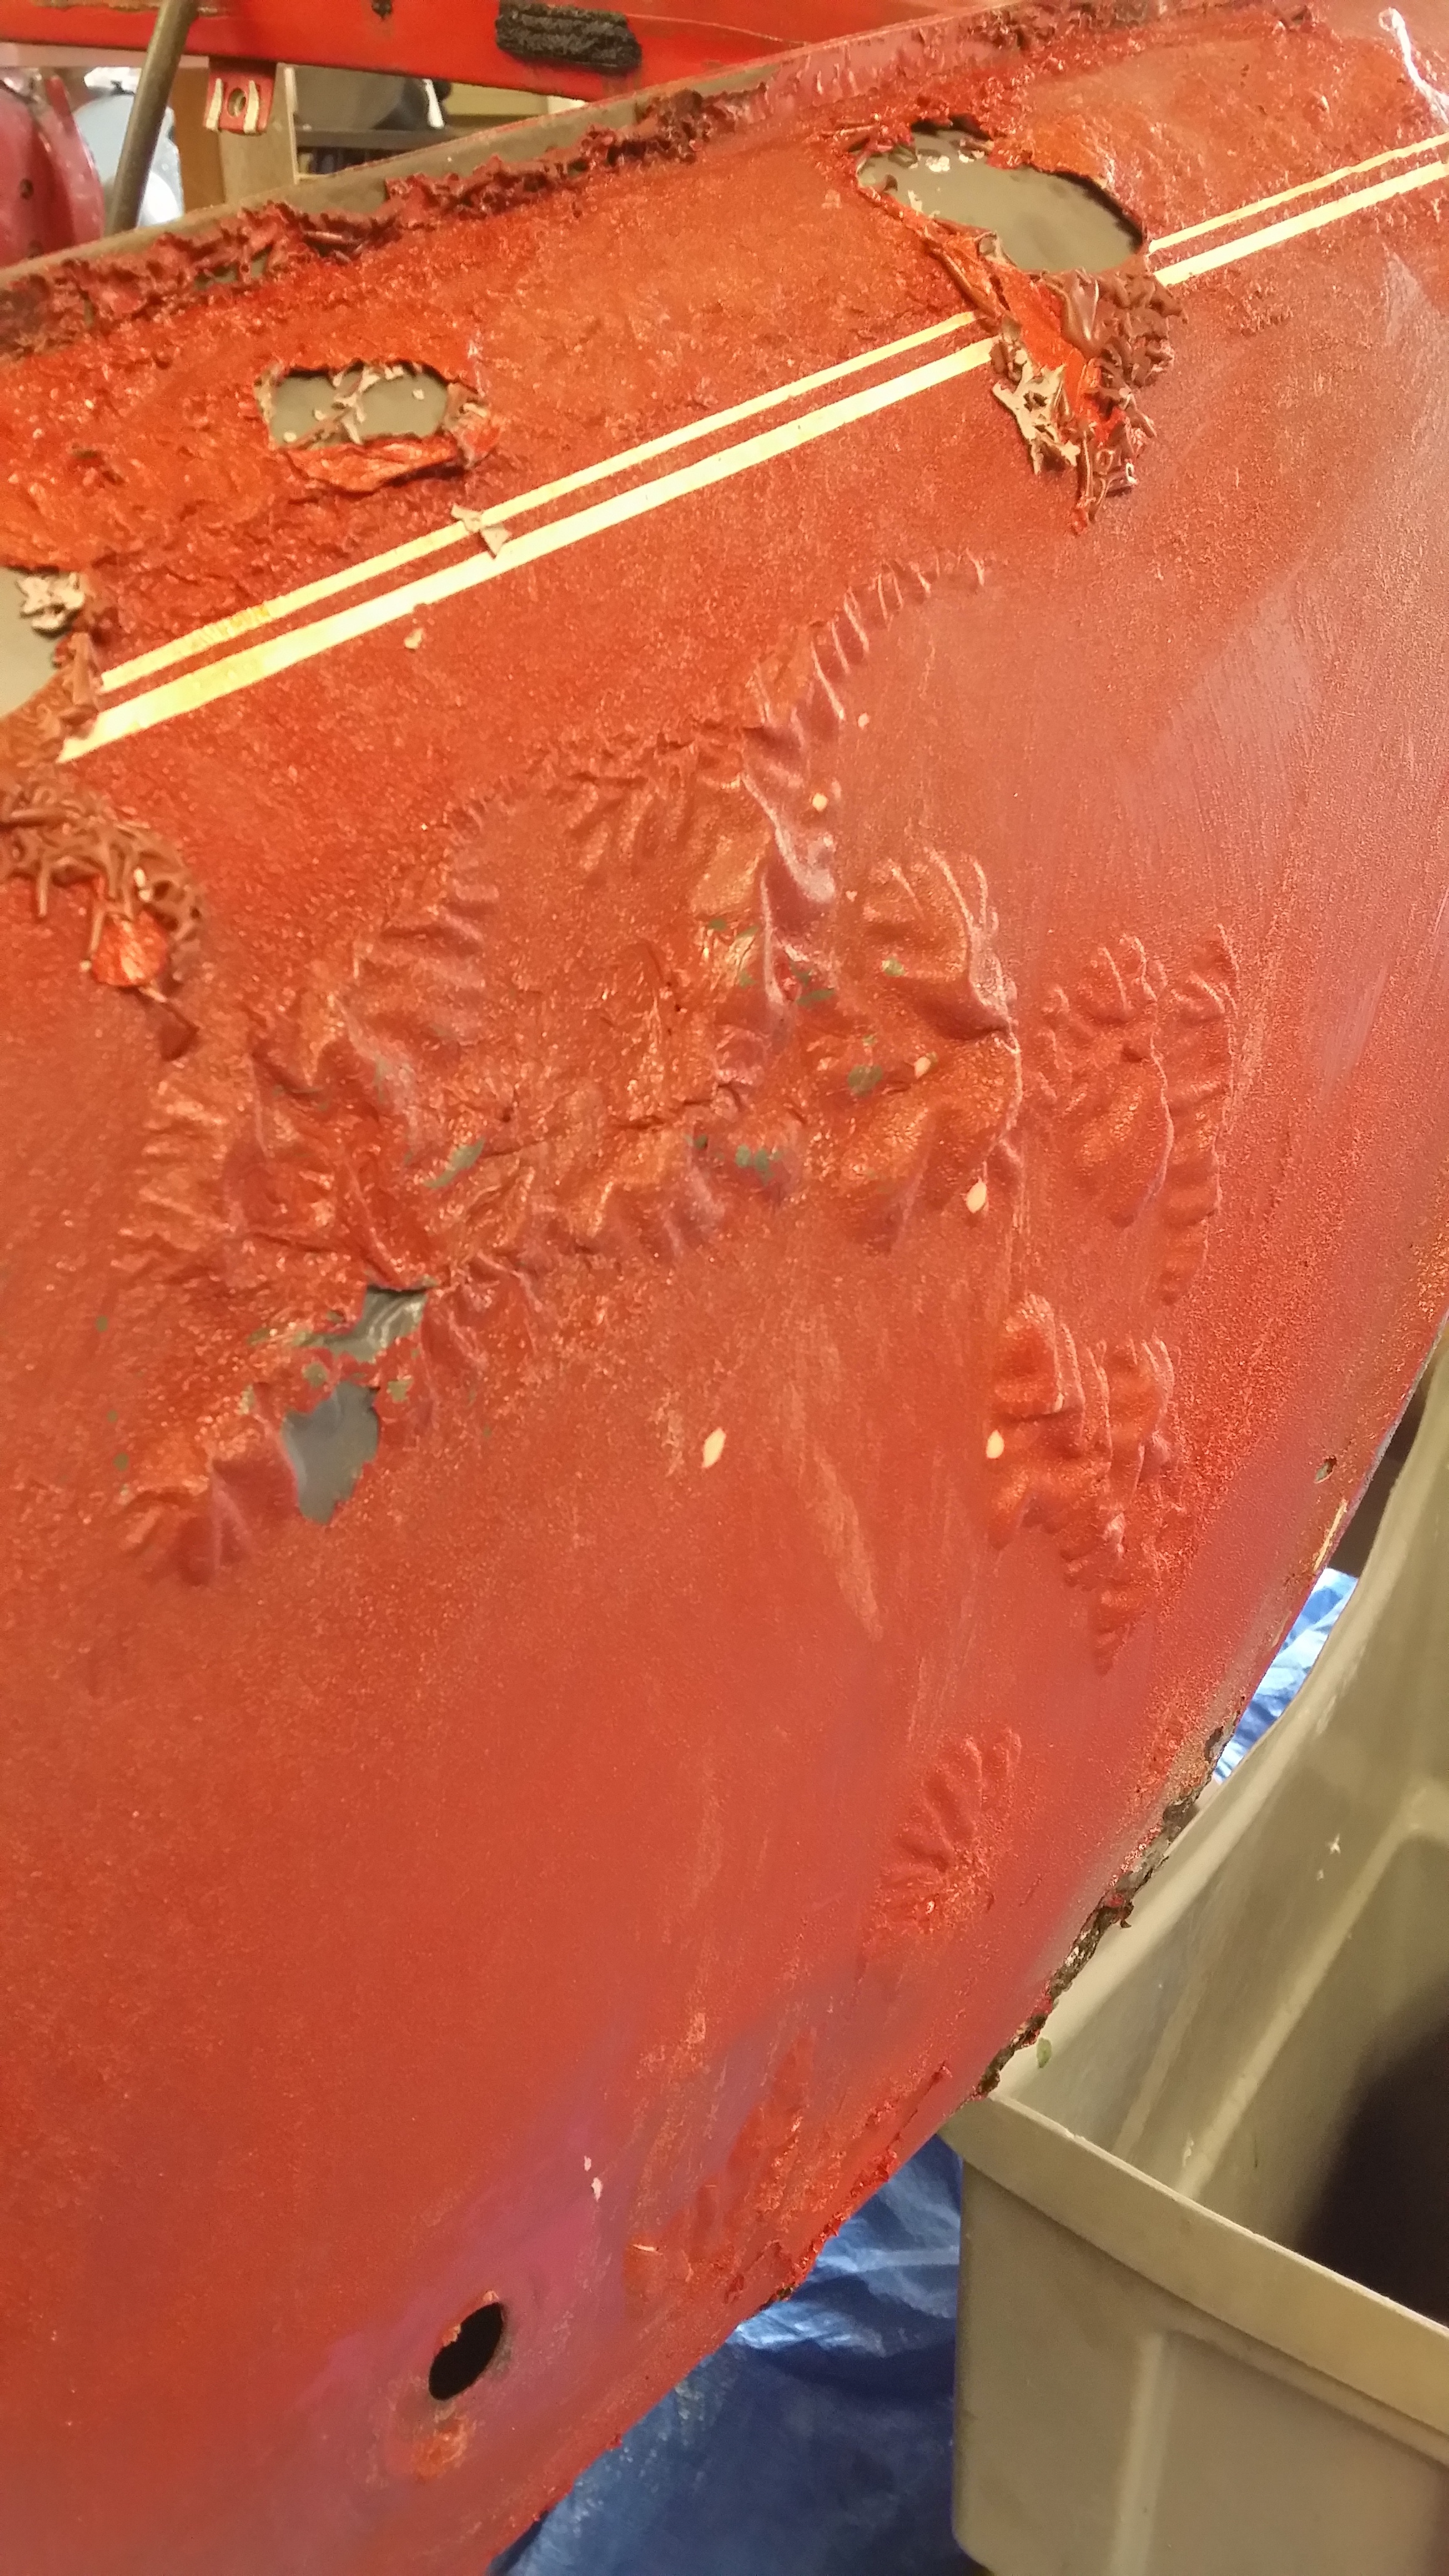 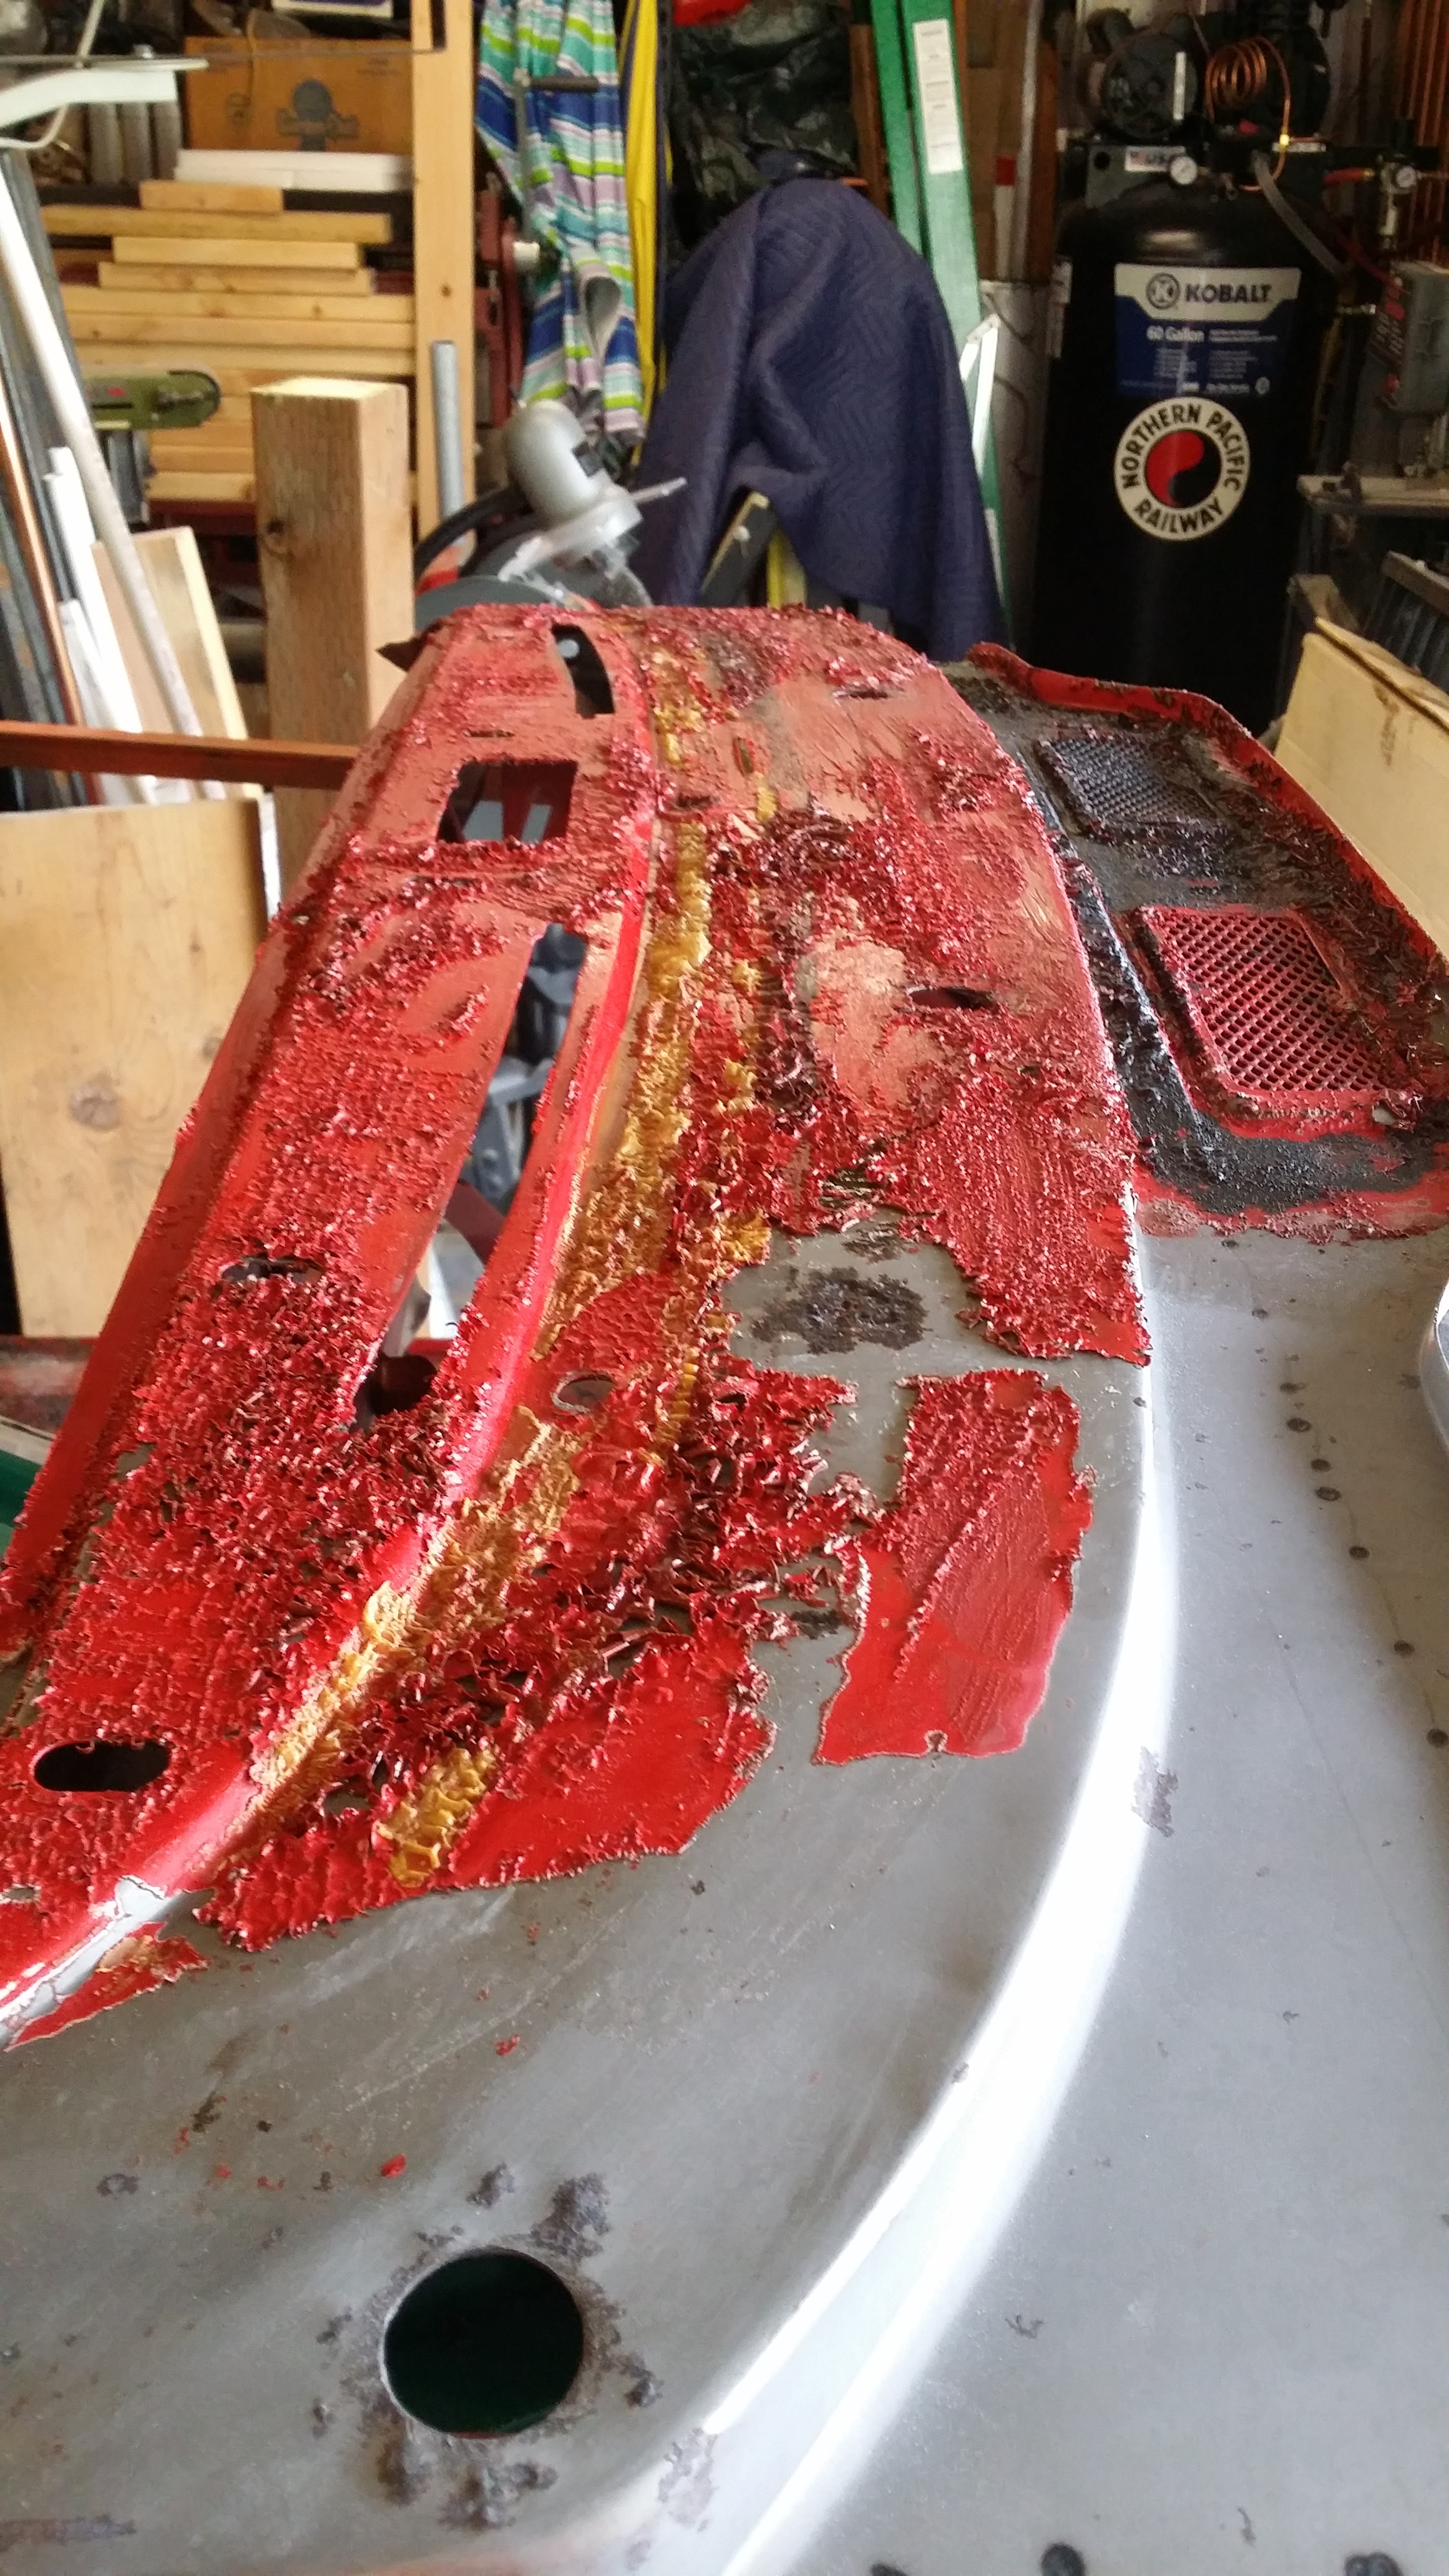 Picked up some aircraft paint remover and started attacking the rocker panels and rear fenders of the body tub on one side. Aldo did the cowl above the firewall. I've done the hard part of the firewall with soda blasting, but chemical stripping is the easy and fast way for the main exposed body panels. Took several applications to get the right results, but it is worth it. After applying the stripper, putting plastic food wrap over it helps prevent it from evaporating too quickly, which extends its active period and gives you more penetrating power for good effect. I need to take off the remainder with fiber conditioning discs and clean it up before I work the metal. Definitely making progress. I think I could potentially have the body tub exterior stripped to bare metal in a full day. Found body filler where someone previously had tried filling in small dings and damage that is actually very easy to fix with body tools so I'll just fix that instead of using filler. The deep V body line behind the door to the rear fender was nearly filled in for no reason that I could find, so that will be taken down to bare metal and redone as well. Looked at the rust areas in the rear fenders. I think I can get away with just patch panels. 06/15/15: Look! A new website! Suffice to say that these updates have to start happening a bit more frequently than in yearly or multiple year gaps. In the last couple of years with the Spit sitting outisde under a cover I have been deciding what direction I want to take. I redid the frame years ago. Do I want to take the body tub off and work on it with a body cart, or what? I put Giles up on the lift in my garage and took a good long look at the chassis and bottom of the tub. Enough things bother me about the way I did it originally that I need to go back and redo it. Steel fuel and brake lines had been cleaned, but not clear coated so they started rusting. Similar for bolts and other hardware. I now have the tools to power coat brackets and such that wasn't even a technology available back when I started this. My income is enough that I can afford to get fuel and brake line kits to replace what is there. The original red painted frame has done weird things in discoloration, even without being exposed to sunlight. With the decision made to go ahead and pull the body tub, it took very little time to do so. I think I can have the chassis stripped in half a day if need be. But first I need to concentrate on the body tub which has been removed and gutted fully. That was an experience in itself. Soda blasting is in progress. I don't know how long this is going to to take to strip the body down to bare metal, but I will keep at it. 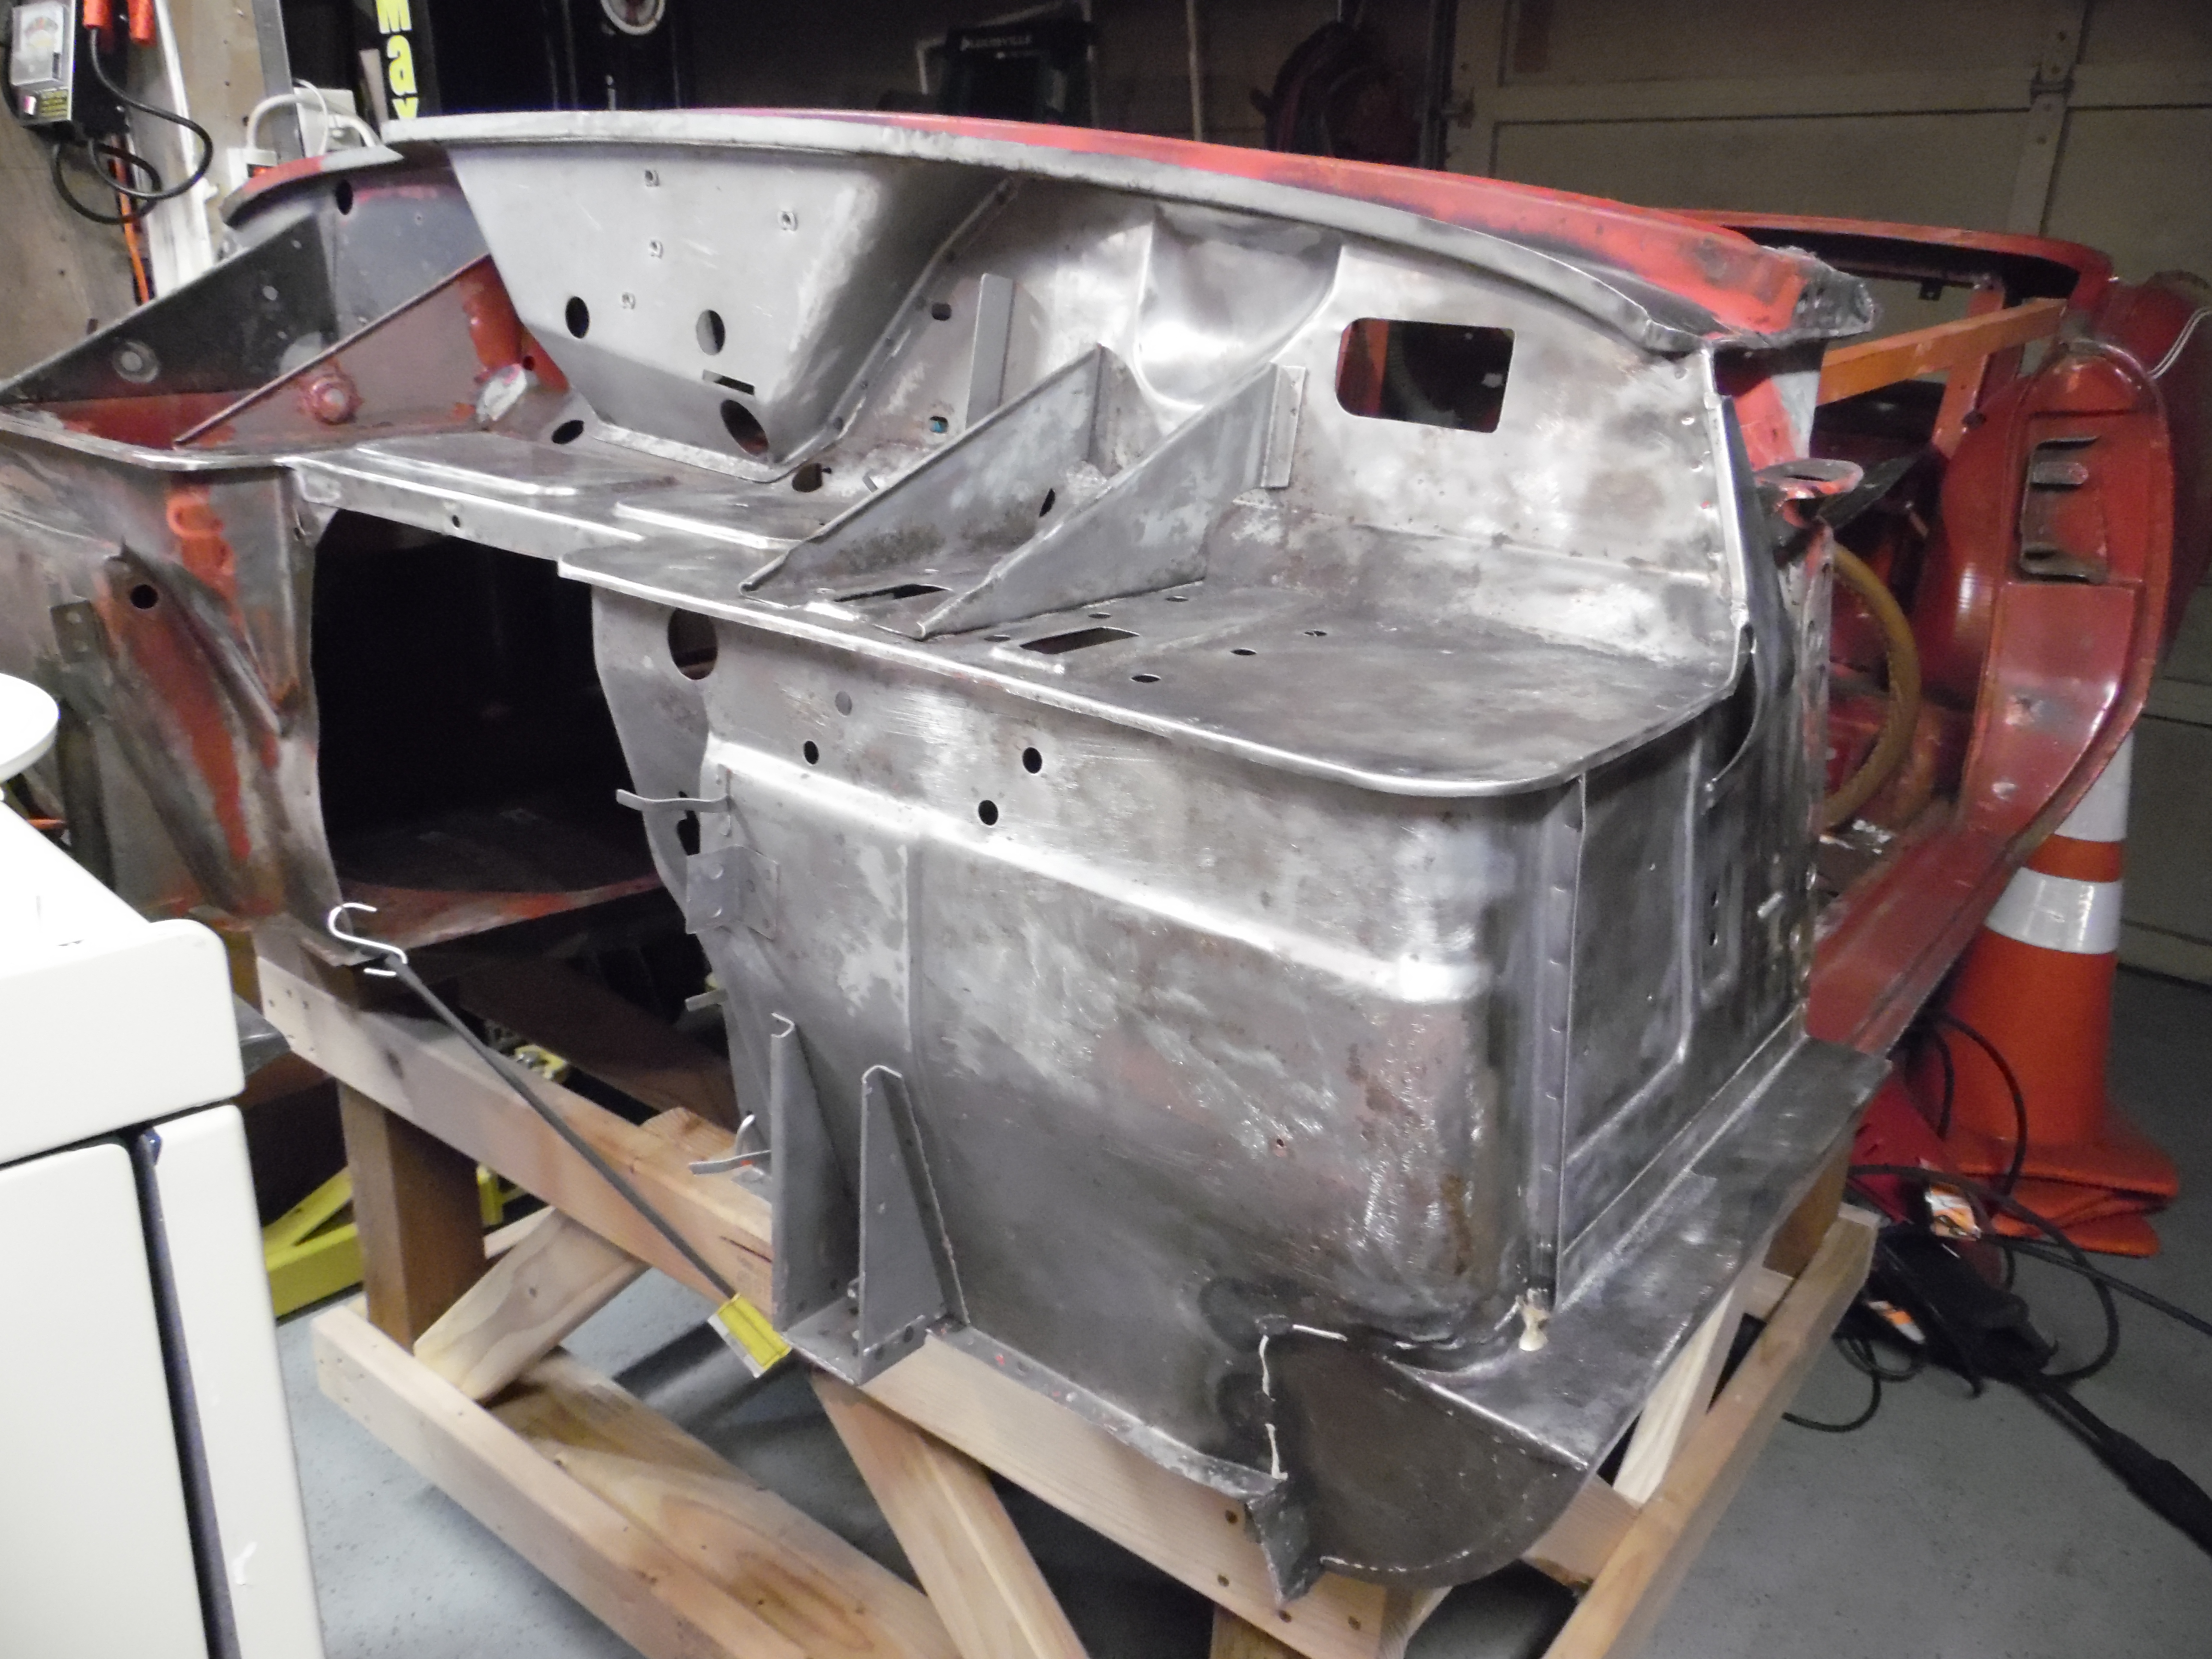 03/26/13: AND ANOTHER THREE. 06/28/10: SKIP AHEAD SEVEN YEARS. 05/12/03: Wow, it's been almost a year since we updated the log. So many things have happened, but very few regarding the Spitfire. Job change, lots of financial worries and now an impending move. I have to move from my nice 3,000 sq ft house with 2 car garage to an apartment with no garage at all. That means all those lovely tools in the background of these pictures have to go. Rats. It also means that the body tub which is still sitting on the engine stand rotisserie must go as well. The entire car must be gone! Don't worry- I had thought at first I would have to sell the car or give it away. I really hated to do that, but I didn't have much of a choice. Now things have changed and my brother is offering a garage space for the little car. Fantastic! But before I move him, Giles has to have the body tub reassembled to the chassis. Since the chassis is all fixed up and restored, I really don't want to put the body tub on there until at least the bottom of the tub is fixed up so I don't have to take the body off again to fix this or that little item. I've ordered a repair panel for the right hand side lower quarter panel in front of the rear wing (TS20RH if you want a part number), from Nigel at SpitBits. Nice fellow and he comes highly recommended. That, plus a windshield gasket and a body mount kit (minus pads- I'll have to reuse mine since Nigel is out), and I should be able to get the body tub back on the chassis. That will really give me some incentive to get this back on the road. I've got a replacement wiring harness, the doors are done, as is the rear deck lid and bonnet. They all need painting, of course, but even in primer they look pretty good. I hope I can weld up the patch panel, fix the nasty hole around one windshield post mount and get it all back in one piece. At that point I can take it to get it painted I think- once I have the money. In the mean time I can continue to work on things like the dash, seats, etc. I'm not really THAT far from having the car on the road. Engine runs and the major bodywork is done. I can see driving the car this summer- if only in primer. 06/05/02: The engine and transmission are done!
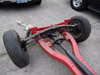
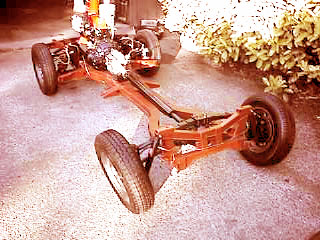
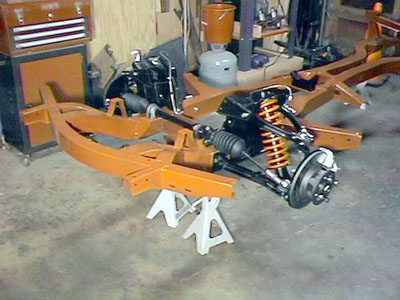
It's a very exciting day. This chassis is entirely rebuilt with all new suspension (polyurethane), new brakes, lines, universal joints, motor and transmission mounts, clutch, etc. If I could unbolt it, it was removed, repaired, and rebuilt. I even replaced the original sway bar mounts as they were pretty well beat up and needed decent repairs with new plates welded on. With the engine mounted and the drive train complete, this means I can now officially put a tarp over this and store it in the garage while I start work on the final part of this project- the body tub itself.
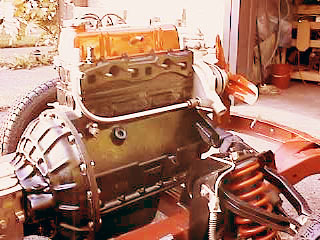
So much left to do, but we are at about 65% done with this project. It has a solid rolling chassis and most of the body work is done. This should be an exciting time ahead! HEAR IT RUN!05/22/02:
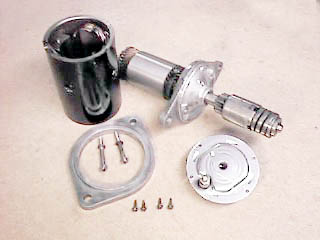
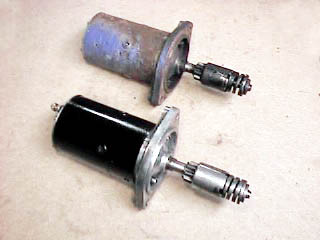
Another task in the 'remove, rebuild, repaint' saga. I had an extra starter to use as a guide while I disassembled the original working unit. It worked, it didn't need any attention, but then the engine has been painted and looks gorgeous. I couldn't very well put a greasy old nasty starter on that shiny engine, could I? A couple of hours had the unit torn down, parts cleaned, and the case painted. It looks very nice, especially compared to a stock unit that has seen better days. The blue starter also works, so I may clean that one up next and have it painted and ready as a spare. Next up will be the transmission. Need to clean and paint it and the bellhousing, then work on the driveshaft. That also needs to be cleaned and painted, along with having the universal joints replaced. I need to find the funds to buy the clutch parts and engine/tranny mounts, then put it all together. It's a slow process, but it's getting there. Every time I restore one more part, it's that much closer to being done. 03/21/02: Great
amounts of work have been done so far! All those parts have been a
real
joy to put together on the car. Cleaning up the parts and painting
them
really makes a difference.
The brake calipers had stuck pistons and I ended up using a hydraulic grease gun to force grease into the calipers which forced the pistons out easily. It wasn't as easy cleaning out all the grease and making sure the passageways were clear, but it's worth it. I had to order four new pistons as well. The old ones were too far gone and pitted to be of use. No need to borrow trouble! The new pads bound up and didn't fit the caliper casting as well as I would have liked. A bit of time on the bench grinder yielded easy moving pads that don't bind up at all. I assembled the calipers and mounted those to the chassis. The brake hoses went on next, but they don't appear to be the right ones- they are too short. They fit, but they don't let the hubs turn fully to the left or right as much as the original hoses did. In addition, I can't get the things to seal properly. I think they are the wrong hoses. I may pull off a used hose off one of the chassis to compare with. I also ran into trouble with the sway bar mounts. The chassis had been hit at some time in its lifetime and the driver side sway bar mount was destroyed. Someone tried to fix it, but it was badly bodged. I ground off the offending plate and got another from the spare chassis in the back yard. That I welded onto the new chassis and painted the affected area. That made putting on the sway bar so much nicer. It's worth spending the time to do things like this right. The front end is complete! Just those pesky brake hoses to fix, but that's easy. Now
it's just time to start working on the rear end of the chassis.
Clean
up the differential, check it for wear, replace the fluid, mount
it
with the poly urethane bushings I've been using everywhere else,
etc.
Shocks, spring, all sorts of goodies. Got new brakes, wheel
cylinders,
and hardware for the rear. It all should be perfect when the body
is
mounted. I'll need to pick up six universal joints as this is the
perfect time to replace the half shaft joints as well as the main
universals. Got to find a purpose for the 12 ton shop press we
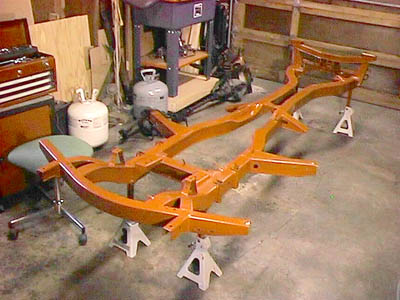
got! 07/10/01: Warm weather has finally arrived. The body tub was removed and put up on a rotisserie that I built from a pair of engine stands. The plans and info for that are in the PROJECTS section to the left. Well worth checking out. With the body off, I was free to attack the chassis. Two days and a lot of beating of the impact wrench and I was able to strip the chassis down to only welded on items. Several weeks of on and off again cleaning/scraping/sanding got the frame finally ready for paint.
Pretty nifty, eh? Once a project reaches this stage, you're ready to start assembling all the parts back. This is rock bottom and many cars that are torn down never are reassembled. Painting the chassis really makes a huge difference in not only the appearance, but your attitude towards the project. Now everything you do is making it better and nicer. Sure will make buying parts for it much easier. Let's see, we'll need suspension and chassis rubber bits, poly bushings, new shocks, etc. Lots of fun! I look forward to having a rolling chassis again. Then I'll finish off the body tub, prime the whole thing, paint it, and be ready to go! Of course there's that pesky interior to work with, but that's nothing that money can't fix. Hmm, money, I better go earn some! 02/27/02: February? What happened to all those months since last July when I updated this log book? Well, nothing really since I was busy job hunting and didn't have the cash to do much to the Spit. I finally landed a job a week after the 9/11 tragedy and only now got the funds together to place an order for parts. I ordered a ton of suspension and steering components, along with brake hardware. With luck, I should have all the parts necessary to get the chassis back on its wheels and have it rolling with the engine and transmission in place. I picked up a 12 ton shop press and a tire changer as well to add to the equipment in the garage. It's getting crowded in there with all the tools, but you can never have enough tools, right? I ordered the parts from British Parts Northwest and they say I'll have them in a day or two. That's an awful fast turnaround time and I'm pleased with the service so far. I am eager to get the parts- but that means I'll have to put them on as well. More work! It's not so bad when it's new parts going on though as each part that goes on is one step closer to being done. 03/02/02: Parts have arrived. I've taken inventory of the parts I ordered from British Parts Northwest who not only had excellent prices and a knowledgable staff, but the fastest shipping I've encountered yet. I see I need to order a few more parts, but we are getting closer to what we need. I pressed the polyurethane bushings (I'm going poly all around) into the lower control arms which was trivial. I just cleaned and painted the upper control arms so those will be next to get bushings. The dust shields for the brakes are done as well. Brake hose brackets are cleaned up and ready for installation. I took the calipers off the parts pile and took off the brake hoses and bleeder valves. I've been really lucky that none of the brake line fittings on this car have seized up anywhere. I expected to have twisted fittings before I was done. Removing the pads was easy and I applied compressed air to the inlet of the caliper after padding the jaws with a thick rag to catch the pistons. WHOOSH! No pressure and brake fluid sprayed out the hole where the bleeder valve goes. Hmph. A cleanup of the bench area shortly afterwards and I fitted a valve in place. The inboard piston popped free, but the outboard one is seized. I'm not sure how to remove that since you can't build air pressure when you have the inboard piston out. I may need to put that back in and work out some new method. I'll be sure to ask others about this task since I'm sure it's come up before. Oh, I also took the chassis out to the yard and washed it down with soap and water. The dust in the garage from wood working projects was getting everywhere. Does this mean I've washed the car? 04/28/01: A recent request for help on the Totally Triumph Garage caught my attention. A fellow needed a guide for placement of the chrome letters that attach to the front of early roundtail Spitfires. Some replacement bonnets don't have the holes and if you want the look of the earlier Spits, then you'll need to hand drill them. But where exactly do they go? I have the bonnet off my own Spit right now as I am doing bodywork on it so I was able to go out there today and make a paper template from the holes in the bonnet there for the letters. Once I did that, I took measurements of where the template was taped to the hood and have since put the whole thing through Photoshop and now have the results available online so you can print the templates out for yourself. Just click on 'Projects' on the left menu bar and go to the Letter Template section. 03/05/01: Wowzers, how has the time flown! I'd like to say I got a lot more done on the Spitfire, but I haven't. I did sand down the bonnet and got it mostly primered. I want this to look good so I'm taking my time. The weather has been horribly cold and the garage also gets that way so my enthusiasm to be out there in the cold garage has been reduced. I got a propane jet heater (85,000 BTU!) which helps a lot, but warmer weather would be a better solution. A local storage unit was rented recently and I now have more room in the garage. I can actually work on the car more comfortably and not have to keep moving things around all the time. It's amazing how much a little more space can affect your frame of mind. More lighting over the car has helped too. I now have enough room to work on the passenger side of the bonnet next. So many things yet to do. Sigh. But it's quantifiable. I can see an end. I'm not sure if I want to pull the body for a paintjob. I definately will pull the engine and transmission though so I can clean off the undercoating that is on the firewall and get that repainted as well. Wonder what this will all cost eventually. Oh well, this is my car and I'm not going to think that way. Time is not the issue. Enjoying the car is, even if it's not running right now. Actually it runs fine, but I'm not driving it since I pulled the lights and bumper off the front. Plus the clutch master cylinder leaked all its fluid so that will need to be rebuilt. Luckily I have modified my sand blast cabinet so it works much better now so I can do a very clean rebuild of the clutch master cylinder. Good time to do the brake master as well. 11/20/00: It's alive! Okay I haven't had time to work on the car with a convention (www.conifur.org) that has now finally come and gone. It's cold out in the garage, but it's time to start working on the beastie again. The body work I think is next. The engine runs- but needs more of a tuneup than I have been able to do so far. I recently picked up a stethescope so I can hopefully balance the carbs. I may buy one of those transparent spark plugs for checking fuel mixture. They run $40, but at this point, it may be worth it in tuning the carbs.
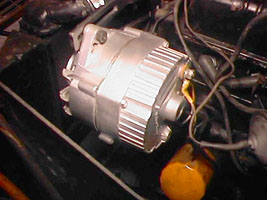
I need to start sanding the bodywork and preparing it for a paint job in the spring. Minor body damage and all easily repairable. I might need to do some welding on the boot lid's lower edge though to restore the metal there. After I remove the rust, it may leave a ragged edge. If I weld a bead across the entire lip and then grind it flat, I should be able to get a workable lid. I have a spare that has some cracks around the hinges which I can also repair so one way or another I should be able to work it out. I think I'll tow the car to a paint shop to be painted though. I've done enough painting in the past to know for a really good job, I need to take it to a shop where they have dust free conditions. So it will cost $600-$800 for a basecoat clearcoat job on a stripped body- it will be worth it if it is bright and shiney signal red. 10/11/00: It's been a while but I have fixed the clutch slave cylinder. Or at least bled the system. It is still leaking and that means removing the clave cylinder and rebuilding it. If I'm going to to do that, I'd rather rebuild both it and the clutch master cylinder at the same time. That must wait until after the beginning of November when a convention I'm organizing will be done. I simply don't have the time available right now. But it's working and that's the main thing. I also fixed the fuse block. I picked up another aftermarket one that had spots for four glass fuses. I mounted that in the same place as the old one on the package shelf. It's not great, but it will work. I would really like to get the original box on the firewall replaced in the future. Once I replaced the corroded mess that was the 'fixed' fuse block, a lot of the electrical problems disappeared. Finicky things, those electrons. 09/22/00: I picked up some
minor parts and wire connectors to work on the charging system. I
installed a GM internally regulated alternator (7127-3C) and was
able
to do the conversion from Lucas generator to GM alternator in just
one
evening. It's a quick and easy job for reliable
operation.
It even charges at idle nicely. Check out the PROJECTS
section on
the left side for this conversion project.
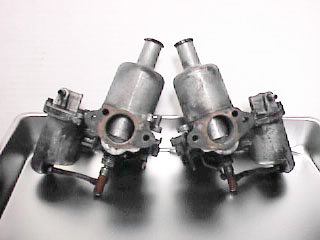
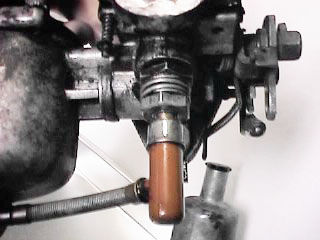
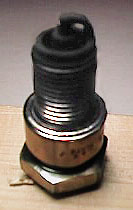
Next I need to address the clutch slave cylinder and bleed that system. I also need to replace the badly installed fuse block with inline fuses until I can get a replacement original fuse block. The one that is in place is horribly corroded and intermittent at best. With a new alternator in place, I want to make sure the voltage is getting to the battery after all that work. 09/12/00: It runs! It actually runs! I changed out plugs with the old original set that was in the car when I got it and the miss went away. I checked the affected plugs on 1 and 2 and discovered they were internally shorted so while they would 'fire' according to my light, they didn't actually create a spark. I've had that happen rarely on a plug when it is defective, but it's very rare to have two in a row. I felt so good I decided to take the car to work. Bad idea. I got a few blocks and the clutch was getting harder to disengage. I checked the clutch master cylinder- it was near empty. I topped it off with brake fluid and it is working better, but there is a leak definately, most likely at the slave cylinder. I drove the 20 miles to Seattle with my lights on, the top down. and engine screaming along. I stopped at a fast food place on my way in to check the fluid level. It's fine. I tossed it in gear, hit the key and- -nothing. No juice left in the battery. It would try to crank over but could not quite do it. I didn't have jumper cables with me (at home in the shop), but two miles away there was a NAPA auto part store I could get a set. An hour later I came back to the car and of course the battery had self charged enough to start immediately. Sigh. Apparently it was not charging at all. I called in to work with car trouble and limped it home. It ran great all the way. Once I got home, I checked the voltage of the battery: 12.4 volts. I started the engine with a jumper spare battery. Voltage: 12.3 volts. That's not going to do it folks. Either the generator or voltage regulator has packed it in. I yanked off the regulator (easier to get to) and replaced it with another from a spare car. No change. That means it's generator time. I'll deal with that later. The battery charger I had bought a few weeks earlier has developed a dead short on the output which isn't too good for it so I had to take it in for replacement. Once I get some free time, I'll replace the generator and also take a look at the slave cylinder for the clutch. 09/05/00: Okay, maybe it isn't fuel at all. The steady miss is still there and doing the adjustments on the carbs really didn't help it much. I could tell where it was the best at, about 2.75 turns from being screwed in completely, but it's still missing and low on power. For giggles, I hooked up the timing light to verify everything is firing. At first I thought I had a broken lead in the new timing light I got last week since I didn't get any flashes for indication of the cylinders firing. I tried the coil wire and it flashes lots. Tried cylinders 3 and 4 in the rear and they flash reliably. Tried 1 and 2 and nothing. While the engine was running, I pulled the first plug lead out of the distributor cap while wearing heavy rubber gloves. No change. Let's try the second one. No change. Let's try them both. Amazingly, the engine didn't even notice. I have physical proof that only two cylinders are hooked up and it runs just the same. I hooked everything back up and pulled #3. Engine starts stalling. Pulled #4, same thing. Okay, whatever the steady miss is, it's in the first two cylinders. I pulled plug wires and replaced the front two. No change. If you hold them next to a metal surface, they will fire. If you pull them from the distributor cap, they'll fire into the cap. So if there is fire running through the plug wires, then the timing light should be able to detect and flash from it. No dice. Could it really be just a cap/rotor/plug wires tuneup necessary? With that in mind, I went out and replaced the cap and rotor from another Spit I had picked up a year ago. I had bought a new cap and rotor for that one and never got to use it more than 10 minutes or so. Plopped that in place and .... well it's better. It's still missing on one cylinder, but not two. Much more power. I've confirmed that the plugs are getting good spark on all four. Carbs are adjusted right. The only things I can think of now are still timing/ignition, or a valve problem. I need to verify where plug 1 is on the cap- it is possible I'm off on all positions by one in the 1-3-4-2 sequence. 09/04/00: I pulled the
carbs off and checked out how the jets were working. They
aren't
as free moving as I'd like them to be and when the choke is
engaged,
they don't always return. Since I have royally messed up the
settings on these, I decided to try my hand with the orginal pair
of
carbs that were on the car that I had pulled off due to the jets
being
seized up.
After a bit of fiddling the car 'runs' per se, but I'm still figuring out mixtures. It's not running rich anymore so that's an improvement. I'll mark the lower nut on the jet you see in the above picture with a paint dot and then screw it up all the way and count the number of turns. That way even if I completely mess things up, I can return each jet to a setting that runs. I may end up giving up and taking this to a shop to work on. The car did run great when it first started. Now it's problematic. I'm closer than I was though. The steady miss I had earlier now is erratic so I'm pretty sure it was fuel related. 08/31/00: Frustrated with the carbs, I decided to work on the wiring some more. A test light, crimp connectors, and spare parts have gotten the tail lights, brake lights, turn signals and backup lights all working front and back. Did you know the backup clear lenses on the MK III's are actually made of glass? I never have seen glass lenses on a car other than headlights before. Easy to clean though.08/28/00: Well I don't know what's going on. It ran fine two days ago. Now it has a steady miss in it. I checked electrical and it seems fine. Swapped out cap, rotor, and plug wires. Spark plugs too. Heavy steady miss. I pulled the plugs and they were all heavily carbonized so it's running too rich. 08/26/00: After renting a U-Haul tow dolly and a bit of money exchanged, I brought the 1968 Spitfire MK III home from Mike Nugent another Spitfire enthusiast who was going to use it for a project car (Spit 6) until his wife decided she liked the square tail cars intead of this boat tail. He put it up for sale or parts and I couldn't resist. It's
home now and over the weekend I swapped out the carbs with another
pair
that came off a running car. The originals had seized jet
assemblies and wouldn't let the car start. I charge the
battery,
fixed a few electrical gremlins and..... it ran! And it ran
very
smooth and powerful too. No miss, no smoke, very
quiet. I
was thrilled. I took it out for a test drive and eventually
put
20 miles on it on Sunday. It starts reliably and runs
smoothly.
|
|||||||||||||